# Aragon Legacy Documentation

{% hint style="danger" %}
The products and developer tools in this documentation are Aragon Legacy Products & Tools and are no longer being maintained. For a better experience and support **check out our newest Aragon Products and OSx** [**here**](https://aragon.org)**.**
{% endhint %}

Welcome to the :flag\_gb: **English** user and developers documentation for Aragon's **legacy products**.

* Para la versión de la documentación de usuario en :flag\_es: **español** vaya [aquí](https://legacy-docs.aragon.org/documentacion-del-usuario-de-aragon/).
* Pour la version :flag\_fr: **française** de la documentation utilisateur, cliquez [ici](https://legacy-docs.aragon.org/documentation-utilisateur-aragon/).
* :flag\_in: **हिंदी** यूज़र डाक्यमेन्टेशन वर्शन के लिए [यहां](https://legacy-docs.aragon.org/hindi-aragon-user-documentation/) जाएं।.
* :flag\_jp: **日本**ユーザー向け説明書は[**こちら**](https://legacy-docs.aragon.org/japanese-aragon-user-documentation/).
* Para a versão :flag\_pt: **portuguesa** da documentação do utilizador, vá [aqui](https://legacy-docs.aragon.org/aragon-documentacao-do-utilizador/).


# Aragon Values, Finances, and Legal

{% hint style="warning" %}
Learn about Aragon: our values, our finances, as well as technical and legal infrastructure.
{% endhint %}

## Manifesto

Aragon is governed by [our manifesto ](https://aragon.org/manifesto)- a living document developed by the community and is evolving with time.

## Mission

Aragon is a community-driven project with a mission to **empower freedom** by creating tools for **decentralized governance** to thrive.

These tools help people freely organize **across borders** and **without intermediaries.** Instead of bureaucracy, subjectivity, and trust, the use of smart contracts has opened the door to **experiment with decentralized governance (at the speed of software)**.

Organizations that can be spun up instantly, can't be shut down by governments, are resistant to internet censorship, and allow small groups of people to collaborate effectively.

Aragon takes care of the most important pieces of infrastructure to deliver censorship-resistant, decentralized and upgradeable apps.

## Vision

Aragon **provides the lego pieces** to allow people (like you) to build the **next generation of human organizations**.

## Our users

If you're new to this ecosystem, don't worry if some (or all) of the above sounded a bit abstract. You can think of Aragon as **providing the lego pieces** to allow people (like you) to build the **next generation of human organizations**.

> <mark style="color:purple;">**Leave your comments here at the Aragon forum**</mark>\*\* 👇\*\*

{% embed url="<https://forum.aragon.org/categories>" %}


# Legal and technical infrastructure

{% hint style="info" %}
How Aragon and the AN DAO are structured
{% endhint %}

## The Aragon Association

The Aragon project is stewarded by the **Aragon Association**, a non-profit entity based in Zug, Switzerland, and governed by **Aragon Network Token (ANT)** **holders**.

**Within this legal infrastructure, the DAO is subdivided to streamline governance and execution:**

### **Main DAO**

The Main DAO is an Aragon Govern DAO that acts as the executor for community votes on Aragon Voice, enabling $ANT holders to exercise a direct token-weighted democracy over the network.

### **Executive Sub-DAO**

The Executive Sub-DAO (ESD) acts as strategy facilitator and finance director for the AN DAO. The ESD is responsible for scheduling payments and deciding on which initiatives to fund.

### **Compliance Sub-DAO**

Committee members of the Compliance Sub-DAO review all proposals to the AN DAO and any sub-DAO for compliance within the Charter and overall legal compliance, providing feedback to proposal creators where appropriate. They are charged with removing any proposals they deem to be non-compliant with any part of this Charter or illegal and assume full legal responsibility for the approval of any illegal, unlawful, criminal or fraudulent proposals.

### **Tech Committee**

The Tech Committee is responsible for overseeing the quality of the Aragon Network's code and [smart contracts](https://en.wikipedia.org/wiki/Smart_contract). Members of the Committee are required to review technical proposals in the Main DAO and sub-DAOs and either remove any offending proposals, suspend proposals pending a 3rd party audit or approve beneficial proposals that do not require an audit. The Committee will merge any approved repositories.

{% hint style="info" %}
You can read more about the Aragon Structure [here](https://andao.aragon.org/#Structure).
{% endhint %}


# Financial infrastructure

{% hint style="info" %}
Here you will learn how Aragon deals with its financial ecosystem.
{% endhint %}

## Aragon portfolio

The current portfolio composition of the Aragon Association is made up of predominantly:

* $ETH,
* $BTC,
* altcoins,
* stable coins,
* other coins such as $ANT,
* reserve of USD.

![This image shows our holdings from Q3 2021](/files/iuaR2vINjTXs7mFztHW0)

**Decentralized coins make up 94% of the portfolio, in line with the Aragon Association’s commitment to maintaining a high percentage of highly liquid, decentralized assets.** \\

***

## Usage of the portfolio

The Association is committed to keeping the treasury in assets that drive decentralization. The remaining portion of the portfolio has been diversified to protect against volatility in the market and maintain a stable cash balance to allow for the smooth running of the Aragon project. The Aragon Association has built a strong position in USDC.

*Further details may be requested from the team directly.*

## Funding sources

The Association is currently generating funds from the interest from the treasury. At the current burn rate the Association has 10+ years of runway.

With a focus on new product development to improve the user experience and align with user requests Aragon sees DAO creation and usage as key metrics in our path forward.

**Transparency Reports** will be released **bi-annually** and will show the state of the Treasury and the spending along with the news from the previous 6-months.

### **Useful links**

[Transparency Report July 2021 for Q1 & Q2](https://assets.website-files.com/5e997428d0f2eb13a90aec8c/60f15e66bc685a9ffefe088e_Aragon_Transparency_Report_-_07-21_18.pdf)

**Deepdao.io** has a profile on Aragon Network <https://deepdao.io/organization/18abd2d8-ff90-40cd-a889-4cc2fed78364/finance>

*For more information please contact: <transparency@aragon.org>*

\_\_


# Meet your DAO support network

{% hint style="info" %}
Get started in our community by connecting to our wide network of human resources
{% endhint %}

### Clear communication is at the heart of Aragon, and various tools are used throughout the ecosystem to help connect the millions of people who have been engaged in some capacity.

#### Here is a short list of ways for a newcomer to get started if you are a...

### **DAOist => starting or joining a DAO**

* Aragon Discord [#intros](https://discord.gg/ATbzCJRA) is a great place to start for introducing yourself. [#biz-dev](https://discord.gg/TnkR229C) working group has specific connection tools for founders and executives.
* [Aragon Governance Forum ](https://forum.aragon.org)- one way to learn about DAOs is to see the DAO for DAO software itself (Aragon) in action.
* [Business development form ](https://forms.gle/tWfJa1tcsxyL7eV88?_imcp=1)- fill this in to get support and review from the community.
* Technical Forum: <https://support.aragon.org>

### **Developer => code and coordinate with the tools**

* Aragon Github - Open source GPL goodness: <https://github.com/aragon>
* Aragon Discord [#questions](https://discord.gg/XgCeeKYd) and [#dev-space](https://discord.gg/nSDwG5tf) channels
* Technical Forum: <https://support.aragon.org>


# Learn about DAOs

{% hint style="info" %}
Learn about Decentralized Autonomous Organizations and how they are related to Aragon.
{% endhint %}

The term *DAO* is constantly evolving and hundreds of valid answers already exist. Here is our effort to communicate how Aragon perceives a DAO, with specific reference to our current working practices in 2022.


# What is a DAO?

{% hint style="info" %}
DAO (*acronym*) = **Decentralized Autonomous Organization**
{% endhint %}

## Defintions

### Short definition

A DAO is a **group of people** **without central management** that coordinates over the Internet around a **shared set of rules** to achieve a **common goal**.

### Technical definition

A DAO is an **internet-native entity** **without central management** which is regulated by a set of automatically enforceable rules on a **public blockchain**, and whose goal is to take on a life of its own and incentivize people to achieve a shared common mission.

### Aragon-specific technical definition

Aragon brings more than a general description of DAO - we provide an opinionated technical framework for developing DAOs. At present these technical opinions include

* Ethereum Virtual Machine (EVM) and EVM compatible tools as our public blockchain of choice
* IPFS as our web3 network storage protocol of choice
* Multi-signature wallets as the default
* Freedom to customize the EVM Access Control Lists (ACLs) in a hierarchical and flexible way - software should aspire to reflect how people naturally interact.

## Key words

For our purposes, you can think of DAOs as **flexible, global**, and **uncensored online organizations**.

## **DAO use cases**

* Part-time projects with friends or strangers
* Future of work: people working part-time on multiple things for short periods of time
* Temporary pop-up companies
* Companies in authoritarian jurisdictions
* Global, distributed teams

## **Trends around the world accelerating DAO adoption**

* The rise of populist authoritarians
* The future of work (remote and distributed)
* The growing de-platforming problem
* The rise of decentralized finance
* The [increasing](https://medium.com/complex-systems-channel/teams-a-manifesto-7490eab144fa) [complexity](https://necsi.edu/complexity-rising-from-human-beings-to-human-civilization-a-complexity-profile) of human civilization
* Growing adoption of blockchain currencies in central banking institutions

> ***You can read more about DAOs at*** [***aragon.org/dao***](https://aragon.org/dao)***.***

### References

[Decentralised Autonomous Organisations and the Corporate Form](https://doi.org/10.26686/vuwlr.v51i2.6573) p. 316

[Comparison and Analysis of Governance Mechanisms Employed by Blockchain-Based Distributed Autonomous Organizations](https://ieeexplore.ieee.org/document/8428782) p. 196


# Why do we need DAOs?

> **Problem statement**
>
> Common corporate entities such as the Limited Liability Company (LLC) have served us for many decades. With the advent of the World Wide Web and the increased international cooperation that came alongside it, nationally registered corporate entities seem like relics from the past\*\*.\*\*

### Some benefits that DAOs offer compared to traditional organizations.

## Scalability

\=> Corporate entities are registered on a national level, and it is tedious (and costly) to set-up international corporate structures. Also they are often opaque black-box entities - adding new people or engaging in global corporate endeavors may take years of legal proceedings.

> **Solution:** DAOs are able to operate globally, in any time zone without the need to produce a complicated bureaucratic processes - leveraging auditable smart contract tooling users may engage with DAOs with confidence in their ability to be remunerated in a secure and timely manner.

## Accountability

\=> Corporate structures often tend to focus on maximizing profits around a service, neglecting long-term social and environmental impacts.

> **Solution:** DAOs allow people to come together and work on common missions just as easy as joining a chat group. By formalizing a contractually binding work statement people collaborating may confidently proceed in their work, knowing that compliance and regulation within the organization is mandated.

## Ownership

\=> Most people in organizations are employees who dedicate a large part of their life to an organization but never receive a (real) share of it, or get a real vote in it.

> **Solution:** DAOs are driven by democracy and remove some of the principal-agent based systems from the organization. DAO-native-tokens give them the share and the voting power.

## Security

\=> Except for finance departments and management, it is hard to know how exactly what funds are available and how they are managed. This opens the door for mismanagement of funds and even to fraud and corruption.

> **Solution:** In DAOs the fund are transparently stored in publicly auditable blockchains - the community votes on how the funds are distributed. Various degrees of anonymity may exist depending on underlying infrastructure, but ultimately all transactions and contracts are auditable on their respective chains.

## Governance in DAOs

Comparison between DAOs and traditional organizations and governing processes.

| DAO                                                                        | A traditional organization                                                                             |
| -------------------------------------------------------------------------- | ------------------------------------------------------------------------------------------------------ |
| Voting required by members for any changes to be implemented.              | Depending on structure, changes can be demanded from a sole party, or voting may be offered.           |
| Votes tallied, and outcome implemented automatically without intermediary. | If voting is allowed, votes are tallied internally, and an outcome of voting must be handled manually. |
| Activity is transparent and fully public.                                  | Activity is typically private, and limited to the public.                                              |

### **References**

[What are DAOs?](https://ethereum.org/en/dao/)

[Crypto tokens and decentralised financial applications](https://www.bundesbank.de/resource/blob/873132/74fc658db07569219ff74f4e4e55c36f/mL/2021-07-kryptotoken-data.pdf)

[Blockchains, Smart Contracts, Decentralised Autonomous Organisations and the Law](https://doi.org/10.4337/9781788115131.00015) \*\*\*\* p. 19

[The Rise of Decentralized Autonomous Organizations: Opportunities and Challenges](https://stanford-jblp.pubpub.org/pub/rise-of-daos) p. 163

#### &#x20;<a href="#more-on-daos" id="more-on-daos"></a>


# What is decentralized autonomous governance?

Every centralized organization is controlled by an individual or a small group. They serve as a trusted middleman and ideally would act in the name of the shared interest. Unfortunately these individuals or small groups sometimes put their own interests above the shared interest of the organisation they are supposed to serve. In this case they are a 'single point of failure' which causes the whole organisation to malfunction.

Decentralized governance aims to fix the 'single point of failure' issue. How? It is basically decentralizing governance into the hands of all the organization members instead of an individual or small group. It is using transparent management of finance and efficient voting mechanisms to do so:

| DAO                                                                                | A traditional organization                                                                       |
| ---------------------------------------------------------------------------------- | ------------------------------------------------------------------------------------------------ |
| Voting required by members for any changes to be implemented.                      | Depending on structure, changes can be demanded from a sole party, or voting may be offered.     |
| Votes tallied, and outcome implemented automatically without trusted intermediary. | If voting allowed, votes are tallied internally, and outcome of voting must be handled manually. |
| All activity is transparent and fully public.                                      | Activity is typically private, and limited to the public.                                        |

#### **References**

[What are DAOs?](https://ethereum.org/en/dao/)


# What is the AN DAO?

{% hint style="info" %}
*the AN DAO = **the Aragon Network DAO***
{% endhint %}

### The Aragon Network DAO is a [decentralized autonomous organization](https://en.wikipedia.org/wiki/Decentralized_autonomous_organization) that was established by the Aragon Association after a public vote of $ANT holders on the Aragon Network Charter[ ](https://en.wikipedia.org/wiki/Draft:Aragon_\(organization\)#cite_note-6)in October 2021.

## Mission

The AN DAO is intended to be the vehicle for the Aragon project after the dissolution of the Aragon Association.

## Structure

The Aragon Network DAO consists of a **Main DAO** and three satellite organizations:

* the Executive Sub-DAO
  * Ivan | AN#6678
  * lee0007#8152
  * danielo#2815
* the Compliance Sub-DAO
  * Eagle#2979
  * Tayy#3241
  * k\_ronald#2911
* the Tech Committee
  * Wenzel#6681
  * p4u | vocdoni.io#6817
  * Samuel Furter#6696

Each sub-DAO has a committee of three members, elected by a combination of a public vote and the Aragon Association.

Each committee member has a tenure of one year and is paid **200 $ANT** per month.

### **References**

[the AN DAO](https://andao.aragon.org)


# TAO Voting

{% hint style="info" %}
TAO is currently in the proposal process, and the demo will be put to a token holder vote in the Fall.
{% endhint %}

## The beginning...

Initially Aragon was managed centrally by its founders, **Luis Cuende** and **Jorge Izquierdo**. With leadership derived from thousands of hours of sweat equity investment, they delegated work directly to employees who delivered on the central vision of leadership in a "[waterfall method](https://en.wikipedia.org/wiki/Waterfall_model)" of governance.

As time progressed Aragon moved to a tokenized voting strategy that **allowed token holders** the ability **to vote on decisions** in the company. Token holders cast votes in a [**weighted democracy**](https://en.wikipedia.org/wiki/Weighted_voting) approach wherein 50 tokens equals 50 votes, 500 tokens equals 500 votes etc... This method has facilitated unique opportunities for new ideas to enter in to the ecosystem, however in practice one of the greatest dilemmas has been engagement. Perhaps an evolution of the[ Paradox of Voting](https://en.wikipedia.org/wiki/Paradox_of_voting) addressed 200+ years go by governance pioneer [Nicolas de Condorcet](https://en.wikipedia.org/wiki/Marquis_de_Condorcet) - Aragon (and many other DAOs) have rediscovered that for most people the cost of voting wisely exceeds the value of the outcomes.

## The transfer of the Aragon Funds...

To put a finer point on it, in May of 2022 Aragon voted to[ ](https://voice.aragon.org/processes/#/0x21b2ea5345d2e0c941dd44ff4c43fc4683088b846ddb3234d1690b000000000e)"[**Transfer the Aragon Project Funds to an Aragon DAO Governed by (Delegated) ANT**](https://voice.aragon.org/processes/#/0x21b2ea5345d2e0c941dd44ff4c43fc4683088b846ddb3234d1690b000000000e)**."** This decision involves moving hundreds of millions of dollars from one governance system to another on the Ethereum blockchain. By any measure this is a "big deal" and a spectacular **opportunity to witness and participate in a governance process** that could never have been possible without access to the suite of blockchain tools now available. And yet a mere 46 out of [13,000 token holding wallets voted, ](https://etherscan.io/token/0xa117000000f279d81a1d3cc75430faa017fa5a2e)representing under 4% of the total tokens issued. In the industry, this is often referred to as "not ideal."™

We are not at all alone in our effort to increase engagement and improve outcomes. Across many DAOs turnout for votes in the 1-3% range is the norm, and getting 5-10% engagement is almost unheard of. One of the exciting advantages of digital voting mechanisms is that they allow us the opportunity to explore new approaches that traditional pen and paper products could never seriously consider.

[Liquid Democracy](https://en.wikipedia.org/wiki/Liquid_democracy) is one such system that has been advanced in the past two decades by groups such as the [German Pirate Party](https://en.wikipedia.org/wiki/Pirate_Party_Germany) in an attempt to increase engagement by **allowing users to delegate their voting power** to other users temporarily and to further incentives or coerce those who have been delegated authority to act on it - thus breaking the paradox.

> The image below shows an example of a delegated democratic vote where several layers of delegation occur. For instance two voters delegate their votes to a third voter, and then that voter delegates all three of the votes under their control to yet another delegate who ends up voting for a decision or candidate

![An example of a delegated democratic vote](/files/N7TNxeksvHwQRlWPpbPD)

In 2021 the [Token Engineering Commons team](https://tecommons.org/) released a config dashboard <https://config.tecommons.org/config/1> to support their work in[ Conviction Voting ](https://medium.com/giveth/conviction-voting-a-novel-continuous-decision-making-alternative-to-governance-aa746cfb9475)- an experimental mechanism that leverages some of the technical opportunities derived from all-digital voting tools such as Aragon. The hosted a series of "Param Parties" which in turn led to a community token launch.

With the vote to fund decentralized governance moving forward ([Approve 72k to fund S1 decentralised Goverance (dGov) 1 May through 31 August 2022.](https://voice.aragon.org/processes/#/0x21b2ea5345d2e0c941dd44ff4c43fc4683088b846ddb3234d1690b0000000008)) the dGov team worked on a variety of proposals including the decision to work with Blossom labs, General Magic to take the work they had done for TECommons and deliver a product and process similar to that for the Aragon community. Funding & oversight were delivered by the executive subDAO [with communication and budget notes taking place in the forum](https://forum.aragon.org/t/financial-proposal-demoing-a-tao-voting-dao/3622).

[**Tao voting**](https://token-engineering-commons.gitbook.io/tec-handbook/governance/voting-tools-and-methods/tao-voting) is a variation of liquid democracy developed by the [Token Engineering Commons](https://tecommons.org/) with a limited set of parameters:

* [Support Required](https://forum.aragon.org/t/tao-voting-support-required/3663) - how much total support is required for a proposal to pass
* [Minimum Quorum](https://forum.aragon.org/t/tao-voting-minimum-quorum/3664) - minimum percentage of token support required
* [Vote Duration](https://forum.aragon.org/t/tao-voting-execution-delay/3668) - the voting duration (usually in days) of a proposal
* [Execution Delay](https://forum.aragon.org/t/tao-voting-vote-duration/3665) - amount of time after a proposal passes for execution to occur
* [Delegated Voting](https://forum.aragon.org/t/tao-voting-delegated-voting-period/3666) - this is the period of time, within the Vote Duration, when delegates can cast votes that have been vested to them. When this period ends delegates can no longer vote.
* [Quiet Ending](https://forum.aragon.org/t/tao-voting-quiet-ending-period-and-quiet-ending-extension/3667) - checks for flipped outcomes during the final portion of the Vote Duration and adds more voting time in the event of a flip.
* [Proposal and Challenge Deposit](https://forum.aragon.org/t/deposit-and-challenge-deposit/3669) - a set amount of funds used as the collateral required to create a proposal
* [Settlement Period](https://forum.aragon.org/t/settlement-period/3670) - if an individual believes that a certain proposal is malicious, contains an error, or is not in alignment with the Community Covenant, they can[ challenge the proposal](https://forum.1hive.org/t/disputable-honey-pot-celeste-and-agreement-user-process/1343).

> Using a dashboard (image below) with a few parameters on the screen we are going to **engage the community** in a discussion about the values and risks associated with **delegated process**. This dashboard links to discussions about each parameter and serves to help us shape the governance structure of our DAO going forward.

![The dashboard with a few parameters on the screen used to engage the community.](/files/cdrFwRmFp7g3ukQU8l81)

While these parameters do not pretend to encompass the full breadth of liquid democratic possibility they give us a starting point to explore the opportunities, risks, successes and failures. We hope you'll work with us to shed light on these ideas and continue this living research work-in-progress.

There are hundreds of great articles on the subject - here are a few:

* [The Convergence of Iterative Delegations in Liquid Democracy in a Social Network -](https://arxiv.org/pdf/1904.05775.pdf)
* <https://en.wikipedia.org/wiki/Liquid_democracy>

> <mark style="color:purple;">**Do you have a question? Leave your comments here at our forum**</mark>\*\* 👇\*\*

{% embed url="<https://forum.aragon.org/>" %}


# Why use Aragon to build a DAO?

### Aragon is the major player in building DAOs

With Aragon you can have your DAO on **Ethereum or other blockchains**. Most of the DAOs currently operational are either built directly on Aragon or have forked Aragon's open source code.

### **Aragon is community-driven wi**th a full-time development team

Our users always have a say on how the platform evolves. Aragon is transparent. You can talk to developers in Discord or on our forum and ask any question. Beyond that we have our in-house team that works exclusively on upgrading the Aragon ecosystem.

### **Aragon offers user-friendly guides**

We provide information about how to build DAOs and a welcoming community that will help you out with advice. And if you are not confident, you may work with our emerging 3rd party developer network.


# Prerequisites

{% hint style="info" %}
In this section, you will learn about the prerequisites for using Aragon Products.
{% endhint %}

## To start using Aragon products you need:

* A working desktop computer, a laptop, a smartphone, or a tablet
* A "decent" internet connection

## **Tools for desktop computer or laptop:**

* Up to date [Brave](https://brave.com/), [Chrome](https://www.google.com/chrome/)/[Chromium](https://www.chromium.org/getting-involved/download-chromium), [Firefox](https://www.mozilla.org/) desktop web browser. Brave is recommended.
* A Web3-enabled Ethereum provider such as [Frame](https://frame.sh) or [Metamask](https://metamask.io) and (optional, but more secure) compatible Ethereum hardware wallet such as [Ledger](https://www.ledger.com) or [Trezor](https://trezor.io).

## **Tools for smartphone or tablet:**

* Up-to-date [Coinbase](https://wallet.coinbase.com), [imToken](https://www.token.im/download), [Status](https://status.im), [Trust](https://trustwallet.com/dapp), [Metamask](https://metamask.io) mobile Web3 browser.


# Quickstart

{% hint style="info" %}
A high-level overview of the Aragon Solutions
{% endhint %}

## Aragon Products:

**In Production**

* [Aragon Client](/products/aragon-client): our online **DAO maker for beginners and developers**. Aragon Client is the name for our fully hosted, easy-to-use, free online DAO maker. The most widely used DAO maker in the world. It's the perfect place to start if you are a beginner. Where you can create your first DAO in a couple of clicks: manage your members, vote, admin your funds directly on the blockchain without a single line of code.

**In Development**

* [Aragon Govern](/products/aragon-govern): an experimental leading-edge version of our client. It is the next-generation solution for **building DAOs.** It was designed to provide even greater freedom of action, yet take a fraction of the time to deploy. It may require significant technical background but showcases many exciting new opportunities.
* [Aragon Voice](/products/aragon-voice): the new **gasless** and universally verifiable **voting solution** for submitting proposals for any ERC20 token and voting on them using a decentralized end-to-end verifiable protocol.
* [Aragon Vocdoni](broken://pages/0QnMvRkyzmC1FtIcKBm0): the main product is a governance platform, which allows participation in conventional organizations with the maximum guarantees of security and privacy. The **voting** protocol \*\*\*\* that powers the platform is designed to be **universally verifiable, secure, and resistant to attack and censorship** through the use of blockchain technology, together with decentralized technologies and cryptographic mechanisms, such as zero-knowledge proofs.
* [Aragon Court](/products/aragon-court): a **dispute resolution** protocol that handles subjective disputes that cannot be solved by smart contracts. This is achieved by having a set of guardians drafted for each dispute who will vote to guarantee a certain ruling.


# Setting up a Metamask Wallet

{% hint style="info" %}
In this section, you will learn **how to install a Metamask wallet**, **how to set up a Metamask wallet** and how to configure it on different blockchains. You can either watch the **Video** or you can read the **Text** below the Video.
{% endhint %}

{% embed url="<https://www.youtube.com/watch?v=ILD0X32TmFg>" %}

{% hint style="success" %}
**We recommend using** [**Metamask**](https://metamask.io) **as your Web3 wallet.**

Metamask is a browser plugin that lets you make Ethereum (and other blockchains) transactions through regular websites.
{% endhint %}

{% hint style="warning" %}
This guide focuses on a Chrome extension. However, the process is similar for all browsers.
{% endhint %}

## **How to install a Metamask wallet?**

Watch the **Video** (1:24 mins)**👇** and then you are ready to start :tada:.

{% embed url="<https://youtu.be/NeVoRo8U6Yc>" %}

## Getting started <a href="#getting-started" id="getting-started"></a>

For creating and using an Aragon **Client DAO** you need to connect to one test or one main network. You can choose from different blockchains:

* [Ethereum Mainnet](/products/set-up-metamask/getting-started-with-ethereum)
* [Goerli Testnet](/products/set-up-metamask/getting-started-with-rinkeby-testnet)
* [Polygon](/products/set-up-metamask/getting-started-with-polygon)
* Andromeda
* [Mumbai Testnet](/products/set-up-metamask/getting-started-with-mumbai-testnet)
* [Harmony](/products/set-up-metamask/getting-started-with-harmony)
* [Harmony Testnet](/products/set-up-metamask/getting-started-with-harmony-testnet)
* [Stardust testnet](/products/set-up-metamask/getting-started-with-metis-andromeda)
* [BSC Testnet](/products/set-up-metamask/getting-started-with-bsc-testnet)

You can also create and interact to a DAO directly using command-line (in this case a bit dev skills are required), also in this case you need to connect to one test or one main network (the available networks are the same in the upper list).

For creating or using an Aragon **Govern DAO** you need to connect to the main network:

* [Ethereum Mainnet](/products/set-up-metamask/getting-started-with-ethereum)

Let's start to configure and understand the main futures of the metamask wallet and then you can pass to choose your favorite network.

## Getting started <a href="#getting-started" id="getting-started"></a>

* Visit the [Metamask homepage](https://metamask.io) and download the browser extension. Once it is downloaded, you should be automatically directed to a welcome page.

<figure><img src="/files/fFsdCOCZF1u3xxgvcQ8m" alt=""><figcaption><p>Metamask welcome PageFollow the instructions carefully.</p></figcaption></figure>

* Set up your Metamask account accordingly.

{% hint style="info" %}
If you need more info regarding creating your own Metamask profile, you can go [here](https://docs.polygon.technology/docs/develop/metamask/hello/).
{% endhint %}

* Once your Metamask setup is complete, you should be redirected to your newly created Ethereum wallet.

![Metamask account](/files/SPCVh4vtFDIRXdbS3OOr)

{% hint style="success" %}
If you have made it this far, congratulations 🎉.
{% endhint %}

## Account address <a href="#account-address" id="account-address"></a>

If you click on the **"three dots"** button below your account name - in our case *Account 1* - a popup will appear with your account address. It should look similar to the example below:

> **0x931D387731bBbC988B312206c74F77D004D6B84b**

{% hint style="success" %}
This is your public address (or public key). You can share this with other people to receive ETH or other tokens.
{% endhint %}

## Selected networks <a href="#selected-networks" id="selected-networks"></a>

In the top right you should see a dropdown menu with ***Main Ethereum Network*** selected. With this option, you are able to interact directly with the main Ethereum blockchain.

#### If you click on it, a selection of other networks will be shown.

<figure><img src="/files/aYvWrHeoiKgTnBdxLXp4" alt=""><figcaption><p>Drop down menu for selecting the network.</p></figcaption></figure>

## Why should you select other networks?

Before launching a project (or Dapp) on the main Ethereum network, it is good practice to deploy a version to an Ethereum test network or on other main networks (like Polygon) to save on costs for transaction fees.

### The benefits of using a testnet

The main reason for using a testnet ETH is that it can be obtained without having to pay real money. This gives developers and the community a chance to iron out any problems before real money is involved.

#### There are two testnets:

* Goerli
* Sepolia

{% hint style="warning" %}
**At this stage don't worry about the differences between these networks.** All you need to know is that they simulate Ethereum and can be used without having to pay real money.
{% endhint %}

### Using private networks

Finally, you can also interact with private Ethereum networks by selecting **Localhost 8545**. Private in this case doesn't mean more secure. It just means that the nodes are not connected to the main or test network nodes. **Perfect for rapid experimentation and testing.**

{% hint style="warning" %}
Remember that if you want to use different networks, you need to set up your wallet and load your wallet with enough funds for paying the transaction fees. We will explain how to do this in the next sections.
{% endhint %}


# Getting started with Ethereum

{% hint style="info" %}
In this section, you will learn how to connect and use your Web3 wallet on the Ethereum Network (also called Ethereum Mainnet).
{% endhint %}

## **Connect your Web3 wallet to the Ethereum Network**

{% hint style="info" %}
We recommend using [Metamask wallet](/products/set-up-metamask) as your Web3 wallet.
{% endhint %}

{% hint style="success" %}
The Ethereum Network is already set up on your Metamask wallet.
{% endhint %}

Log in to your wallet and select the Ethereum Mainnet on the dropdown Networks menu.

![Ethereum Mainnet network selection](/files/Mn37rwjwaun94H83rRTj)

## **Deposit at least 0.2 ETH to your Ethereum wallet.**

Now you need to load your wallet with enough Ether (abbreviated as ETH) to pay for gas. Each transaction on the network requires a gas fee for e.g.:

* transactions for the transfer of funds from your wallet
* the deployment of your organization
* the interactions within your organization

{% hint style="info" %}
$ETH is a cryptocurrency native to the Ethereum network and can be acquired from any [cryptocurrency exchange that lists ETH](https://docs.ethhub.io/using-ethereum/how-to-buy-ether/).
{% endhint %}

{% hint style="danger" %}
**How much $ETH is necessary to deploy a DAO?**

As a rough estimate of how much ETH you will need: multiply the [current “standard” gas price in gwei](https://ethgasstation.info) by 0.02.

**For example:** at a standard gas price of 10 gwei, you should have 0.2 ETH in your wallet. You can estimate the necessary gas price [here](/products/set-up-metamask/gas-tracker).
{% endhint %}


# Getting started with Goerli Testnet

{% hint style="info" %}
In this section, you will learn how to connect and use your web3 wallet on the Goerli Testnet.
{% endhint %}

## **Connect your Web3 wallet to the Goerli Testnet**

{% hint style="info" %}
We recommend using [Metamask wallet](/products/set-up-metamask) as your Web3 wallet.
{% endhint %}

{% hint style="success" %}
The Goerli Network is already set up on your Metamask wallet.
{% endhint %}

Log in to your wallet and select the Goerli Test Network on the dropdown Networks menu.

<figure><img src="/files/lkaJ2aZCCkapVsJPdP49" alt=""><figcaption><p>Goerli testnet selection</p></figcaption></figure>

## **Deposit GoerliETH to your Goerli wallet**

Now you need to load your wallet with enough test-Ether (abbreviated as GoerliETH) to pay for gas. Each transaction on the network requires a gas fee for e.g.:

* transactions for the transfer of funds from your wallet
* the deployment of your Organization
* the interactions within your Organization

#### You can claim GoerliETH on the Goerli Faucet:

* <https://goerli-faucet.mudit.blog/>
* <https://fauceth.komputing.org/?chain=5>

#### Or post your Goerli Testnet address in the [Aragon Chat #questions-community](https://discordapp.com/channels/672466989217873929/694844628586856469) to receive GoerliETH for free.

{% hint style="warning" %}
If you post your faucet request in an Aragon Chat channel, please, be patient. We will send them to you asap.
{% endhint %}


# Getting started with Polygon

{% hint style="info" %}
In this section, you will learn how to connect and use your Web3 wallet on the Polygon Network.
{% endhint %}

## **Connect your Web3 wallet to the Polygon Network**

{% hint style="info" %}
We recommend using [Metamask wallet](/products/set-up-metamask) as your Web3 wallet.
{% endhint %}

* Log in to your wallet
* Go to [https://chainlist.org/](https://chainlist.org) site
* In the search box insert ***polygon mainnet***
* Click the ***connect your wallet*** button on the top right
* Click \_**add to Metamask** \_ button

{% hint style="info" %}
If Metamask is well connected the fox icon appears.
{% endhint %}

![Add the Polygon network to Metamask using chainlist.org](/files/4UJsjHokZdHrfk8m0XTC)

## **Deposit at least 0.2 MATIC to your Polygon wallet.**

### What is $MATIC?

$MATIC is the currency used on Polygon to pay for transaction fees and, consequently, for deploying a DAO, in the same way that ETH is used on Ethereum.

### Where can I get $MATIC?

$MATIC can be bought on a decentralized exchange such as [UniSwap](https://app.uniswap.org/#/swap), using $ETH or any other ERC20 token. Then $MATIC needs to be transferred onto the Polygon network using a 'bridge' such as <https://wallet.matic.network/bridge>.

Alternatively, $MATIC can be bought from a centralized exchange, such as Binance or Kucoin and then sent directly to your Polygon wallet.

{% hint style="danger" %}
**How much $MATIC is necessary to deploy a DAO?**

At least 0.2 $MATIC is required to deploy an Aragon DAO, though the actual cost might be more or less (depending on the network traffic). You can estimate the necessary gas price [here](/products/set-up-metamask/gas-tracker).
{% endhint %}


# Getting started with Mumbai Testnet

{% hint style="info" %}
In this section, you will learn how to connect and use your Web3 wallet on the Mumbai Testnet. You can either watch the **Videos** or you can read the **Text** below the Video.
{% endhint %}

{% embed url="<https://youtu.be/QhmpZjZ7UPo>" %}

{% embed url="<https://youtu.be/mJO77h6Plz0>" %}

## **Connect your Web3 wallet to the Mumbai Testnet**

{% hint style="info" %}
We recommend using [Metamask wallet](/products/set-up-metamask) as your Web3 wallet.
{% endhint %}

* Log in to your wallet
* Go to [https://chainlist.org/](https://chainlist.org) site
* In the search box insert ***mumbai***
* Click the ***connect your wallet*** button on the top right
* And click \_**add to Metamask** \_ button

{% hint style="info" %}
If Metamask is well connected the fox icon appears.
{% endhint %}

![Add the Mumbai testnet to Metamask using chainlist.org](/files/hKi68AAzH4ncPlFgu9VF)

## **Deposit test-MATIC to your Mumbai wallet**

### What is test-MATIC?

TEST MATIC token is the ERC20 token used on Mumbai to pay for transaction fees (abbreviated as MATIC) and, consequently, for deploying a DAO, in the same way that test-ETH is used on e.g. Goerli testnet.

> Important info: please note that the symbol of the test-MATIC is "MATIC", the same as for mainnet-matic.

### How to get test-MATIC?

To get test-MATIC, you can go to the [Polygon Mumbai Faucet](https://faucet.polygon.technology):

* Network select ***Mumbai***
* Select token ***MATIC Token***
* Enter your wallet address where you will receive the test-Matic

{% hint style="info" %}
If you are using Metamask, it is your wallet account address.
{% endhint %}

* Click ***Submit***

![Polygon Mumbai Faucet](/files/3aKtn1bxb7ftCpUIhO00)

{% hint style="warning" %}
It may take up to 30 minutes to receive your test-MATIC due to network traffic. You should see test-MATIC in your wallet (in our example, Metamask account) soon after.
{% endhint %}


# Getting started with Harmony

{% hint style="info" %}
In this section, you will learn how to connect and use your Web3 wallet on the Harmony Network.
{% endhint %}

## **Connect your Web3 wallet to the Harmony Network**

{% hint style="info" %}
We recommend using [Metamask wallet](/products/set-up-metamask) as your Web3 wallet.
{% endhint %}

* Login to your wallet
* Go to the [https://chainlist.org/](https://chainlist.org) site
* In the search box insert ***harmony mainnet shard 0***
* Click the ***connect your wallet*** button on the top right

{% hint style="info" %}
If Metamask is well connected the fox icon appears
{% endhint %}

* Click \_**add to Metamask** \_ button

![Add the Harmony network to Metamask using chainlist.org](/files/dj6FkNVD0RwdAispTW5v)

## **Deposit at least 0.2 ONE to your Harmony wallet**

### What is ONE?

ONE is the currency used on Harmony to pay for transaction fees and, consequently, to deploy a DAO, in the same way that ETH is used on Ethereum.

### How to get ONE?

$ONE needs to be transferred onto the Polygon network using a 'bridge' such as <https://bridge.harmony.one/busd>. An alternative bridge can be found [here](https://synapseprotocol.com/?inputCurrency=USDT\&outputCurrency=USDC\&outputChain=1666600000).

{% hint style="danger" %}
**How much $ONE is necessary to deploy a DAO?**

At least 0.2 $ONE is required to deploy an Aragon DAO, though the actual cost might be much less.
{% endhint %}


# Getting started with Harmony testnet

{% hint style="info" %}
In this section, you will learn how to connect and use your Web3 wallet on the Harmony Testnet.
{% endhint %}

## **Connect your Web3 wallet to the Harmony Testnet**

{% hint style="info" %}
We recommend using [Metamask wallet](/products/set-up-metamask) as your Web3 wallet.
{% endhint %}

* Log in to your wallet
* Go to [https://chainlist.org/](https://chainlist.org) site
* In the search box insert ***harmony testnet shard 0***
* Click the ***connect your wallet*** button on the top right

{% hint style="info" %}
If Metamask is well connected the fox icon appears.
{% endhint %}

* And click \_**add to Metamask** \_ button

![Add the Harmony testnet to Metamask using chainlist.org](/files/EiAwf4yl2tn7zGwIQDqx)

## **Deposit TEST ONE to your Harmony test wallet**

### What is TEST ONE?

TEST ONE token is used on the Harmony Testnet. It is used to:

* pay for transaction fees (abbreviated as ONE)
* to deploy a DAO in the same way that test-ETH is used on Goerli

{% hint style="warning" %}
Please note that the symbol of the test-ONE is "ONE", the same as for mainnet-ONE.
{% endhint %}

### How to get your Harmony One address for the faucet?

* Go to [https://explorer.harmony.one/](https://explorer.harmony.one).
* Copy the account address from your Metamask wallet and paste it into the search bar.
* It should output an address that begins with ***one1**.*
* You will need to copy that address and then insert it at [https://faucet.pops.one/](https://faucet.pops.one).
* In a couple of seconds you should receive 1000 TEST ONE to deploy your DAO.

![](https://d33v4339jhl8k0.cloudfront.net/docs/assets/5c98a4fe0428633d2cf3fcf7/images/61db0984d268f00e10386d30/file-k4lsn7c6rW.png)


# Getting started with Metis Andromeda

{% hint style="info" %}
In this section, you will learn how to connect and use your Web3 wallet on the Metis Andromeda Network.
{% endhint %}

## **Connect your Web3 wallet to the Andromeda Network**

{% hint style="info" %}
We recommend using [Metamask wallet](/products/set-up-metamask) as your Web3 wallet.
{% endhint %}

* Login to your wallet
* Go to [https://chainlist.org/](https://chainlist.org) site
* In the search box insert \*\* **\_**&#x61;ndromeda\*\*\_
* Click the ***connect your wallet*** button on the top right

{% hint style="info" %}
If Metamask is well connected the fox icon appears.
{% endhint %}

* And click \*\* **\_**&#x61;dd to Metamask\*\* \_ button\_.\_

![Add the Andromeda Metis network to metamask using chainlist.org](/files/inHApwFczzHX0LYYKGV7)

## **Deposit at least 0.2 METIS to your Andromeda wallet**

### **What is** $METIS?

$METIS is the currency used on Andromeda to pay for transaction fees and, consequently, to deploy a DAO, in the same way that $ETH is used on Ethereum.

### How to get $METIS?

$METIS needs to be transferred onto the Andromeda Network using a 'bridge' such as this bridge [here.](https://bridge.metis.io/home) It allows you to bring the $METIS from the Ethereum Network to $METIS on the Metis Andromeda Mainnet.

{% hint style="warning" %}
**How much $METIS is necessary to deploy a DAO?**

At least 0.2 $METIS is required to deploy an Aragon DAO, though the actual cost might be much less.
{% endhint %}


# Getting started with Stardust Testnet

{% hint style="info" %}
In this section, you will learn how to connect and use your Web3 wallet on the Stardust Testnet.
{% endhint %}

## **Connect your Web3 wallet to the Stardust Testnet**

{% hint style="info" %}
We recommend using [Metamask wallet](/products/set-up-metamask) as your Web3 wallet.
{% endhint %}

* Login to your wallet
* Go to [https://chainlist.org/](https://chainlist.org) site
* In the search box insert ***stardust***
* Click the ***connect your wallet*** button on the top right

{% hint style="info" %}
If Metamask is well connected the fox icon appears.
{% endhint %}

* And click ***add to Metamask** \_ button*.\_

![Add the Stardust Testnet to Metamask using chainlist.org](/files/zgECBIjXamVPmUoVJK81)

## **Deposit test-METIS token to your Stardust wallet**

### **What is** $METIS TEST?

$METIS TEST token is the test-METIS used on Stardust to pay for transaction fees (abbreviated as "METIS") and, consequently, to deploy a DAO, in the same way, that test-ETH is used on Rinkeby.

{% hint style="info" %}
Please note that the symbol of the test-METIS is "METIS", the same as for the mainnet-METIS.
{% endhint %}

### How to get TEST-METIS tokens?

* Switch to the Rinkeby test network on your Metamask
* Import Token

You will need to import the Metis token. Click on the ***Import Token*** option on Metamask and copy-paste the Metis token address `0xe552fb52a4f19e44ef5a967632dbc320b0820639`. You will then see your Metis token balance.

* Get Rinkeby Ether

{% hint style="warning" %}
This step is applicable if you do not have any tokens at all or if you have a fresh account with 0 Metis balance. If you need some Rinkeby test "ETH" go [here](/products/set-up-metamask/getting-started-with-rinkeby-testnet).
{% endhint %}

* Get Metis on Rinkeby

Head over to [https://rinkeby-faucet.metis.io/](https://rinkeby-faucet.metis.io) and make sure your account is connected.

Confirm the transaction and wait until it is completed. Once all instructions are followed, you will receive a message informing you that the transaction was successful and that your wallet was updated.

* Transfer tokens from L1 (layer 1) to L2 (layer 2)

Go to the [bridge](https://bridge.metis.io) to transfer tokens from L1 to L2. Select the ***Rinkeby Testnet Network*** in your Metamask wallet.

Select ***deposit*** => ***Metis*** and insert the amount as shown in the image below. Confirm the transactions and wait.

Select the ***Metis Stardust Network*** in your Metamask wallet for seeing your test-METIS ($METIS) ready for use.

![Metis bridge - from L1 to L2.](/files/lF4TNNAoi0x70kvGvxQA)


# Getting started with BSC Testnet

{% hint style="info" %}
In this section, you will learn how to connect and use your Web3 wallet on the BSC Testnet.
{% endhint %}

## **Connect your Web3 wallet to the BSC Testnet**

{% hint style="info" %}
We recommend using [Metamask wallet](/products/set-up-metamask) as your Web3 wallet.
{% endhint %}

* Login to your wallet
* Go to [https://chainlist.org/](https://chainlist.org) site
* In the search box insert ***binance smart chain testnet***
* Click the *connect **your wallet*** button on the top right (if Metamask is well connected the fox icon appears)
* And click ***add to Metamask*** button

![Add the BSC testnet to Metamask using chainlist.org](/files/YxRgzpg1h1xvBcDezvKP)

## **Deposit test-BNB token to your BSC Testnet wallet**

You will then need to load your wallet with enough test-BNB (abbreviated as "BNB") to pay for gas fees when you deploy your organization and make transactions within the organization.

{% hint style="warning" %}
Please note that the symbol of the test-BNB is ***BNB*** - *\*\*\*\** the same as for mainnet-BNB.
{% endhint %}

You can try the [Binance Smart Chain faucet](https://testnet.binance.org/faucet-smart) or post your BSC Testnet address in the [Aragon Chat #support-community](https://discordapp.com/channels/672466989217873929/694844628586856469) to receive test-BSC for free.

{% hint style="warning" %}
If you post your faucet request in an Aragon Chat channel, please, wait for our response. We will send them to you asap.
{% endhint %}


# How to sign a transaction?

{% hint style="info" %}
In this section, you will learn about how to sign a transaction in your DAO using Metamask.
{% endhint %}

## The process of signing transaction explained

### Open up the Metamask browser extension and log in.

If you are using Chrome you should be able to do this by clicking on the fox icon located to the right of your address bar.

If you can't see it, [click here](https://chrome.google.com/webstore/search/metamask). This will open up an interface to your Ethereum wallet. Set up your wallet as described [here](/products/set-up-metamask).

### Select the network and the account you want to use.

In the Metamask wallet, select the network and the account you want to use. Access your DAO, connect your Metamask wallet, and interact with the DAO (for example by adding a new member in the Token App).

### Add a token.

{% hint style="info" %}
In the following example, we will add a new token and we will show how to sign the transaction to finalize this. If you need help on "How to add tokens to your Dao" please go [here](/products/aragon-client/explore-template-dao/what-are-apps/token-app).
{% endhint %}

### Confirm a transaction

After filling in all the requested fields on the ***Add tokens*** page and clicking the ***Create transaction*** button, a Metamask popup opens (as shown in the image below). Please, follow as requested to sign the transaction with the ***Confirm*** button.

## Example

{% hint style="info" %}
In the following example, we will *add a new token* in the *Token* App in our DAO and we will show how to sign the transaction for finalizing the process.
{% endhint %}

* Access your DAO

{% hint style="info" %}
If you do not have a DAO one go [here](/products/aragon-client/how-to-create-a-dao-using-aragon-client) to deploy it.
{% endhint %}

* Connect your Metamask wallet.
* Click ***Add a new token*** in the Token App

{% hint style="info" %}
If you need help on how to add tokens to your DAO, please go [here](/products/aragon-client/explore-template-dao/what-are-apps/token-app).
{% endhint %}

* Fill in all the requested fields in the ***Add tokens*** page and click the ***Create transaction*** button
* A Metamask popup (as shown in the image) requesting you to sign the transaction with the ***Confirm*** button, should appear - click the confirm button to proceed.

{% hint style="success" %}
The transaction is done.
{% endhint %}

![Sign a Metamask transaction.](/files/q2yWHkDbvrq8Y88hmwzo)


# Import your seed wallet to Metamask

{% hint style="info" %}
In this section, we'll go through how to import the seed wallet into the Metamask wallet.
{% endhint %}

### Log in to your Metamask wallet

The first step is to open up the Metamask browser extension and to log in. If you're using Chrome you should be able to open Metamask by clicking on the fox icon located to the right of your address bar *(see the image below)*.

If you can't see it, [*click here*](https://chrome.google.com/webstore/search/metamask). This will open up an interface to your Ethereum wallet.

<figure><img src="/files/P6Z0U99eqoGUQtuI84t1" alt=""><figcaption></figcaption></figure>

### Click on the ***circle*** in the top right.

You should see a black drop down menu appear *(see image below)*.

<figure><img src="/files/VeNx76IcFOdcE1lKlIeD" alt=""><figcaption></figcaption></figure>

### Click on the *Log out* button in the top right of this menu.

You'll be taken to a *Welcome Back* page.

<figure><img src="/files/V6DONDYet9eGys0JQUCB" alt=""><figcaption></figcaption></figure>

### Importing the 12 words phrase will allow you to use Metamask with your wallet.

Click on *Import using account seed phrase*. Metamask should now open up in a new tab with a heading ***Restore your account with Seed Phrase***. Import the unique phrase you were given when setting up your account.

{% hint style="danger" %}
Note that your mnemonic phrase won't be the same as mine. So make sure you copy yours from your terminal, and not from this blog.
{% endhint %}

### Create a new password

Once you copied the 12 word seed phrase, paste it into the wallet seed text box, and create a new password (see image below).

<figure><img src="/files/VDVHrbkX03faff9ggTTG" alt=""><figcaption></figcaption></figure>

### Click on the *Restore* button at the bottom of the page.

The imported account will appear in the *My account list* when clicking on the top right circle.

{% hint style="success" %}
You've now connected Metamask to an Ethereum account.
{% endhint %}


# Gas Tracker

{% hint style="warning" %}
Your Ethereum provider - Metamask, should pre-fill the correct gas limit and the gas price, but sometimes the amount will be too low which causes transactions to last longer or not take place at all.
{% endhint %}

{% hint style="info" %}
You can assert an optimal gas cost and adjust it in the transaction settings of your wallet during the transaction approval process.
{% endhint %}

### Gas trackers for different networks

* The Mainnet - <https://etherscan.io/gastracker>
* The Polygon Network - <https://polygonscan.com/gastracker>
* The Harmony Network - not yet available
* The Metis Andromeda Network - not yet available

{% hint style="info" %}
[Here](https://metamask.zendesk.com/hc/en-us/articles/360022895972-Using-advanced-gas-controls) you can find how to adjust the gas price in Metamask for a transaction.
{% endhint %}


# Setting up a Frame Wallet

{% hint style="info" %}
In this section, you will learn how to get started with Frame and interact with a DAO using a hardware wallet.
{% endhint %}

## **Install Frame**

Go to the [Frame website](https://frame.sh) and install the Frame desktop client and browser extension.

![Download Frame Page](https://d33v4339jhl8k0.cloudfront.net/docs/assets/5c98a4fe0428633d2cf3fcf7/images/5d8bcfb504286364bc8f9089/file-RW9LeLOUHS.png)

## Setup

{% hint style="warning" %}
You need a Metamask, Ledger or Trezor wallet to use Frame.
{% endhint %}

Start by downloading Frame from the official website: <https://frame.sh>. Afterwards, you will find Frame in your Menu bar.

<figure><img src="/files/2q2arLEcuYHHVVpXSFag" alt=""><figcaption></figcaption></figure>

## Configure your device <a href="#configure-your-device" id="configure-your-device"></a>

### **Metamask**

To import your Metamask wallet into Frame:

* Click on the ***+*** button in the Accounts bar in top of the wallet.
* Click on the ***add new accounts*** button in the frame which pop-ups on the right.
* Click on the ***seed phrase*** button.
* Copy and paste the seed phrase from your Metamask wallet and click ***next** (see image below).*
* Your Metamask wallet should now appear in the Frame wallet.

![](/files/7P53uZJKaDHBEy37Dgfp)

### **Ledger**

On Ledger devices insert your pin to unlock it. Next open Frame.

<figure><img src="/files/po8MIp06x3yaWupDQynE" alt=""><figcaption></figcaption></figure>

### **Trezor**

On Trezor devices insert your pin directly on Frame. You should now be able to select the network and account you would like to use.

<figure><img src="/files/F8yg9oMxlZvfh41otixc" alt=""><figcaption></figcaption></figure>

### **Network**

To choose the desired network, select the ***network symbol*** button (as shown in the image below) in the upper right corner. This will take you to Frame Chains menu, where you can configure its general settings.

<figure><img src="/files/qAY6sXqFZP0YfGBKFsIi" alt=""><figcaption></figcaption></figure>

Feel free to choose any of the following networks: **Goerli** or **Mainnet.**

{% hint style="info" %}
For this tutorial, we will select Goerli.
{% endhint %}

<figure><img src="/files/g7gMFZ6N44dy0qKbxd2f" alt=""><figcaption></figcaption></figure>

<figure><img src="/files/3glp5AIP2JWYqQQTB0h2" alt=""><figcaption></figcaption></figure>

### **Accounts**

The last step is to choose your account. Click on the ***Configuration*** button. You will find it on the right of the Ledger or Trezor icon). Click on the ***Accounts*** button that pops up below the icon. This will display a new menu with the available accounts on your device for the network. Select one with some GoerliEther.

{% hint style="info" %}
If you don't have any, you can request a Goerli faucet [here](https://goerli-faucet.mudit.blog/) or [here](https://fauceth.komputing.org/?chain=5).
{% endhint %}

In the configuration menu, you can also manage the Dapp permissions you have granted for that particular account.

<figure><img src="/files/YUIsRaMqM3RNRfmbMZ06" alt=""><figcaption></figcaption></figure>

{% hint style="success" %}
You are now finished setting up Frame for your device and ready to sign your first transaction.
{% endhint %}


# Setting up a Gnosis Safe MultiSig Wallet

{% hint style="info" %}
In this section, we will look into how Aragon Client DAOs can be managed by a **MultiSig wallet**.
{% endhint %}

{% hint style="warning" %}
Here we are going to use [**Gnosis Safe MultiSig**](https://gnosis-safe.io), however, you could follow a similar approach for any other MultiSig wallet that supports contract interaction.
{% endhint %}

###

## Setting up the necessary permissions

{% hint style="info" %}
Aragon Client DAOs have access to a control system, where each action is protected by a set of permission records. Only someone with specific permissions can act.

**That is why we need to assign the MultiSig wallet to a range of permissions in the DAO that correspond with the desired actions.**

You can read more about permission settings [here](/products/aragon-client/explore-template-dao/system-setting/permissions-setting).
{% endhint %}

In this example an Aragon Client DAO has a balance of ETH tokens stored in its Vault and you want to initiate a payment to compensate a DAO Contributor for her work. We will show how to **initiate a withdrawal of some of the ETH to the Contributor.**

Start by opening your Aragon Client DAO, you should see a similar dashboard as in the image below. Click in the left hand menu on 'Permissions':

<figure><img src="/files/hHCGuqHl8sxuE7bUPsvs" alt=""><figcaption></figcaption></figure>

We want to add new permissions for your MultiSig, so click in this screen on 'New permission':

<figure><img src="/files/sgY35BD1QWRtV2VKalXO" alt=""><figcaption></figcaption></figure>

You should see the following side-window appear. Click on 'Select an app':

![](/files/zVj7GQXiayutnoLzXEGx)

For this example we want to initiate a withdrawal of ETH by the MultiSig. This is usually done from the Finance app of the DAO, so select 'Finance' here and then click on 'Select an entity':

![](/files/pxL74IFGowlneCXxR2iV)

Since we need to add the address of your MultiSig, click here on 'Custom address...':

![](/files/fLH5VAnmkXJqZ5Bf7FRt)

Now go to your Gnosis Safe, copy its address and paste the address of your MultiSig in the 'GRANT PERMISSION TO' box. Then click on 'Select an action':

![](/files/HTBiGbSHKcWexKttEQd7)

{% hint style="danger" %}
Do not forget to remove the letters from the front of the Gnosis Safe address,\*\*`eth:`**or**`gor:`\*\*or different depending on the network you use! Otherwise it won't work..

The address should start with: **`0x`**
{% endhint %}

In this case we want to initiate a new payment, so click on 'Create new payments':

![](/files/VjLBHmbvq7FircfRIPpi)

Now you filled the required boxes, click on 'Add permission':

![](/files/lPGeq2IueORPPk5oQAaP)

Here the app warns that the permission can not be directly changed, but that a vote will be created to change the permission. Click on 'Create transaction':

![](/files/WdtbOleoUK9gOax9FHYp)

A transaction should pop-up in your Web3 Wallet, 'Confirm' the transaction:

![](/files/n1uD9r2WSFxl1VfyEqnW)

Once the transaction has processed, head over to the 'Voting' app of your DAO. You should see that an open vote has been generated. Click on the vote:

<figure><img src="/files/EPCe8AYBfzqFKdzMR47d" alt=""><figcaption></figcaption></figure>

Now confirm the vote by clicking 'Yes':

<figure><img src="/files/1jufdRfSmrwWQnqBUlZ6" alt=""><figcaption></figcaption></figure>

Click here on 'Create transaction' and confirm the transaction that should pop-up in your Web3 Wallet:

<figure><img src="/files/tYGpN3XCfYLOdLoPt0dg" alt=""><figcaption></figcaption></figure>

In our example it confirmed that the vote has passed:

<figure><img src="/files/A0BSVTAvMway4ebtPCnf" alt=""><figcaption></figcaption></figure>

{% hint style="danger" %}
More DAO members might need to approve the vote for the vote to pass. This depends on the **SUPPORT** and **MINIMUM APPROVAL** settings of your DAO
{% endhint %}

Now head over to the 'Permissions' app to check whether the permission for your MultiSig has been added. In our case click on the **Finance** app, and then unfold the 'Create new payments' permission. We now see that the MultiSig address has appeared!

<figure><img src="/files/rnpzpX18L8jnLVCFdZ51" alt=""><figcaption></figcaption></figure>

## Initiate payment at the MultiSig

Now that's done we can initiate a payment at the MultiSig!

Head back to the (in this case) Gnosis Safe and press on 'New Transaction'. In the pop-up window which appears, press 'Contract Interaction':

<figure><img src="/files/lu3aOnfO689K2Cl9AfMI" alt=""><figcaption></figcaption></figure>

We now need the 'Contract address' of the app we want to interact with, which is the Finance app in this case:

<figure><img src="/files/0GnzEwpKHrHLpJiqJo2Q" alt=""><figcaption></figcaption></figure>

So head back to your Aragon Client DAO, open the **Organization** app, click on the address under (in this case) 'FINANCE', and copy the address:

<figure><img src="/files/Y2LrsoOwljLmRFb0Zbrh" alt=""><figcaption></figcaption></figure>

Paste the address in the 'Contract address' field back in the Gnosis Safe:

<figure><img src="/files/y90YtaQoUKhcjEjdNCBf" alt=""><figcaption></figcaption></figure>

{% hint style="danger" %}
If the 'ABI' field automatically populates, **REMOVE** all the contents in the field, since we will need a different ABI
{% endhint %}

Now we need to get the ABI of the base contract of the app we interact with, which is the **Finance** app in this case. Click on 'Finance App' in the box below:

{% hint style="info" %}
You can find Etherscan links to the smart contracts of the most used apps below:

* [Tokens App](https://etherscan.io/address/0xde3A93028F2283cc28756B3674BD657eaFB992f4#code)
* [Finance App](https://etherscan.io/address/0x836835289A2E81B66AE5d95b7c8dBC0480dCf9da#code)
* [Voting App](https://etherscan.io/address/0xb935C3D80229d5D92f3761b17Cd81dC2610e3a45#code)
  {% endhint %}

On the Etherscan page, scroll down until you see the 'Contract ABI' box. Click on the Copy symbol, to copy the ABI of the smart contract:

<figure><img src="/files/VyMIFQ6JAL4jiFUc8L7j" alt=""><figcaption></figcaption></figure>

Paste the ABI in the 'ABI' field in the Gnosis Safe, and click on 'Method':

<figure><img src="/files/8IUfZFRhwNUjFWDXMCeN" alt=""><figcaption></figcaption></figure>

Search here for 'newImmediatePayment', since we want to do an immediate payment in this example, and select it:

<figure><img src="/files/YN6n5aGIAmAg5w5sGw8Q" alt=""><figcaption></figcaption></figure>

Now find the 'token address' of the token you want to send. In this case we are sending ETH. The token address of ETH is: `0x0000000000000000000000000000000000000000`

Add the 'receiver address' of in this example the Contributor.

Then add the 'amount'. In this case we will send the DAO Contributor an amount of 0.1 ETH.

{% hint style="danger" %}
For the 'amount' field, add 18 decimals to the original value. For example, if you want to invoke the\*\*`newImmediatePayment`\*\*method to transfer 10.5 tokens, you will have to input 10.5 \* 10 ^ 18 = **`10500000000000000000`** into the amount field.
{% endhint %}

In our example the amount is 0.1 \* 10 ^ 18 = `100000000000000000`

Then you can add a 'reference string' as a payment reference, and click on 'Review':

<figure><img src="/files/xJr464izAVZmIbtJC6XQ" alt=""><figcaption></figcaption></figure>

Scroll down and test the transaction by clicking on 'Simulate'. If all is well it should display 'Success'. If so, click on 'Submit':

<figure><img src="/files/9eG7fkP45uaLqWd0i0uU" alt=""><figcaption></figcaption></figure>

{% hint style="danger" %}
If the **simulation has failed** and you get warnings (like a gas estimation error) there has likely been a mistake either in permissions, method parameters, or ABI and contract address. Please go through the setup again
{% endhint %}

A transaction should pop-up in your Web3 Wallet. 'Confirm' the transaction and wait for it to be processed. If all good, it executed:

<figure><img src="/files/ivrU2EVOb1iWR9hntNNt" alt=""><figcaption></figcaption></figure>

Head back for the last time to your Aragon Client DAO :fingers\_crossed:, and open the **Finance** app. In our example we see that a 'Contributor compensation' of 0.1 ETH is displaying in the 'Transfers' overview:

<figure><img src="/files/ZrnKSFr1H1o6Ab4iS37R" alt=""><figcaption></figcaption></figure>

We did it! :partying\_face: Well done! :medal:


# Aragon Client

{% hint style="info" %}
In this section, you will learn how to create and navigate a DAO using the Aragon Client.

\
The Aragon Client product itself can be found [here](https://client.aragon.org/).
{% endhint %}


# What is Aragon Client

{% hint style="info" %}
In this section, you will learn about Aragon Client.
{% endhint %}

## What is Aragon Client?

The Aragon Client is the Aragon solution for creating a DAO easily. It is perfect for beginners who want to create a new DAO.

## **Aragon Client History**

**Aragon Client** (regarded as Aragon v1) is the first generation protocol to create DAOs. It is a thoroughly tested toolkit that has been used for 3 years. Launched in 2019, it became the dominant solution on the market. You can check the organizations powered by Aragon [here](https://poweredby.aragon.org).

## Aragon Client Benefits

Aragon Client has a modular structure, which is great if you are just starting with a DAO creation. It allows you to play around with adding more apps and functionalities through the easy UI.


# How to create a DAO

Note: Make sure you have all of the prerequisites before proceeding with this guide

{% hint style="info" %}
In this section, you will learn how to create a DAO using the Aragon Client. In the example below we will use the Goerli Network.
{% endhint %}

## How to create a DAO

* Log in to your Web3 wallet (e.g. Metamask), select your account address and the network you want to use.
* Go [here](https://aragon.org) and click the ***Create your DAO*** button and then choose to use ***Aragon Client**.*
* Check that the wallet account is connected (as shown in the image), if not press ***connect wallet***.

{% hint style="danger" %}
Remember that you'll need 0.2ETH (or more depending on the network traffic) to create a DAO on the Ethereum network. So it's recommended that you use a test network (like Goerli) when setting up your first DAO. For more info about how to connect to a Test Network go [here](/products/set-up-metamask/getting-started-with-rinkeby-testnet).
{% endhint %}

<figure><img src="/files/PGaZz3i9g5FSgWYPm28W" alt=""><figcaption><p>Check the wallet connection.</p></figcaption></figure>

* Select a template (click on **view details** and then *use this template).*

<figure><img src="/files/9y4gXRWvvkmNAe8WKDvY" alt=""><figcaption><p>Select the template</p></figcaption></figure>

### For more details about the different Templates go here.

* Company template: [here](/products/aragon-client/how-to-create-a-dao-using-aragon-client/use-company-template).
* Membership template: [here](/products/aragon-client/how-to-create-a-dao-using-aragon-client/use-membership-template).
* Reputation template: [here](/products/aragon-client/how-to-create-a-dao-using-aragon-client/page-1).


# Templates

{% hint style="info" %}
In this section, you will learn which are the templates available for creating a DAO and which are the main differences.
{% endhint %}

## What are templates?

Templates are pre-configured smart contracts for different types of organizations. You can use the templates that are included with Aragon or [create your own](https://github.com/aragon/dao-templates).

## Template types

### [Company](/products/aragon-client/how-to-create-a-dao-using-aragon-client/use-company-template)

A Company organization is an organization that uses **transferable tokens** to represent stake in the company. Decisions are made using **token-weighted voting**, where one token equals one vote.

### [Membership](/products/aragon-client/how-to-create-a-dao-using-aragon-client/use-membership-template)

A Membership organization is an organization that uses a **non-transferable token** to represent membership. Decisions are made based on **one-member-one-vote** governance.

### [Reputation](/products/aragon-client/how-to-create-a-dao-using-aragon-client/page-1)

A Reputation organization is an organization that uses **non-transferable tokens** to represent reputation. Decisions are made using **reputation-weighted voting**.

{% hint style="warning" %}
If the default templates do not provide you with the desired solution, you can set up a [development environment](https://hack.aragon.org/) and use the [aragonCLI](https://hack.aragon.org/developers/tools/aragoncli) to [create a custom organization](https://hack.aragon.org/developers/tools/guides/custom-deploy).
{% endhint %}


# Using the Company Template

{% hint style="info" %}
In this section, you will learn how to create a Company DAO using the Company Template in the Aragon Client.
{% endhint %}

{% hint style="danger" %}
Before starting be sure to have read [How to create a DAO](/products/aragon-client/how-to-create-a-dao-using-aragon-client).
{% endhint %}

## What is a company organization?

A Company organization is an organization that uses transferable tokens to represent stake in the company. Decisions are made using token-weighted voting, where one token equals one vote.

## Create a Company DAO

Click ***View details***, review the apps available, check the boxes to install any optional apps you want to install. When finished, click ***Use this template***.

![Select the template](/files/2ynGhI1uXdpBpN0ftUXt)

![Company template](https://d33v4339jhl8k0.cloudfront.net/docs/assets/5c98a4fe0428633d2cf3fcf7/images/5d86242f04286364bc8f6507/file-QeXiahqUec.png)

## Claim a name

Select the name of your DAO and fill in the *Organization Name* tab. Aragon uses the [Ethereum Name Service](https://ens.domains) (ENS) to assign names to organizations.

{% hint style="warning" %}
This name will be useful for accessing your DAO. Don't forget it!
{% endhint %}

![Select a DAO name](/files/3yPsLhPJknBqSr9PMv6M)

## Configure the parameters of the Voting App

{% hint style="info" %}
The Voting app parameters currently cannot be changed from the Aragon front-end client. To change the Voting app parameters after your organization has been created, you must first initialize the permissions to change these parameters, then you can change the parameters using the [aragonCLI](https://hack.aragon.org/developers/tools/aragoncli).
{% endhint %}

### Configure the voting settings

#### The Support percentage

It \_\_ is the relative percentage of tokens that are required to vote ***Yes*** for a proposal to be approved. For example, if ***Support*** is set to 50%, then more than 50% of the tokens used to vote on a proposal must vote ***Yes*** for it to pass.

#### The Minimum Approval percentage

It is the percentage of the total token supply that is required to vote ***Yes*** on a proposal before it can be approved. For example, if the ***Minimum Approval*** is set to 20%, then more than 20% of the outstanding token supply must vote ***Yes*** on a proposal for it to pass.

#### The Vote Duration

It is the length of time that the vote will be open for participation. For example, if the Vote Duration is set to 24 hours, then token holders have 24 hours to participate in the vote.

![Configure the Voting settings](/files/akFdkEQjVtCtjMUVfMxY)

## Configure the parameters of the Token App

Choose a token name, a symbol, the token holders and the amount (balance) of token for each token holders. You can add the token holder using the ***Add more*** button.

{% hint style="warning" %}
The token name and symbol currently cannot be changed. Do not add more than a few token holders to your organization on this screen or the transaction to create your organization may fail. You can add more token holders after the organization has been created.
{% endhint %}

![Token app settings](https://d33v4339jhl8k0.cloudfront.net/docs/assets/5c98a4fe0428633d2cf3fcf7/images/5d8624862c7d3a7e9ae173e4/file-wSKI8WfAzK.png)

## Review organization information

Open each panel to make sure that the information entered to launch your organization is correct. If anything is incorrect, you can click the ***back*** button to return to an earlier screen and make the necessary correction.

![](https://d33v4339jhl8k0.cloudfront.net/docs/assets/5c98a4fe0428633d2cf3fcf7/images/5d8624af04286364bc8f650a/file-QLxk1Q0FZj.png)

![](https://d33v4339jhl8k0.cloudfront.net/docs/assets/5c98a4fe0428633d2cf3fcf7/images/5d8624b704286364bc8f650b/file-IsP1SOVaHO.png)

![](https://d33v4339jhl8k0.cloudfront.net/docs/assets/5c98a4fe0428633d2cf3fcf7/images/5d8624bf2c7d3a7e9ae173e5/file-Qn8KEkg3If.png)

![](https://d33v4339jhl8k0.cloudfront.net/docs/assets/5c98a4fe0428633d2cf3fcf7/images/5d8624c604286364bc8f650c/file-Fqvyo6L3Kz.png)

## Launch your organization

Now you need to sign a transaction to create your organization. Open your Ethereum provider if the window does not open automatically. Click the \_**confirm** \_ button in your Ethereum provider to sign and broadcast the transaction.

Wait until the transaction is completed.

![](https://d33v4339jhl8k0.cloudfront.net/docs/assets/5c98a4fe0428633d2cf3fcf7/images/5d8624d704286364bc8f650d/file-arEtXF8S0j.png)

Don't close or refresh the page until the process is completed and the DAO is deployed.

## Click "Get started"

{% hint style="success" %}
Your new Company organization is ready to go!
{% endhint %}

Now you can [explore your new Company organization](/products/aragon-client/explore-template-dao).

![](https://d33v4339jhl8k0.cloudfront.net/docs/assets/5c98a4fe0428633d2cf3fcf7/images/5d8624ee04286364bc8f650e/file-a4bAYgLmxU.png)

{% hint style="info" %}
If your DAO doesn't open automatically, go [here](/faq/products/aragon-client/where-is-my-dao) and find how to access it.
{% endhint %}


# Using the Membership Template

{% hint style="info" %}
In this section, you will learn how to create a Membership DAO using the Membership Template in the Aragon Client.
{% endhint %}

{% hint style="danger" %}
Before starting be sure to have read [How to create a DAO](/products/aragon-client/how-to-create-a-dao-using-aragon-client).
{% endhint %}

A Membership organization is an organization that uses **non-transferable tokens** to represent membership. Decisions are made based on **one-member-one-vote** governance.

## Creating a Membership DAO

![](/files/XiFPPxCWnO1Vj6qSbzlQ)

Click ***View details***, review the apps available, check the boxes to install any optional apps you want to install. When finished, click ***Use this template***.

![](/files/c50SFmkmngGd4pXaHKVq)

## Claim a name

Select the name of your DAO and fill in the ***Organization Name*** tab. Aragon uses the [Ethereum Name Service](https://ens.domains) (ENS) to assign names to organizations.

{% hint style="warning" %}
This name will be useful for accessing your DAO. Don't forget it!
{% endhint %}

![](/files/rdLLCAz61oGIFdMWYvXY)

## Configure the parameters of the Voting App

{% hint style="info" %}
The Voting app parameters currently cannot be changed from the Aragon front-end client. To change the Voting app parameters after your organization has been created, you must first initialize the permissions to change these parameters, then you can change the parameters using the [aragonCLI](https://hack.aragon.org/developers/tools/aragoncli).
{% endhint %}

### Configure the voting settings

#### The Support percentage

It \_\_ is the relative percentage of tokens that are required to vote ***Yes*** for a proposal to be approved. For example, if ***Support*** is set to 50%, then more than 50% of the tokens used to vote on a proposal must vote ***Yes*** for it to pass.

#### The Minimum Approval percentage

It is the percentage of the total token supply that is required to vote ***Yes*** on a proposal before it can be approved. For example, if the ***Minimum Approval*** is set to 20%, then more than 20% of the outstanding token supply must vote ***Yes*** on a proposal for it to pass.

#### The Vote Duration

It is the length of time that the vote will be open for participation. For example, if the Vote Duration is set to 24 hours, then token holders have 24 hours to participate in the vote.

![](/files/HL4l1lW7Jtz0koekbvYS)

## Configure the parameters of the Token App

Choose a token name, a symbol, the token holders and the amount (balance) of token for each token holders. You can add the token holder using the ***Add more*** button.

{% hint style="warning" %}
The token name and symbol currently cannot be changed. Do not add more than a few token holders to your organization on this screen or the transaction to create your organization may fail. You can add more token holders after the organization has been created.
{% endhint %}

![](/files/7rRv7wQb1v7XdjboO5oe)

## Review organization information

Open each panel to make sure that the information entered to launch your organization is correct. If anything is incorrect, you can click the ***back*** button to return to an earlier screen and make the necessary correction.

![](/files/VI1hLp5kwPaSsiBIYZQ5)

![](/files/Ty7CKfDZJPpdFRBFvZAI)

![](/files/TQrtKvYl9U5xfnBNxGnM)

![](/files/wOtY5MpW3qTU09aGSQmB)

## Launch your organization

Now you need to sign a transaction to create your organization. Open your Ethereum provider if the window does not open automatically. Click the ***confirm*** button in your Ethereum provider to sign and broadcast the transaction.

Wait until the transaction is completed.

![](https://d33v4339jhl8k0.cloudfront.net/docs/assets/5c98a4fe0428633d2cf3fcf7/images/5d8624d704286364bc8f650d/file-arEtXF8S0j.png)

Don't close or refresh the page until the process is completed and the DAO is deployed.

## Click "Get started"

{% hint style="success" %}
Your new Membership organization is ready to go!
{% endhint %}

Now you can [explore your new Membership organization.](/products/aragon-client/explore-template-dao)

![](/files/EoKjj4fopXdwRPMreAYL)

{% hint style="info" %}
If your DAO doesn't open automatically, go [here](/faq/products/aragon-client/where-is-my-dao) and find how to access.
{% endhint %}


# Use the Reputation template

{% hint style="info" %}
In this section, you will learn how to create a Reputation DAO using the Reputation Template in the Aragon Client.
{% endhint %}

{% hint style="danger" %}
Before starting be sure to have read [How to create a DAO](/products/aragon-client/how-to-create-a-dao-using-aragon-client).
{% endhint %}

A Reputation organization is an organization that uses **non-transferable tokens** to represent reputation. Decisions are made using **reputation-weighted voting**.

## Creating a Reputation DAO

![](/files/XiFPPxCWnO1Vj6qSbzlQ)

Click ***View details***, review the apps available, check the boxes to install any optional apps you want to install. When finished, click ***Use this template***.

![](/files/Y7r6NmMl4xXIvKhCUqfd)

## Claim a name

Select the name of your DAO and fill in the ***Organization Name*** tab. Aragon uses the [Ethereum Name Service](https://ens.domains) (ENS) to assign names to organizations.

{% hint style="warning" %}
This name will be useful for accessing your DAO. Don't forget it!
{% endhint %}

![](/files/OBxauoNkqvL2gRT7pXrN)

## Configure the parameters of the Voting App

\_\_

{% hint style="info" %}
The Voting app parameters currently cannot be changed from the Aragon front-end client. To change the Voting app parameters after your organization has been created, you must first initialize the permissions to change these parameters, then you can change the parameters using the [aragonCLI](https://hack.aragon.org/developers/tools/aragoncli).
{% endhint %}

### Configure the voting settings

#### The Support percentage

It \_\_ is the relative percentage of tokens that are required to vote ***Yes*** for a proposal to be approved. For example, if ***Support*** is set to 50%, then more than 50% of the tokens used to vote on a proposal must vote ***Yes*** for it to pass.

#### The Minimum Approval percentage

It is the percentage of the total token supply that is required to vote ***Yes*** on a proposal before it can be approved. For example, if the ***Minimum Approval*** is set to 20%, then more than 20% of the outstanding token supply must vote ***Yes*** on a proposal for it to pass.

#### The Vote Duration

It is the length of time that the vote will be open for participation. For example, if the Vote Duration is set to 24 hours, then token holders have 24 hours to participate in the vote.

![](/files/HL4l1lW7Jtz0koekbvYS)

## Configure the parameters of the Token App

Choose a token name, a symbol, the token holders and the amount (balance) of token for each token holders. You can add the token holder using the ***Add more*** button.

{% hint style="warning" %}
The token name and symbol currently cannot be changed. Do not add more than a few token holders to your organization on this screen or the transaction to create your organization may fail. You can add more token holders after the organization has been created.
{% endhint %}

![](/files/NdQ9maRYkeSEq4d2GOcS)

## Review organization information

Open each panel to make sure that the information entered to launch your organization is correct. If anything is incorrect, you can click the ***back*** button to return to an earlier screen and make the necessary correction.

![](/files/HOsCxk5GjDSgVPnUAfhN)

![](/files/31aP6QTlRKtmBkiYZV26)

![](/files/y6jG2kziAB0zbV0GcPOU)

## Launch your organization

Now you need to sign a transaction to create your organization. Open your Ethereum provider if the window does not open automatically. Click the ***confirm*** button in your Ethereum provider to sign and broadcast the transaction.

Wait until the transaction is completed.

![](https://d33v4339jhl8k0.cloudfront.net/docs/assets/5c98a4fe0428633d2cf3fcf7/images/5d8624d704286364bc8f650d/file-arEtXF8S0j.png)

Don't close or refresh the page until the process is completed and the DAO is deployed.

## Click "Get started"

{% hint style="success" %}
Your new Reputation organization is ready to go!
{% endhint %}

Now you can [explore your new Reputation organization.](/products/aragon-client/explore-template-dao)

![](/files/EoKjj4fopXdwRPMreAYL)

{% hint style="info" %}
If your DAO doesn't open automatically, go [here](/faq/products/aragon-client/where-is-my-dao) and find how to access.
{% endhint %}


# How to create a DAO on Polygon

{% hint style="info" %}
In this section, we will walk you through how to deploy a DAO using the Aragon Client on the Polygon network. You can either watch the **Video** or you can read the **Text** below the Video.
{% endhint %}

{% embed url="<https://www.youtube.com/watch?v=NbeMilheqy0>" %}

## What is Polygon?

[Polygon](https://polygon.technology) is an [L2 scaling solution](https://ethereum.org/en/developers/docs/scaling/layer-2-rollups/) for Ethereum. It is a 'Proof of Stake' network, where users can transact with each other for fraction of the Mainnet transaction cost.

Assets on Ethereum can be moved to Polygon and back again using [bridges](https://support.opensea.io/hc/en-us/articles/1500012881642-How-do-I-transfer-ETH-from-Ethereum-to-Polygon-). Ethereum fees are proportional to the complexity of the transaction but Polygon enables complex transactions for very low cost without leaving the Ethereum ecosystem.

**This is why Aragon has deployed its own DAO infrastructure to Polygon, effectively reducing the cost of deploying a DAO from $500+ to a few cents.**

## Getting Started with the Polygon Testnet

* Connect your Web3 wallet to the Polygon Testnet and deposit "test-MATIC".

{% hint style="info" %}
How? [Here](/products/set-up-metamask/getting-started-with-mumbai-testnet) is a guide.
{% endhint %}

## Getting Started with Polygon

### **Connect your Web3 wallet to the Polygon network**

Connect your Web3 wallet to the Polygon network and deposit at least 0.2 MATIC.

{% hint style="info" %}
How? [Here](/products/set-up-metamask/getting-started-with-polygon) is a guide.
{% endhint %}

### Deploying a DAO

1. Go to the [Aragon Client](https://client.aragon.org/#/) page.

![](/files/EpnstASxxMgQOarMOrwB)

1. Click ***Connect account*** and select your wallet provider. In the example below, we have connected our Metamask account to the Polygon network. If the dialogue box says that it is connected to another network, switch your wallet to the Polygon network. The connected network is automatically derived from the network selected on the wallet.
2. Click ***Create an Organization*** and follow [this tutorial](/products/aragon-client/how-to-create-a-dao-using-aragon-client) that will run you through the creation process

![](https://d33v4339jhl8k0.cloudfront.net/docs/assets/5c98a4fe0428633d2cf3fcf7/images/6139f3ebd3b029285070f569/file-MSqrvMAds0.png)


# How to create a DAO on Harmony

{% hint style="info" %}
In this section, we will walk you through how to deploy a DAO using the Aragon Client on the Harmony network.
{% endhint %}

{% hint style="success" %}
[In 2021 Harmony paired with Aragon to deliver a DAO product using the client.aragon.org interface](https://blog.aragon.org/aragon-client-deployed-on-harmony/)
{% endhint %}

## What is Harmony?

[Harmony.one](https://www.harmony.one) is an L2 Ethereum compatible blockchain network with broad compatibility, low costs, and [high transaction rates (allegedly up to 10M/ sec)](https://medium.com/@aervinaervin/harmony-10million-transactions-per-second-e8161b7b7f61). It is an 'Effective Proof of Stake' network, where users can transact with each other for fraction of the Mainnet transaction costs.

Assets on Ethereum can be moved to Harmony and back again using [bridges](https://docs.harmony.one/home/general/horizon-bridge/bridging-eth-one). By reducing the cost of deploying a DAO from $500+ to a few cents Aragon hopes to inspire hundreds of businesses and non-profits to enter into the Web3 economy.

## Getting Started with Harmony Testnet

Connect your Web3 wallet to the Harmony Testnet and deposit "test-ONE".

{% hint style="info" %}
How? [Here](/products/set-up-metamask/getting-started-with-harmony-testnet) is a guide.
{% endhint %}

## Getting Started with Harmony for real!

Connect your Web3 wallet to the Harmony network and deposit at least 0.2 ONE.

{% hint style="info" %}
How? [Here](/products/set-up-metamask/getting-started-with-harmony) is a guide.
{% endhint %}

## Deploying a DAO

1. Go to the [Aragon Client](https://client.aragon.org/#/) page.

![](/files/c4LwcvN8CGfa4Ttgpe18)

1. Click ***Connect account*** and select your wallet provider. In the example below, we have connected our Metamask account to the Harmony network. If the dialogue box says that it is connected to another network, switch your wallet to the Harmony network. The connected network is automatically derived from the network selected on the wallet
2. Click ***Create an Organization*** and follow [this tutorial](/products/aragon-client/how-to-create-a-dao-using-aragon-client) that will run you through the creation process.

![](https://d33v4339jhl8k0.cloudfront.net/docs/assets/5c98a4fe0428633d2cf3fcf7/images/61db019ca6a5ee76d8a2e9cd/file-xKHkRPU0F6.png)


# How to navigate your DAO

{% hint style="info" %}
In the previous articles, you have created a new DAO. Now, let us explore it. You can either watch the **Video** or you can read the **Text** by clicking 'Next' below the video.
{% endhint %}

{% embed url="<https://www.youtube.com/watch?v=hg7yLukn01s>" %}


# Home

{% hint style="info" %}
In this section, we explore the Home page of your DAO, the menu and the main section.
{% endhint %}

## Home page

The **Home page** welcomes you to your organization and offers you several options for different actions you can take.

### The Home page is a simple landing page that shows you:

* The **name of the organization** (on the top left) you have created and loaded.
* The **wallet address** and the **network** in use (on the top right).
* As well as different actions that you can take using the **pre-installed apps** in your organization.

You can also use the menu on the left-hand side of the screen to view the different **apps** that are currently installed for your organization.

In the example (shown in the image), the organization ***camino.aragonid.eth*** has the Token Manager, Voting, Finance, and Agent apps installed, plus default Permissions, App Center, and Organization System apps.

So in this DAO we can perform the actions of assign *Tokens*, *Vote*, *Check Finance*, and *Create Payments*.

![Aragon Client Home Page](https://d33v4339jhl8k0.cloudfront.net/docs/assets/5c98a4fe0428633d2cf3fcf7/images/5d86746c04286364bc8f65bf/file-xfmyJqyDNO.png)

## Menu features

In the menu on the top left and right sides of the screen, there are several features that you may find useful.

Note that many of these features take advantage of the *local storage* in your browser, so if you clear your browser data then you may lose this data unless you make a backup.

### Network connection indicator

The network connection indicator (located on the top right) will tell you if the Aragon client you are using is connected to one of the supported networks or not (either Ethereum, Polygon, Harmony, Goerli, and so on).

* <mark style="color:red;">Red light</mark>: your Aragon client isn't connected to the node. The connection has failed.
* <mark style="color:green;">Green light</mark>: your Aragon client is well connected to the node and it is working properly. The client is successfully connected to the network.

### Enable account

{% hint style="warning" %}
To use the Aragon client, you must first allow Aragon to access your Ethereum account (your web3 wallet).
{% endhint %}

This will allow the Aragon client to send transactions to your Ethereum account for signing and to read information about your Ethereum account, such as the address and token balances.

{% hint style="info" %}
For more info about Ethereum account and web3 Metamask wallet read [here](/products/set-up-metamask).
{% endhint %}

If not already connected, click ***Enable account*** and approve the access request in your Ethereum provider to complete the process.

### Favorite organization

You can click on the organization name at the top left of the screen and click the *star* icon next to it to add the organization to your favorites.

Then even if you go to another organization, you can click on the ***organization name*** and see your list of favorites that you can easily navigate to.

![Star icon for adding the organization to your favorites](https://d33v4339jhl8k0.cloudfront.net/docs/assets/5c98a4fe0428633d2cf3fcf7/images/5d8674e82c7d3a7e9ae174a3/file-nGxht8KRpF.png)

### Activity status

Click the ***alarm bell*** icon (on the right) to see the status of any transactions you have made using Aragon.

You can clear the status history by clicking the ***Clear history*** button once you have made a transaction.

![Status of any transactions list](https://d33v4339jhl8k0.cloudfront.net/docs/assets/5c98a4fe0428633d2cf3fcf7/images/5d8674fd2c7d3a7e9ae174a4/file-Bb4iqf37Ue.png)

### Global preference

Click the \_**gear** \_ icon (on the top right) to manage your global preferences. These preferences will be saved locally and used across every Aragon organization you use.

## **Custom labels**

Click on any Ethereum address throughout the Aragon client to give it a custom label, such as the name of the person or organization that owns the address. Enter the label and save.

![Click on a address wallet](/files/LZ4kPTJs6oWqb6HfSxFA)

![Write a label and save](/files/JCx8xYJ4gISHbeHN8wnt)

These labels will then show up in your global preferences (the *gear* icon on the top right) under the Custom Labels tab. You can import a list of labels provided by someone else, and also export or any labels you have created.

Make sure to export your labels from time to time to ensure you have a backup in case the local storage in your browser where the labels are stored is accidentally or intentionally cleared.

![Settings - Global preference -Custom Labels](/files/vZW4lzT1HjnH1s3QnZOE)

## **Notifications**

You can opt-in to email notifications about activity in organizations that you are interested in on the Notifications tab of your global preferences.

Enter your email address and then click the activation link in your email to sign up.

{% hint style="warning" %}
If you don't receive the email in your inbox folder, please check your Spam folder.
{% endhint %}

Then you can add "actions" in your organization that you want to get notified about whenever they happen.

![](/files/h3UE7V251tWTai4mOPFL)

![](/files/jAKcZg2zDZJDdR7e0d2V)

![](/files/WqfsUULItIG3F6r5mVj5)

![](/files/ONmm1RRbaK7tBNl0hH8n)

## **Apps menu**

On the left side bar are listed all the apps installed on your DAO. For access to an app click on its name. For more info about the apps go [here](/products/aragon-client/explore-template-dao/what-are-apps).

## **System menu**

On the left side bar click on the ***System*** menu to reveal the System settings that come with every Aragon organization template by default:

* Permissions
* App Center
* Organization

{% hint style="info" %}
For more info go about the settings go [here](/products/aragon-client/explore-template-dao/system-setting).
{% endhint %}

![](https://d33v4339jhl8k0.cloudfront.net/docs/assets/5c98a4fe0428633d2cf3fcf7/images/5d86746c04286364bc8f65bf/file-xfmyJqyDNO.png)


# The Apps

{% hint style="info" %}
In this section, we explore the different Apps of the DAO.
{% endhint %}

Aragon organizations have the ability to extend their functionality using Aragon apps. The apps that come pre-installed with the Company, Membership, and Reputation organizations are:

* Tokens
* Voting
* Finance
* Agent (optional)

There is a Marketplace where you can find more apps, such as Redemption, Payroll, Surveys.

Here is a list of recently updated apps associated with Aragon client\
<https://aragonorg.notion.site/c12d39395c7745d9a9a014d6e089d994?v=1a3eb944ceda42d398e6f7d22a9a14ef>

{% hint style="info" %}
You can install multiple instances of any [custom app](https://github.com/aragon/aragon-apps), if this fits your use case.
{% endhint %}

{% hint style="danger" %}
Some apps are *not maintained* anymore, to be recognized by a *not maintained* label.
{% endhint %}


# Tokens App

The Tokens app is used to **mint new tokens** and **assign** them to yourself or other entities. Tokens minted by the Tokens app **confer voting abilities** to holders of the tokens.

For instructions on minting new tokens with EVM Crispr go here <https://docs.evmcrispr.blossom.software/aragonOS/token-manager/>

{% hint style="info" %}
**What is minting?**

Minting is the process of creating new tokens. You can create as many tokens as you'd like (as long as members of the organization are agree). This means you can add as many new users to your organization as you wish, you just need to mint new tokens for them. Below we will show "How to Add new tokens" into your Organization.
{% endhint %}

## Reasons to mint tokens for entities

* The organization commits to giving its workers a stake in the company e.g. half of the company tokens are held by workers and the other half by investors .
* The organization mints tokens to entities proportional to the amount of funds they have invested in the company.
* The organization mints a specific amount of tokens for an entity in exchange for a specific good or service .
* The organization mints a fixed amount of tokens per month and distributes them proportionally to everyone who has contributed value to the organization that month.

## Using Tokens app with different templates

The Tokens app is used to **manage membership** and **voting power** in an organization. To add members to an organization, it’s as easy as minting and assigning a token to them.

This simple process for managing membership and voting power provides the foundation for governing the resources of an organization using Aragon.

### Company template

On the Company template, one token equals one vote, members can hold as many tokens as are assigned to them, and tokens are transferable.

### Membership template

With the Membership template, one token also equals one vote, but members cannot hold more than one token each and tokens are non-transferable.

### Reputation template

Regarding the Reputation template, one token equals one vote, and members can hold as many tokens as are assigned to them, but the tokens are non-transferable.

![Tokens App](https://d33v4339jhl8k0.cloudfront.net/docs/assets/5c98a4fe0428633d2cf3fcf7/images/5d867d542c7d3a7e9ae174bd/file-3GPg0yG2o5.png)

## **Holder**

In the *Holder* section of the *Tokens* app, you can see the current list of token holders and the balance of organization tokens they each hold.

### Clicking on the dropdown menu on one of the rows in the list will provide you options for:

* Assigning more tokens to that token holder (*Add tokens* option).
* Removing tokens from the token holder (*Remove tokens* option).
* Editing a custom label (for more about this go [here](/products/aragon-client/explore-template-dao/home)).

![Tokens app view](https://d33v4339jhl8k0.cloudfront.net/docs/assets/5c98a4fe0428633d2cf3fcf7/images/5d867d622c7d3a7e9ae174be/file-dgpIXaBkm6.png)

## **Token Info**

In the ***Token Info*** section you can see information about the token that is used for governance in your organization.

### **Token supply**

How many tokens have been minted in total?

### **Transferable**

Whether or not the token can be transferred to another entity after it has been assigned.

### Token

The token name and token symbol.

![Token info view](https://d33v4339jhl8k0.cloudfront.net/docs/assets/5c98a4fe0428633d2cf3fcf7/images/5d867df22c7d3a7e9ae174bf/file-7fiikNO0jj.png)

## **Ownership Distribution**

In the ***Ownership Distribution*** section, you can see which entities own what percent of the organization’s token supply. This can be helpful as a spot check to see how token ownership is concentrated in the organization.

![Ownership distribution](https://d33v4339jhl8k0.cloudfront.net/docs/assets/5c98a4fe0428633d2cf3fcf7/images/5d867dff04286364bc8f65d9/file-nj7kpToblW.png)

## **Add Tokens**

If you need to add members to your organization and assign them DAO tokens, you need to use the ***Add Token*** option.

If you click the \*\* **\_**&#x41;dd Tokens\*\*\_\*\* \*\* button, a panel will open up with text fields for entering:

* ***The recipient***: the address of the entity you want to assign tokens to.
* ***Number of tokens***: how many tokens you want to assign.

After you enter this information, you can click the button in the panel to finish completing the action.

![Add token](https://d33v4339jhl8k0.cloudfront.net/docs/assets/5c98a4fe0428633d2cf3fcf7/images/5d867e382c7d3a7e9ae174c0/file-gQIE902ZlX.png)

### At this point, the organization still requires a token holder vote for every action.

Click ***Create transaction***\*\* \*\* to create the transaction that creates a **new vote** to assign the new token you want to mint. Sign the transaction in your Ethereum provider, wait for a confirmation, then move on to the next step.

![](https://lh3.googleusercontent.com/RVlpE5QIyKb2gvvr5KQOf8ukZa0k5wczXfgOnnHfcvXI2JnBUtLX4KjKob_EWMF9k9y1NjB1yzNcYrJLm2ETRezy7v9DDWucQNQ18OEQT_8dBjMvSoZsymVIGK_BJv_8Cw1Mk88L)

### \*\*Vote "Yes" to approve the "Assign Tokens" vote \*\*

Go to the Voting app, click on the ***Mint tokens*** proposal you just created, and vote "Yes" to approve minting and assigning the token.

![](https://d33v4339jhl8k0.cloudfront.net/docs/assets/5c98a4fe0428633d2cf3fcf7/images/5d8a553504286364bc8f7fff/file-qb1DOKAI56.png)

![](https://lh6.googleusercontent.com/OYlBJ41umTMbdfMLqS9geT8ycshlmUfUgPHz6pNkg9cwIx3zNKAb8elnfw0QAKpo5N9rpah_vExxl2lJYQG3ChtEK-5evFmrDG_C92IUjn6_Gt1_WD8sP2ntGPaiVAeo4jZrQq1_)

![](https://lh5.googleusercontent.com/IJWz3XKDtHi4MlsuxGlLJ8zatP6RiAluev6UK72zn1kMlHkpzNMAZEGyqSxw_sp5lRIwHNU5ErZI1F0tjh_8yVfIx99ImrR3X_Xy7DWd9MC8k_nY9w4X5CVbH6EqwnR54SD3kBw7)

![](https://lh6.googleusercontent.com/SJXCuLvpm6UwVIvBsplOQCcH5mfm11meFrHj9HRVH1FOGiM_ax8Wmzf4IoQtX2GJNSDLC7BrUn8RmdDuaZ0Vzd9fhH_JT-TggnudmR_408oQ6VC6N6JWZXi1Hc2SudTl_Y1p0xzZ)

### **Check out the newest member of your organization**

{% hint style="success" %}
Your organization just went from one to two members. A good start to a new Company organization!
{% endhint %}

{% hint style="warning" %}

* If a vote is cast that causes the Approval % to be equal to or greater than the Support required (e.g. 60% required Support with current 65% Approval), then the proposition will be completed automatically.
* If the Approval % is less than the Support required (e.g. 60% required Support with current 40% Approval) then additional "no" votes could still stop the proposition from being passed.

**Thus the proposition will remain open until either the duration is reached or the Approval % is equal to or greater than the Support requirement.**
{% endhint %}

![](https://lh4.googleusercontent.com/DOedZ-Oj8ettsh6BPRTs7e7aY9ubI8k_1R9oYcVTdiDouLo3coVdYI4s8pGTtZdHqw65aS1JgJ4ZTdQT77Unz86R9BvorceFOaebefJP9u1UJ2pfMY71PPZEerI3uVcGD_CW13UA)

If you are using <https://evm-crispr.blossom.software/> you can do things like assign vested tokens to accounts using code such as the following

```
connect <DAO> token-manager
exec token-manager assignVested <ACCOUNT> <AMOUNT>e18 <START-DATE> <CLIFF-DATE> <END-DATE> true
```

\\


# Voting App

The Voting app makes it easy for you to poll your fellow token holders about their position on an infinite range of topics. Votes initiated by other Aragon apps also show up in the Voting app.

{% hint style="info" %}
For example, assigning tokens using the Token Manager or moving funds from the Finance app are each action that require a vote by token holders in a Company organization.
{% endhint %}

The ***Voting app*** is where you can see all open and closed votes. You can also use the Voting app to start a new vote and poll token holders in the organization about an issue that is important to you.

![Voting summary](https://d33v4339jhl8k0.cloudfront.net/docs/assets/5c98a4fe0428633d2cf3fcf7/images/5d8a573e2c7d3a7e9ae18ff0/file-diNRwkpZ5S.png)

## **Voting filters**

The Voting app has filters that you can use to sort the visible votes by their:

* **Status:** all, open, closed

![](https://d33v4339jhl8k0.cloudfront.net/docs/assets/5c98a4fe0428633d2cf3fcf7/images/5d8a56cb04286364bc8f801e/file-NUOi75e3Z9.png)

* **Outcome:** all, passed, rejected, enacted, pending

![](https://d33v4339jhl8k0.cloudfront.net/docs/assets/5c98a4fe0428633d2cf3fcf7/images/5d8a56da2c7d3a7e9ae18fe7/file-YwgPhS2yB2.png)

* **App:** which app created the vote, or if it was an external account, "external"

![](https://d33v4339jhl8k0.cloudfront.net/docs/assets/5c98a4fe0428633d2cf3fcf7/images/5d8a56e02c7d3a7e9ae18fe8/file-dppwlwO9hJ.png)

* **Start and end date**

![](https://d33v4339jhl8k0.cloudfront.net/docs/assets/5c98a4fe0428633d2cf3fcf7/images/5d8a56e62c7d3a7e9ae18fe9/file-IP6ZFN5oJr.png)

## **Open votes**

The ***Open votes*** section shows how many open votes there are and cards for each of the open votes, which show how much time is left in the vote, the number of the vote, a snippet of the issue being voted on, and the current status of the vote.

You can click on the card to expand it and, if you have permission, either cast you vote if you have not voted yet or change your vote if you have already voted.

![Voting summary](https://d33v4339jhl8k0.cloudfront.net/docs/assets/5c98a4fe0428633d2cf3fcf7/images/5d8a573e2c7d3a7e9ae18ff0/file-diNRwkpZ5S.png)

### Vote card

The vote card tell you more detailed information about the status of a vote, such as:

* **The vote number**
* **The question being voted on**
* **What entity created the vote**
* **Current votes:** showing how many tokens in total have so far voted yes and how many have voted no
* **Time remaining:** how much time is left until the vote closes, should no other votes cast cause the vote to automatically pass.
* **Relative Support %**: what percent of voters are required to vote “yes” for the vote to pass, what percent of voters and how many tokens have voted “yes”, and what percent of voters and how many tokens have voted “no”.
* **Minimum Approval %**: what percent of the total token supply is needed to vote “yes” for the vote to be valid, and what percent of the total token supply has voted “yes” so far.
* **If you have not yet cast your vote**, buttons for voting “yes” or “no”.
* **If you have already voted**, a button for changing your vote.
* **How much voting power** your vote will have based on your token balance at the beginning of the vote, along with the block number that the vote snapshot was taken from.

![Vote card](https://d33v4339jhl8k0.cloudfront.net/docs/assets/5c98a4fe0428633d2cf3fcf7/images/5d8a574c2c7d3a7e9ae18ff1/file-JwWUOOLDXB.png)

![](https://d33v4339jhl8k0.cloudfront.net/docs/assets/5c98a4fe0428633d2cf3fcf7/images/5d8a57652c7d3a7e9ae18ff4/file-o96YChd3ub.png)

## **Closed votes**

The ***Closed votes*** section shows how many past votes there have been as well as cards for each of the past votes. Each card shows the date of the past vote, the number of the vote, a snippet of the issue being voted on, and the outcome of the vote.

Clicking on the vote will then show you more detailed information about the vote. See the previous section "Vote card" for a detailed explanation of the information in the ***View vote*** panel.

![](https://d33v4339jhl8k0.cloudfront.net/docs/assets/5c98a4fe0428633d2cf3fcf7/images/5d8a575c2c7d3a7e9ae18ff3/file-YlNlgwRl6E.png)

## **New vote**

If there is an important question you have that you want to poll token holders in the organization about, you can click the ***New vote*** button to start a new vote. These votes are purely informative and will not directly result in any further action being taken in the organization.

After you have filled out the text field (*Question* filed) in the ***New vote*** panel with the question you want to ask, you can click ***Create new** vote* to complete the action and create a new vote if you have permission.

![New vote page](https://d33v4339jhl8k0.cloudfront.net/docs/assets/5c98a4fe0428633d2cf3fcf7/images/5d8a577204286364bc8f802d/file-hZgRtJkFVR.png)

### **Sign transaction to create the new vote**

Click the ***Create transaction*** button, then open your Ethereum provider to sign and send the transaction.

![](https://lh3.googleusercontent.com/O5QcU0EU_reAFPh_8pzobCu0AYJWoGhvjIrrz6Af1WFBAwzFQQ3B66NOBBaDyvqJvGoWURJEGsHGoSzBCRHuWNNygEz3CuF6gNjTCwFcbB97L9SSq2HMW-0-PNupChit8QgiHkwK)

### **Vote on the proposal, then ask the other token holders to review and vote on the proposal**

Vote on the proposal you just created. Then rally your fellow token holders outside the app - for example, by email, forum, chat room, or face-to-face - and ask them to review and vote on the proposal too.

Token holders can also visit the Voting app to see the list of open votes and cast their ballot accordingly.

![](https://lh4.googleusercontent.com/nGpEfIkINa6svbhzITg-ZhsXnzEsEHxI7OUYp9grFJ_toT1Hm7nogTkyEExVnPZWMtk6EJYZNJp4Wi6E8kbOZJkgyPL_7HyfW33fiZQMC-LLIrfN_ydb66t7hQ6oT2SKrZAXo4gp)

### **Other token holders cast their vote**

In this case, the other token holder in the organization supports the proposal and votes "Yes".

![](https://lh6.googleusercontent.com/qN1tTOiEi3GpMz5ylg_eb47CxUEKZdHzNCYqChg3HJOaJXoYiTK-0ulOhaTljuOoosj6Eon8f9gDbotCO0jEh5989fSZpmtsbZ9jJfrxgtx5lSJVM8_BYoYWfdw8AyIoTqh11d6o)

### **Review the vote**

Since there are only two token holders in this organization, and the Support parameter is set to 50%, the unanimous vote on the proposal has resulted in the proposal being passed.

![](https://lh5.googleusercontent.com/s3ZFomLX49IX0uwO-cQESFA6b2TtIWoFm2yF6E_i5EbRAW-wBkYSUwqBnAAH70Sq_AAvoElR7s0_R5_kQcTxzXgro3bs_dscBn4NfZlYvY9GpzPQs6acQbt0gul29-OO6lL28DWU)


# Finance App

The ***Finance app*** is used to manage the financial resources of an organization.

## Purpose of the Finance App

* Checking **the balance** of each asset the organization owns.
* Checking the **history** of past transfers.
* Creating **new transfers** from the Finance app.

![](/files/LK1yvsEHQBVbuwgw1jbB)

## **Token Balance**

The *Token Balances* section shows you the balance of each token owned by the organization.

![](https://d33v4339jhl8k0.cloudfront.net/docs/assets/5c98a4fe0428633d2cf3fcf7/images/5d8a62772c7d3a7e9ae190b0/file-eLUV9SRU2y.png)

## **Transfers**

The section shows you a history of past transfers that have been made using the Finance app, including information about the date of the transfer, what address the transfer was to or from, a reference with additional context about the transfer, and the amount of the transfer.

![](https://d33v4339jhl8k0.cloudfront.net/docs/assets/5c98a4fe0428633d2cf3fcf7/images/5d8a62832c7d3a7e9ae190b1/file-5lFKotQ4xB.png)

### The transfer history can be filtered by date, token symbol or transfer type

See the examples below.

![](https://d33v4339jhl8k0.cloudfront.net/docs/assets/5c98a4fe0428633d2cf3fcf7/images/5d8a629604286364bc8f80c5/file-TXwf7noy6I.png)

![](https://d33v4339jhl8k0.cloudfront.net/docs/assets/5c98a4fe0428633d2cf3fcf7/images/5d8a62a52c7d3a7e9ae190b8/file-HWRr2HXIlA.png)

![](https://d33v4339jhl8k0.cloudfront.net/docs/assets/5c98a4fe0428633d2cf3fcf7/images/5d8a62b62c7d3a7e9ae190b9/file-vWgrnBRGM4.png)

#### For each transfer, you can click on the drop-down menu to get a link to view the transaction on the blockchain so you can see even more detail about the transfer:

![](https://d33v4339jhl8k0.cloudfront.net/docs/assets/5c98a4fe0428633d2cf3fcf7/images/5d8a62c904286364bc8f80cc/file-Puf5b59tKe.png)

#### If you need to export your transfer history for accounting in a separate app, there's an export button that you can use to export a CSV file:

![](https://d33v4339jhl8k0.cloudfront.net/docs/assets/5c98a4fe0428633d2cf3fcf7/images/5d8a62e604286364bc8f80ce/file-wgYMOA7KJK.png)

## **New Transfer**

### **Deposit Funds**

To send funds to your organization, you can create a deposit using the Finance app

* Click the ***New Transfer*** button.
* Open the \_**Deposit** \_ tab.
* Select the token you want to deposit.
* Enter the amount.
* Enter an (optional) reference note.
* Then click the ***Submit** deposit* button.

{% hint style="info" %}
For non-ETH tokens two transactions may be required to make a deposit.

The first transaction approves the Finance app to pull the deposit amount from your account balance, and the second transaction is the actual deposit transaction.

This is a safety feature to prevent the Finance app from pulling more funds from your account than you have explicitly authorized.
{% endhint %}

### **Withdrawal funds**

To create a new transfer from your organization to another address, you can create a withdrawal using the Finance app

* Click the ***New Transfer*** button.
* Open the ***Withdrawal***\*\* \*\* tab.
* Enter the address you want to make the transfer to.
* Enter what token you want to send.
* Enter the amount of tokens you want to send.
* Add (optionally) a reference note to provide more context for the transfer.

Once you have filled out all of this information you can click the ***Submit transfer*** button to complete the action, if you have permission.

![Withdrawal funds - Finance App](https://d33v4339jhl8k0.cloudfront.net/docs/assets/5c98a4fe0428633d2cf3fcf7/images/5d8a63252c7d3a7e9ae190c4/file-L9njobkDLU.png)

### **Sign the transaction to create the New Transfer vote**

As mentioned before, all actions in the Company organization require a vote by token holders. Click ***Create transaction*** then open your Ethereum provider to sign and send the transaction that creates the New Transfer vote.

![](https://lh3.googleusercontent.com/UXQwChFz66jOLkHe2GvPoJ_dTc0dWafDE1aUsgS6GVP47AlL_RNwSvBTLzZqQDq4M8rxpts6acwsYr2MIO4dRBwjJ6S56h8G1-w9f5c_FJAK8usZabmT5WbQvR5bqCCXPr-fiGiX)

### **Vote on the transfer**

The transfer has to be approved by token holders. Cast a ***Yes*** vote to approve the transfer and have the other token holders in the organization vote as well.

![](https://lh3.googleusercontent.com/BYjI_u7oOJgw6s6_0IVRxQy_AAkEHiuc8aQes9a71HZNEknuNwO8FttrpeszbMIXY2j6AV7FfytR-eUi4Y_eoILA_WGjHiCz1cYasmUfj_A0uhmod3bkh1ezWT6IhfP0GmyFmVG7)

### **The vote transaction is signed and sent to approve the transfer**

After confirmation, the transfer will execute.

![](https://lh4.googleusercontent.com/C86GPoGAqAHhOiN-534hCWcWFeLBfwv3gsnEZ_aXKwbYeaj67c8nNnvb3_AK5fEAwPm03a-btdc-mLNkdy_u-ezuZQG-g7iAvtjfHFoBmZxpYLoukXi7FT88VWifr79_L21sGjxC)


# Agent App

## What is the Agent app?

The ***Agent app*** enables Aragon organizations to **interact** directly with any **other smart contracts** on Ethereum. Before Agent, an organization would have to nominate a trusted party to interact with an Ethereum smart contract on its behalf.

{% hint style="info" %}
For example, an organization would send some $DAI to one of its employees, who would then be trusted to lend the $DAI on Compound, earn interest, and then send the interest plus the principle back to the organization.
{% endhint %}

Now with Agent, an organization can lend its $DAI out on Compound directly, without having to trust any intermediaries.

## How to start using the Agent app?

The easiest way to start using the Agent app is to **check the box** to optionally install it when first creating your organization:

![](https://d33v4339jhl8k0.cloudfront.net/docs/assets/5c98a4fe0428633d2cf3fcf7/images/5d8bc80204286364bc8f9029/file-zLiYZ6kXSy.png)

{% hint style="info" %}
Note that installing Agent via one of the templates will replace the Vault app normally included with templates that do not use the Agent app.
{% endhint %}

{% hint style="warning" %}
If you did not optionally install the Agent app when first creating your organization, you can still install it after the organization has been created. To do so, you will need to follow the instructions for [installing and initializing the Agent app using the aragonCLI. ](https://github.com/aragon/aragon-apps)Note that this option is geared towards experts.
{% endhint %}

## **Agent frontend interface**

The ***Agent app*** currently has a **view-only frontend interface** that you can use to see which tokens are currently held by the Agent app (including ERC-20, ERC-677, and ERC-777 tokens) as well as see a history of transactions made using the Agent app. The transaction history can be filtered by transaction type, token, or date, and can be exported as a CSV file.

![Agent App page](https://d33v4339jhl8k0.cloudfront.net/docs/assets/5c98a4fe0428633d2cf3fcf7/images/5e8ce5d32c7d3a7e9aea8d19/file-r5322DPQHX.png)

The Agent smart contract address is available on the ***System*** menu in the ***Organization*** page.

![](https://d33v4339jhl8k0.cloudfront.net/docs/assets/5c98a4fe0428633d2cf3fcf7/images/5d8bcdad2c7d3a7e9ae1a16d/file-pJP6dzQfhR.png)


# How to install the Agent App in your DAO

You need the Agent App but it has not yet been installed in your DAO? Fear not, it can still be installed using [**EVM Crispr**](https://evm-crispr.blossom.software/#/), a tool to modify 'the DNA' of your DAO.

The Agent App is not installed since it is not appearing under 'APPS' in the DAO menu bar:

<figure><img src="/files/cre0z3SNMrQAREQyhGC1" alt=""><figcaption></figcaption></figure>

Before we head to EVM Crispr we need you to collect the 'address' of your DAO. You can find it under 'SYSTEM > Organization':

<figure><img src="/files/TK9CaTSiUxfkHuEwzmqt" alt=""><figcaption></figcaption></figure>

Now let's go to the terminal of EVM Crispr:

{% embed url="<https://evm-crispr.blossom.software/#/terminal>" %}

Clean the terminal by removing all the example commands which you will find when opening it:

<figure><img src="/files/W9HuzqOaY3d3bjAmo6aF" alt=""><figcaption></figcaption></figure>

Now Copy/ Paste the following commands in the terminal:

```
load aragonos as ar
  
ar:connect <your dao address> token-manager voting (
  install agent:new
  grant voting agent:new TRANSFER_ROLE voting
  grant voting agent:new EXECUTE_ROLE voting
  grant voting token-manager ISSUE_ROLE voting
)
```

{% hint style="info" %}
Next to installing the Agent app we also grant the voting app with the `TRANSFER_ROLE`, `EXECUTE_ROLE`, and `ISSUE_ROLE` so `exec agent` and `act agent` commands can be used in the future.
{% endhint %}

This is what the terminal should look like after Copy/ Paste of the above commands:

<figure><img src="/files/WdRdnHqtTESpA2bQvvno" alt=""><figcaption></figcaption></figure>

Find the DAO address which you saved earlier and now replace `<your dao address>` with the address. Click **Connect** and connect with your Web3 wallet (usually MetaMask).

{% hint style="danger" %}
Make sure your Web3 wallet is connected to the **Network** on which the Aragon DAO was created. Also it should be set to the **Account** which has created the DAO on Aragon Client and/ or owns the DAO tokens
{% endhint %}

Now click on **Forwarding from...** :

<figure><img src="/files/3zdubEQB8dEQgdgWaKAj" alt=""><figcaption></figcaption></figure>

A transaction request should now pop-up in your Web3 wallet. Confirm the transaction. Once the transaction has successfully processed in your Web3 wallet return to your Aragon DAO and open the 'Voting' app from the menu bar. You should see that a vote has been generated:

<figure><img src="/files/9wguqrDRtdpZLFyOZy9w" alt=""><figcaption></figcaption></figure>

Now open the vote by clicking on it, and connect your Web3 wallet at the top right hand corner. Once connected scroll down and approve the vote by clicking **Yes**:

<figure><img src="/files/q9WXkViw4TV7FySWavZM" alt=""><figcaption></figcaption></figure>

Then click **Create transaction** and Confirm the transaction in your Web3 wallet. Once the transaction has processed and the vote has passed you should now see the Agent App appear automagically in the menu bar! :partying\_face:

<figure><img src="/files/0nQg5dCsDZJRIjLe6NBc" alt=""><figcaption></figcaption></figure>

{% hint style="danger" %}
If your address does not have enough 'DAO tokens' for the vote to meet the Support and Minimum approval necessary, then mobilise other token holders to vote so the vote can pass.
{% endhint %}

TheAgent App should look like this:

<figure><img src="/files/aAOHcL1mqFT44wcceIhJ" alt=""><figcaption></figcaption></figure>

Read the next Article on [how to use the Agent app](/products/aragon-client/explore-template-dao/what-are-apps/agent-app/using-agent-with-frame)!

And for more options using the Agent App with EVM Crispr, check here:

{% embed url="<https://docs.evmcrispr.blossom.software/aragonOS/agent/>" %}


# Using Agent with Frame

{% hint style="info" %}
In this section, we will walk you through how to use Agent App with Frame wallet.
{% endhint %}

## How to use the Agent app?

The easiest way to use the Agent app to interact directly with other Ethereum smart contracts is using the *smart account* feature of Frame. Frame is a desktop-native Ethereum provider with native support for the Agent app.

{% hint style="info" %}
If you already have Frame installed and an "acting account" added, you can skip ahead to section **Add your Aragon Agent**.
{% endhint %}

{% hint style="info" %}
If you do not have Frame installed go [here](/products/setting-up-a-frame-wallet).
{% endhint %}

## **Send ETH (or test ETH) to your acting account**

{% hint style="warning" %}
Before you get started, prepare by sending ETH (or test ETH) to your acting account.
{% endhint %}

Your **acting account** is the account that holds at least one (or partial if it is divisible) **voting token** in your organization and is the account you will use to **interact with smart contracts** via Agent.

The ETH you send to this account is used to pay for gas whenever the Agent app is interacting with other smart contracts. Be sure to top off the ETH in your acting account whenever it's running low so that you don't experience out-of-gas errors when interacting with other smart contracts.

## **Add your acting account**

Open the Frame desktop app and click the ***plus-sign*** button to add your acting account. You can add it using a hardware wallet or a hot wallet.

{% hint style="info" %}
In this example, we will use a hot wallet since we are using the Goerli Testnet and not real money on the Ethereum Mainnet. However, it is recommended that you use a hardware wallet.
{% endhint %}

![](https://d33v4339jhl8k0.cloudfront.net/docs/assets/5c98a4fe0428633d2cf3fcf7/images/5d8bd9702c7d3a7e9ae1a220/file-wPNVEoD1j4.png)

![](https://d33v4339jhl8k0.cloudfront.net/docs/assets/5c98a4fe0428633d2cf3fcf7/images/5d8bd9782c7d3a7e9ae1a221/file-BZzJ4WikKD.png)

![](/files/G308UPBlYPJ1ABo6rkJ2)

## **Add your Aragon Agent**

* Go to the same screen on Frame you used to add your acting account, then add your Aragon Agent under the ***Smart accounts*** section.
* Enter the *name* of your Aragon organization, then click ***Next***.

![](https://d33v4339jhl8k0.cloudfront.net/docs/assets/5c98a4fe0428633d2cf3fcf7/images/5d8bda5504286364bc8f90f9/file-2urBqXQ8j0.png)

* Then select the acting account, choosing the account with the address that holds your organization's voting token(s) if you have more than one account to select from.

![](https://d33v4339jhl8k0.cloudfront.net/docs/assets/5c98a4fe0428633d2cf3fcf7/images/5d8bdabd04286364bc8f90fb/file-QPxHyh0odz.png)

* Select the acting address, choosing the address that holds your organization's voting token(s).

![](https://d33v4339jhl8k0.cloudfront.net/docs/assets/5c98a4fe0428633d2cf3fcf7/images/5d8bdb0b2c7d3a7e9ae1a22a/file-sfavzdmwav.png)

* Your Aragon Agent will now show up in the list of available accounts to use with Frame.

![](https://d33v4339jhl8k0.cloudfront.net/docs/assets/5c98a4fe0428633d2cf3fcf7/images/5d8bdb3b04286364bc8f9104/file-yCdIwFtn04.png)

## **Using your Aragon Agent**

Click on the Aragon logo to use your Agent account. Enter your password if you are using a hot account. You are now ready to interact with any other Ethereum smart contract directly with your Aragon Agent.

![](https://d33v4339jhl8k0.cloudfront.net/docs/assets/5c98a4fe0428633d2cf3fcf7/images/5d8bddef04286364bc8f9121/file-JXtXhKiVAb.png)

{% hint style="warning" %}
Remember that depending on the permissions set in your organization, your organization's token holders may need to visit the Voting app and vote on each transaction made using the Agent app.
{% endhint %}

![](https://d33v4339jhl8k0.cloudfront.net/docs/assets/5c98a4fe0428633d2cf3fcf7/images/5d8bdf5e04286364bc8f912b/file-FFA5Mwilwm.png)


# System Setting

{% hint style="info" %}
In this section, we explore in depth the System Settings of the DAO.
{% endhint %}


# Permissions Setting

{% hint style="info" %}
In this section, we explore in-depth the Permissions setting. You can find a dedicated video at the end of this page.
{% endhint %}

## What is the Permissions app?

The ***Permissions app***\*\* \*\* is used to view all of the current permissions that have been set in an organization and add or remove permissions as needed.

The permissions set by the Permissions app define which entities have what permissions to perform various actions in an organization.

For example, any account may have permission to create a vote but only token holders in an organization may have permission to cast a vote.

![](https://d33v4339jhl8k0.cloudfront.net/docs/assets/5c98a4fe0428633d2cf3fcf7/images/5d8a697f2c7d3a7e9ae19121/file-gDcISkpUXb.png)

## **Browse by app**

The Permissions app shows a list of every **app installed** in the organization and **the address or token symbol** of that app. You can change *App permissions* and *System permissions*.

![App permissions](https://d33v4339jhl8k0.cloudfront.net/docs/assets/5c98a4fe0428633d2cf3fcf7/images/5d8a6a562c7d3a7e9ae1912e/file-0y5pgj1j2k.png)

![System permissions](/files/lQWaNYFOfFZLW012CRWE)

### Every app has:

* a list of **actions that can be performed** on the app,
* a list of **actions that other entities have been given permission to perform** on the app,
* a list of **permissions that the app has been granted**.

{% hint style="info" %}
The image below shows the list of actions that can be performed by the *Finance* App (*Action* column), the other entities that have the permissions to perform these actions (*Assigned to entity* column) and who has the authority to assign the permission to this entity (*Managed by* column).
{% endhint %}

![Finance permissions example](https://d33v4339jhl8k0.cloudfront.net/docs/assets/5c98a4fe0428633d2cf3fcf7/images/5d8a6a7104286364bc8f8145/file-NKD9Oqrl0V.png)

### Example

If we need to perform a \_**Create new payments** \_ on the Finance App, this action will pass through a vote in the Voting App. The reason behind is that the Create new payments action in the Finance App is assigned to the Voting entity.

### **Available permissions**

The Available permissions section shows:

* **what actions** can be performed on the app,
* **what entity** has permission to **perform** each action,
* **which entity manages** each action. This entity is called a “manager”.

![](https://d33v4339jhl8k0.cloudfront.net/docs/assets/5c98a4fe0428633d2cf3fcf7/images/5d8a6b052c7d3a7e9ae19132/file-68mYNPchqp.png)

A **manager** has the ability to **choose which entities have permission to perform an action** *(Assign Permission)* and the ability to **change the manager of that action** (*Manage Role*). These actions can be done using the drop-down menu under the three dots.

![](/files/p1xW3tMTtLq52R49ibvO)

### Assign Permissions

Click on the drop-down menu on the *three dots* and select *Assign Permission.* Select an App under the *On App* menu, an entity under the *Assign to Entity* menu and an Action.

![Assign a permission](/files/1jCLD8PcUId8TiLZu6Hq)

### Manage Role

Click on the drop-down menu on the \*\* **\_**&#x74;hree dots\*\*\_ and select \_**Manage Role\*\*.\_ Select an update under the \_**&#x55;pdate\*\*\_\*\* \*\* menu.

![Manage Permission](/files/RiCisp6uFHs0LsMwL1da)

{% hint style="warning" %}
If a manager removes themselves as a manager of permission without re-assigning the manager role to another entity, then management of that action defaults to whichever entity manages the ***Create permissions***\*\* \*\* action in the ACL app.

In the example below, the management of the action will be assigned to the Voting App.
{% endhint %}

![](/files/sw3zEzIzRjf2FLkok2yM)

{% hint style="danger" %}
If the manager of action is set as `0x0000000000000000000000000000000000000001` then no new manager can be set and permissions granted for that action will be locked forever.
{% endhint %}

### Initialize Permission

If an action has not been given a manager yet, then it must be initialized. To initialize an action, enter the address (*Grant permission to*) of the entity that you want to manage the action, select which entity you want to grant permission to perform the action, then click the *Initialize permission* button to initialize the permission, if you have permission to do so.

![](/files/z3KLHJxELZ41X1BXeRnN)

### **Browse by entity**

Back on the main Permissions page, you have the ability to get an at-a-glance view of all of the permissions set in an organization in the *Browse by entity* section.

Here, you can quickly see which entities have been granted permission to perform which actions in the organization.

Clicking \*\* **\_**&#x56;iew details\*\*\_ will take you to the permissions page for that entity.

![](https://d33v4339jhl8k0.cloudfront.net/docs/assets/5c98a4fe0428633d2cf3fcf7/images/5d8a6b6104286364bc8f8153/file-W609vjv1Pi.png)

### **Add permission**

To give permission to an entity to perform an action on an app, click the ***Add permission*** button, select which app you want the entity to perform the action on, select which entity you want to grant the permission to, then select the action you want to grant the entity permission to perform.

![](https://d33v4339jhl8k0.cloudfront.net/docs/assets/5c98a4fe0428633d2cf3fcf7/images/5d8a6b732c7d3a7e9ae1913a/file-xsxDomUDSy.png)

Each app has different actions that an entity can be granted permission to perform.

Granting permission to an entity to perform these actions on these apps will allow them to:

#### **ACL (Access Control List)**

* Create permissions: create permissions that have not been initialized yet in any app that uses this ACL instance`*`

> `*`*These actions are very sensitive and will give the entity with permission to perform these actions almost complete control of your organization.*

#### **EVM (Ethereum Virtual Machine) Script Registry**

* **Add executors**: add an executor to the organization`*`
* **Enable and disable executors**: enable and disable executors in an organization`*`

> `*` *These actions are very sensitive actions that will give the entity with permission to perform these actions almost complete control of your organization.*

{% hint style="warning" %}
An executor is an interpreter for running scripts in an organization. All of the apps in an organization use the executors in the organization to execute scripts that are part of transactions sent to the app. Each script has an identifier that determines which executor is used for running the script.

For example, whenever a vote transaction is sent to the Voting app, the app runs a script, then uses an executor to execute the script in the transaction. You can find more documentation about executors in the [Aragon Developer Portal](https://hack.aragon.org/).
{% endhint %}

#### Kernel

* Manage apps: install apps, upgrade apps, and change default apps in an organization. The ACL and the EVM Script Registry are default apps in the organization. Whoever has permission to perform this action can also change the default Vault contract of the organization (which is the Vault that tokens will be sent to if tokens are sent to the address of an app that is not meant to accept token deposits). `*`

> `*` *These actions are very sensitive actions that will give the entity with permission to perform these actions almost complete control of your organization.*

#### **Tokens**

* Mint tokens: create new tokens and transfer them to a specified address
* Issue tokens: create new tokens and transfer them to the organization's Tokens app, for later assignment to a specified entity
* Assign tokens: transfer tokens held by the Tokens app to a specified entity
* Revoke vesting: revoke token vesting from a specified entity
* Burn tokens: delete tokens held by a tokenholder, reducing the total token supply

#### **Voting**

* Create new votes: create a new vote
* Modify support: modify the Support parameter
* Modify quorum: modify the Minimum Approval % parameter

\_\_

{% hint style="info" %}
**Minimum Approval %** is the percentage of the total token supply that support for a proposal must be greater than for the proposal to be considered valid.

**Example 1**

If the Minimum Approval % is set to 20%, then more than 20% of the outstanding token supply must vote to approve a proposal for the vote to be considered valid. If a vote does not make quorum, then it will fail, even if more tokens voted to approve the proposal than voted against it.

**Example 2**

If the Minimum Approval % is set to 20% and 10% of the outstanding token supply votes against the proposal but only 15% vote in support, then the proposal will fail because it has not reached the Minimum Approval % threshold.
{% endhint %}

{% hint style="info" %}
**Support** is the percentage of votes on a proposal that the total support must be greater than for the proposal to be approved. For example, if “Support” is set to 51%, then more than 51% of the votes on a proposal must vote “Yes” for the proposal to pass.
{% endhint %}

#### Finance

* Create new payments: create a transfer from the Finance app to another entity
* Execute payments: trigger a recurring payment owed to an entity
* Change period duration: modify the duration in seconds between accounting periods
* Change budgets: modify how many tokens can be spent within a given accounting period
* Manage payments: enable and disable recurring payments

#### **Vault**

* Transfer Vault’s tokens: transfer tokens held by the Vault app

{% embed url="<https://youtu.be/kMF7Y_KPm-4?t=666>" %}


# App Center

The ***App Center*** has tabs for upgrading currently-installed apps and browsing apps which are currently available (not that some apps are *not maintained* anymore to be recognized by a *not maintained* label).

To upgrade an existing app, simply click the ***Upgrade app*** button and open a vote to upgrade the app if you do not have direct permission to upgrade the app.

![App installed on the DAO](https://d33v4339jhl8k0.cloudfront.net/docs/assets/5c98a4fe0428633d2cf3fcf7/images/5ea0806e04286364bc98d037/file-Kc4Ohw1O3v.png)

![Example of App details (Agent installed on the DAO)](/files/r5zPBAwJcbAojpNKn9tv)

![Apps that can be installed on the DAO](/files/HiFkEXFF5MmsDTXvniIk)


# Organization Setting

## What is the Organization page?

The Organization page has information about your organization, including the **addresses of the installed apps**. Each of these apps is a separate smart contract, and you can use this address to directly interact with them.

If you are using Aragon on testnet, you can also request test tokens from the Organization page. After confirmation, the test tokens will be available to transfer from the Finance app.

{% hint style="info" %}
Do not send any tokens to your organization's app addresses. If you want to send tokens to your organization, you should follow the instructions for [making a deposit](/products/aragon-client/explore-template-dao/what-are-apps/finance-app).
{% endhint %}

![Apps smart contracts](https://d33v4339jhl8k0.cloudfront.net/docs/assets/5c98a4fe0428633d2cf3fcf7/images/5d8a6c8804286364bc8f8165/file-8w15BGoHek.png)


# After you've started a DAO

Once you have started a DAO there are some additional tools you may want to consider using to help monitor and promote the work you're doing.

* Head over to [DeepDao.io](https://deepdao.io) and make sure you've been listed for their analytics.
* Go to [Dune.xyz](https://dune.xyz) and build your own dashboard <https://dune.xyz/browse/dashboards?q=aragon> there have been many built already, and you can customize these to get a better understanding of how your DAO works in practice.
* If you're planning on fundraising you may want to list your new token on Uniswap <https://www.leewayhertz.com/tokens-on-uniswap-exchange/> is a tutorial for that.
* Form a[ legal wrapper](https://a16z.com/2022/05/23/dao-legal-frameworks-entity-features-selection/) for your DAO! Working with Otoco.io and Gnosis-safe.io you can now build a DAO and port your governance tokens in to [Otoco.io ](https://otoco.io)to begin developing legal compliance in your work. [More info here](https://documentation.aragon.org/products/aragon-client/legal-wrappers)
* If you are opening up your DAO to the public and have made significant changes to the default template settings you may consider having an audit done - reach out to the Tech Support Guild for additional resources.
* Communicate with the community - join us on Discord to have your work showcased.


# How to change the Quorum of your DAO


# Change Quorum using Aragon Console

{% hint style="info" %}
This guide will show you how to change the minimum Quorum (turnout) needed for votes in your DAO to pass using Aragon Console.
{% endhint %}

Open your DAO, adding `/console` to the end of your DAO web address. The URL would look like this: `https://client.aragon.org/#/<your-dao-name>/console`

{% hint style="warning" %}
Replace `<your-dao-name>` with the name of your DAO in the above URL
{% endhint %}

You should see something like the below:

<figure><img src="/files/VEu2OMzDUONRSHaZ43fF" alt=""><figcaption></figcaption></figure>

Next select `Exec` which is a command used to perform transactions DAOs.

You should now see the below screen. Select `Voting`, since you will create a change to the Voting App:

<figure><img src="/files/pn9XT0jPrSjvVhUCD2UW" alt=""><figcaption></figcaption></figure>

In the source code of the Voting App on [Github](https://github.com/aragon/aragon-apps/blob/631048d54b9cc71058abb8bd7c17f6738755d950/apps/voting/contracts/Voting.sol) you can find a function to change the minimum accepted Quorum Percentage, exactly what we need:

```solidity
function changeMinAcceptQuorumPct(uint64 _minAcceptQuorumPct)
    external
    authP(MODIFY_QUORUM_ROLE, arr(uint256(_minAcceptQuorumPct), uint256(minAcceptQuorumPct)))
{
    require(_minAcceptQuorumPct <= supportRequiredPct, ERROR_CHANGE_QUORUM_PCTS);
    minAcceptQuorumPct = _minAcceptQuorumPct;

    emit ChangeMinQuorum(_minAcceptQuorumPct);
}
```

We will now call this function from the Aragon Console. We will have to add `changeMinAcceptQuorumPct(uint64 _minAcceptQuorumPct)` to the command in the console, but first we will replace `uint64 _minAcceptQuorumPct` with your desired minimum Quorum Percentage.

This is expressed as a percentage of `10^18` , so for example `100% = 10^18` and `1% = 10^16`. Say you want a new minimum Quorum of 25%, then you need to add 16 zeroes to 25 coming to `250000000000000000`

{% hint style="danger" %}
**Warning**

The **minimum Quorum Percentage can never be higher than the required Support Percentage** for votes within your DAO! So make sure that the required Support Percentage of your DAO is 55% or more. If not, use a percentage lower than the required Support Percentage for this tutorial (otherwise you will run into an issue later).
{% endhint %}

Now add `changeMinAcceptQuorumPct(250000000000000000)` to the command in the console:

<figure><img src="/files/yuigrHMmUy8PtQRq4MKM" alt=""><figcaption></figcaption></figure>

When you now press 'Enter', a transaction should come up in your Web3 Provider (Metamask for most users). Check whether the minimum Quorum Percentage matches with what you had in mind:

<figure><img src="/files/mqVguhev603AEufJsVaS" alt=""><figcaption></figcaption></figure>

Click 'Create transaction' and sign it with your Web3 Provider.

You are almost there! But first go to the Voting app since this change has automatically generated a vote. Now you (and enough of your DAO members) need to approve the vote for it to pass:

<figure><img src="/files/YJaqRqeq2nr7b1gLTM9C" alt=""><figcaption></figcaption></figure>

{% hint style="danger" %}
**Warning**

The change will can only be **enacted** when the remaining voting time has run out. In the case of this example, the `Time remaining` is `23H:59M:12S` :point\_up:
{% endhint %}

When the voting time has run out click on 'Enact this vote' and sign the transaction with your Web3 Provider:

<figure><img src="/files/chUXK9X2S7npJtTyfKEd" alt=""><figcaption></figcaption></figure>

Once this is done the minimum Quorum Percentage should have been adjusted to 25%. You can double check this by creating a new vote. When you open the vote, the `MINIMUM APPROVAL` should have been adjusted to `>25% needed`.

{% hint style="success" %}
If you made it this far, well done! :clap:
{% endhint %}


# Change Quorum using EVMcrispr

{% hint style="info" %}
This guide will show you how to change the minimum Quorum (turnout) needed for votes in your DAO to pass using [**EVMcrispr**](https://evm-crispr.blossom.software/#/).

EVMcrispr is a powerful tool that combines a domain-specific language with a Javascript library to interact with Aragon DAOs.
{% endhint %}

First thing, open EVMcrispr [here](https://evm-crispr.blossom.software/#/) and click 'Open Terminal'. Now, this screen should appear:

<figure><img src="/files/SuZpVQQOPoEfs0iG3Q4A" alt=""><figcaption></figcaption></figure>

Next delete all the text in the terminal:

<figure><img src="/files/oWmiLczlO8JD0MWphaZv" alt=""><figcaption></figcaption></figure>

Click 'Connect' to connect to your Web3 Provider (Metamask for most users).

{% hint style="danger" %}
**Warning**

Make sure you connect an Account to EVMcrispr which also has signing permission on your DAO.
{% endhint %}

We are now going to write the commands to change the mimimum Quorum Percentage.

To change the minimum Quorum Percentage for your DAO you will have to connect to your DAO with `connect <dao-name-or-address`. Next we add `token-manager voting` because the `token-manager` app has the `CREATE_VOTES_ROLE` needed to forward actions to `voting` the app we will interact with. This is what we have so far:

```
connect <dao-name-or-address> token-manager voting
```

Now we will write the second command line for the EVMcrispr terminal. First to add is `exec` which is a command used to perform transactions DAOs. Next we add `voting` the app we will interact with. This is what we have so far:

```
connect <dao-name-or-address> token-manager voting
exec voting
```

We are not ready however. When we look in the source code of the Voting App on [Github](https://github.com/aragon/aragon-apps/blob/631048d54b9cc71058abb8bd7c17f6738755d950/apps/voting/contracts/Voting.sol) we can find a function to change the minimum accepted Quorum Percentage, this is exactly what we need:

```solidity
function changeMinAcceptQuorumPct(uint64 _minAcceptQuorumPct)
    external
    authP(MODIFY_QUORUM_ROLE, arr(uint256(_minAcceptQuorumPct), uint256(minAcceptQuorumPct)))
{
    require(_minAcceptQuorumPct <= supportRequiredPct, ERROR_CHANGE_QUORUM_PCTS);
    minAcceptQuorumPct = _minAcceptQuorumPct;

    emit ChangeMinQuorum(_minAcceptQuorumPct);
}
```

We will now add this function to the commands for the terminal to call it. We will have to add `changeMinAcceptQuorumPct(uint64 _minAcceptQuorumPct)`, but first we will replace `uint64 _minAcceptQuorumPct` with your desired minimum Quorum Percentage.

This is expressed as a percentage of `10^18` , so for example `100% = 10^18` and `1% = 10^16`. Say you want a new minimum Quorum of 25%, then you need to add 16 zeroes to 25 coming to `250000000000000000`

{% hint style="danger" %}
**Warning**

The **minimum Quorum Percentage can never be higher than the required Support Percentage** for votes within your DAO! So make sure that the required Support Percentage of your DAO is 55% or more. If not, use a percentage lower than the required Support Percentage for this tutorial (otherwise you will run into an issue later).
{% endhint %}

Now add `changeMinAcceptQuorumPct 250000000000000000` to the commands for the terminal:

```
connect <dao-name-or-address> token-manager voting
exec voting changeMinAcceptQuorumPct 250000000000000000
```

The commands are ready! Copy/ paste them in the terminal and click the 'Forward ...' button:

<figure><img src="/files/zpjBlpVS04ZEBrVyCZ2J" alt=""><figcaption></figcaption></figure>

Sign the transaction from your Web3 Provider and it should now execute successfully.

{% hint style="danger" %}
**Warning**

Use your DAO address in case of your DAO name in case of this error:

`Error: ENS <dao-name>.aragonid.eth not found in rinkeby, please introduce the address of the DAO instead.`
{% endhint %}

We are almost ready but first open your DAO in the web browser. The url should be:

`https://client.aragon.org/#/<dao-name-or-address>`

Next go to the Voting app since this change has automatically generated a vote. Now you (and enough of your DAO members) need to approve the vote for it to pass:

<figure><img src="/files/U30AG85KKkp1rnj1hOZE" alt=""><figcaption></figcaption></figure>

{% hint style="danger" %}
**Warning**

The change will can only be **enacted** when the remaining voting time has run out. In the case of this example, the `Time remaining` is `23H:59M:12S` :point\_up:
{% endhint %}

When the voting time has run out click on 'Enact this vote' and sign the transaction with your Web3 Provider:

<figure><img src="/files/CHaApOZCJV2VgMQkwdXv" alt=""><figcaption></figcaption></figure>

Once this is done the minimum Quorum Percentage should have been adjusted to 25%. You can double check this by creating a new vote. When you open the vote, the `MINIMUM APPROVAL` should have been adjusted to `>25% needed`.

{% hint style="success" %}
If you made it this far, well done! :clap:
{% endhint %}


# How to create a Legal Wrapper for your DAO with Otoco

{% hint style="info" %}
Being a DAO is great, but sometimes contracts with 'real world' entities are needed, and they need you to be a 'real world' entity as well. This is a How to Guide to setup a standard Delaware Series LLC with [**Otoco**](https://otoco.io/) and to integrate it with your Aragon Client DAO.

Cost to do this? Less than 5 USD!
{% endhint %}

In our example, you started a new Aragon DAO called Awesome Music, a decentralized Music Label. All is working well, you are collaborating with people online in different countries.

But soon you find out that a musician of Classical Music insists on having a legal contract with your DAO Label instead of a token agreement.

That needs the DAO to be registered in the legacy world as an LLC. But how on earth do I do that? Let us show you how!

Open the DAO on Aragon Client by clicking on the following link: [**https://client.aragon.org/#/awsmmusic/**](https://client.aragon.org/#/awsmmusic/) (This example DAO is on Ethereum Mainnet).

{% hint style="danger" %}
Switch your Web3 Wallet to **Ethereum Mainnet**, to make the DAO appear on Aragon Client.

Next to Ethereum Mainnet, Otoco is also available on **Goerli Testnet, Polygon Mainnet, and Mumbai Testnet**, so you can also integrate your Client DAO on these networks with Otoco!
{% endhint %}

You should see the following screen. Click on 'Assign Tokens':

![](https://lh6.googleusercontent.com/9jPGBkFSqmTAGgzGafNHwJbn9RT6pdwpG7mMB-FJiv7aVwbesPPi5JkVLTds-IbXskzxQKTkwvi2loX372FyBw6orZVRVRtZUUPqyfJ39KSEcVjXw_4-l9fRwNJ3OVE4DDxRXTzKWK4cmWe4LVLyDA)

This takes you to the 'Tokens' app. Here you can see some of the Token Holders, the artists which signed up with Awesome Music.

<figure><img src="/files/bIebqjT0He4xA3bQ3U1i" alt=""><figcaption></figcaption></figure>

Now let’s go to Otoco, to create a legal integration for the DAO. Here’s the link [**https://otoco.io/**](https://otoco.io/)

Click on 'Spin up your project now':

![](https://lh6.googleusercontent.com/96D6ygT4pbD8_WFZM3cLBAuPTib4OLDRTF4eAGhAQrdkG7_9R8cukZLubjC6c1sA3d77bVO55NFR_CbNz2u01e0u-_fjeP4Mm-SH3vVApjJ3oGHYGbxz86O9q7P7VypNvYsou0s9DgZmqy6OKoRbiQ)

Select 'Ethereum Mainnet' and click 'Get started on next screen':

![](https://lh4.googleusercontent.com/gCbLVyz0bIefsqaiE4tbcSEJYp9Sildw9ljUh3WyYgolMJ8KVL3YMpL1G6LzhMboFhDkFl4w1SHPjkAEzUWVzTmXbml8eQrSe_UI9SyEtRDaJVnQyO6gOvCrmIZGnWz8RVx07ysj5e14_4ZGzqSgVA)

Then select 'Just Me' and then 'Continue':

![](https://lh5.googleusercontent.com/TZG-OSJnh89laDPv25ZuyhlT5rY7k2JnyjkbjQJHBNPyRGR7PKzdRl09WD-OBQJVsion1klBbSkovtVSsxWf8FWapsCM0y-PqR6qQW-KYtBWTXYMCVgPi4kF7NB_lTyahXf7XBSlN7P9zwKx1nDgjw)

At the moment the only options to set up an LLC are in the USA. For this example select 'Delaware Series LLC', then click 'check' and then 'continue':

![](https://lh3.googleusercontent.com/Qn5t1VJtdoKKXT0tRLpbFoxj3rdD0uu6VdVw1tHKALmlVR6w5HVmA9S4WKV7yP-IdymEWwL-N5hX0UVzHRWrajppt85nTPkAUDoz-DKcHVsDrG2Z56vdC_YRrHBb7RsFjr8J7Dvm5tM6CVGPLU2Lww)

Now it's time to connect your Web3 Wallet. Pre-select the account in your wallet which also owns DAO tokens and the right network, in this case 'AWSMM' tokens and 'Ethereum Mainnet'.

{% hint style="danger" %}
If you connect a Web3 Wallet account to Otoco which does not own DAO tokens, the integration will not work.
{% endhint %}

Click 'Connect Wallet':

![](https://lh6.googleusercontent.com/GPiHnhh-D-YYh0huMOgvtDFObHSjCiHINzNYsoR3yYM4Od6-rSTrQqZVEEInYyeC53qDBjjXJ-3amRuS7G0Rrnvz_k2SFmhLdi2ZR1w27Gc19qSPRR-4CrhamAscGm5U1TVhT2IiGjgE9hesDzLo_w)

Check whether your wallet connected successfully. In this screen click 'Activate Company'. Now a transaction should pop-up in your Web3 Wallet. Confirm the transaction:

<figure><img src="https://lh6.googleusercontent.com/bQ2-bZsbdfipwuwo7Bd0WjkwNg5UWivA7cCq1ehdKlNFPhkG1erluCz3WUJJk8NdU3K2co_zRnjBkXmsWQsMKZxyfNGcvhst4QyiT6a88Pt8hLgLgwPDzBqYFASHDoB-p9vOZtye2uyUvq38Jia5JLmqRrWULTHuIIkTj0-W1juOAYYUvJqXFdUd" alt=""><figcaption></figcaption></figure>

Once the transaction has been processed you should see the following screen. Click here on 'Go To Dashpanel':

![](https://lh4.googleusercontent.com/C98NFdD89dpROjRsSmIZRieZYRhhN91Ib1EsSyctibGqbCvXLSQ1YI04cUVCoEe2R2ShlDtIxfipH0X_5wVzMjv-nr5RhtjYoc9yEo6Vla4PS77aTAnh4Ia9Ab6X8JVnSPF9t0G3tC0scD_cVQknew)

{% hint style="success" %}
Great, the **legal wrapper prepared for your DAO has been setup**! :tada:

Now let’s integrate it with the Aragon Client DAO!
{% endhint %}

In the Otoco Dashpanel, click on 'Tokens' in the left menu bar:

![](https://lh6.googleusercontent.com/zlhj1jPsksD2U-nVVIvy3Fw5d5tP1XBkOnlBz10y9PgmV3Ppdwq6OMdTvRUWJg8WrgJAqrpP4t_LP4JjdEh-m-y48AJtlKym3P3QCBdrP_c7TP7R0kqJ4ZWSuqmL6ESjDHe29aHTYQ3xcmo7-PXmOg)

You should see the following screen:

![](https://lh3.googleusercontent.com/bAPONMEYctecwAz1iuoV69fooidqnBWzN4vwTJ7dLNTvQ3jTmSGRZlvc6TzdwixKr0AfZP5ph6UMaMhQnzsEe5QKHTehU-telIokGfhxdAM83j2LlWiiG24oQgwxSZ5BY_3fUxkWsgIVQ1mLTm_zGA)

Now we need some info from the DAO. Go back to the 'Tokens' app of Awesome Music. Here's the link: [**https://client.aragon.org/#/awsmmusic/0xd181ce5f2e300e13f8327f3208da8903e026a048/**](https://client.aragon.org/#/awsmmusic/0xd181ce5f2e300e13f8327f3208da8903e026a048/)

When there click on 'awsmm.. (AWSMM)' in the 'TOKEN INFO' box.

<img src="https://lh4.googleusercontent.com/MuYOYEbX2u4dopx5O3Ma1EOt4tDuA7jc34vK2RdrER1Kck7L53Frc-lCf59uI41sNdH59rS-aVvmJmvAgB_Pz4NCwHUVla9a02p-q36BiFP44SaDmbnsFhqLs1u8IjAbzYDpsQs5h84YZ0aiwmqiI7GXMk-ojfCWJOKoD2oXXk2_yogtemhwcbZW" alt="" data-size="original">

Then copy the token address by clicking on the copy symbol:
![](https://lh3.googleusercontent.com/WmK0d0AeihWgxuC10ZEzu41iBPoKWo2x5bAHPMhH5qWwl3Okwunpu4FQZi9NVlUgjSViU_5kODxxTu1cCkdFyuwiMWHlkNa1TUj8_e2ZmDjI2OFiSRcyQ5Nu04wqofFUm2h7dx8BEYgTTkCM1tY8M0I29R8yY-uMCngrczNfDnm7RXBqUoeV8eLj)

Now go back to the Otoco screen and paste the address where it says 'paste your ERC-20 token contract address here', and click on 'Attach Token':
![](https://lh3.googleusercontent.com/AHlOW8oSbNiq7T9h-Xrb5wt_ofVCtyPmSMY5u8Sw4t82ZkzrCdq6Tlzox41tj3qQYGsfOx6Y536f8omA659cbrkiQeiL789veF4IF2UnncKY4K-SYhk08vq68dBSyzkF9a7--dRbf7bSPdM8xiRIHg)

In your Web3 Wallet a transaction should popup. Confirm the transaction and wait for it to be processed.
![](https://lh3.googleusercontent.com/3SE87L4YicNC_HKdT9KalZJXu2I5apLQQsXqt4sN6vHyhyXHTp23oefPcRtbJ681YvTeDz2uHpgtKPoF2QGIzcmf1U2569GOUI0LA8qvPL3kKpOZISYpCcTsPaRpIK8narWQqwfd9KUgoTYWTguk0A)

{% hint style="success" %}
Awesome, your Aragon Client DAO has now been integrated with the **Otoco legal wrapper**!
{% endhint %}

You should see the screen below. Click on 'SHOW' to see all the Awesome Music token holders appear:

![](https://lh4.googleusercontent.com/a7JKZUo0IspMEOhHbxJOdNwJu27Jz8NYcKBdkYZrhQGCpBRMTh-EFHOxKLJaLPL3qDziiM67ilBSFD5ZPFJ-Jbjoq2mWxGDYGp8zQTBihQi2fLMPcnwDswZlxA_l2ASHHvkueHpQuy1lK29NSa3WXg)

You should see a list of current holders:
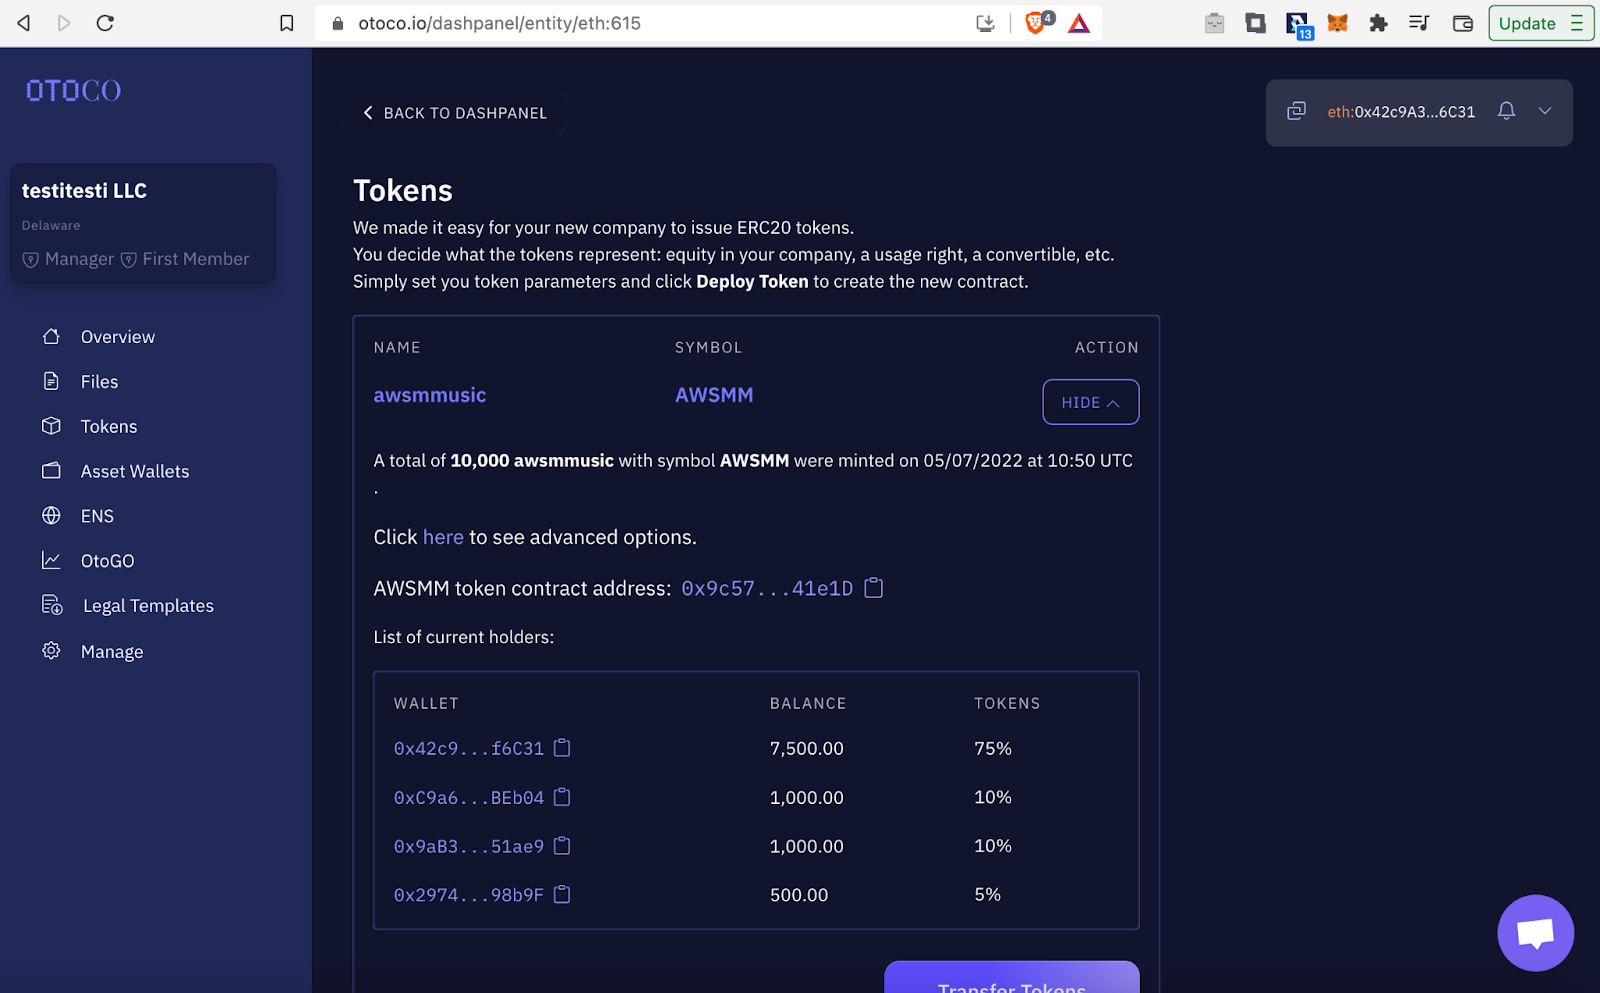
![](https://lh3.googleusercontent.com/U3U6qAWIzlefNpidi1dEEqXqLmu5XB2dlo7Lq4yRGeaxJiM72lKeUR93OMtAEbxnHrDgTxarq-3QvRz_Q2JEmSHyFVL4hBFe5hhR9QUd4DMD_KdlGpxqfU2mJ1ez8Z17KR5KeQao1wu_7wH62pSnjw)

Now if we go back to the Aragon DAO, you can verify that all the token holders are represented in the Legal Wrapper!
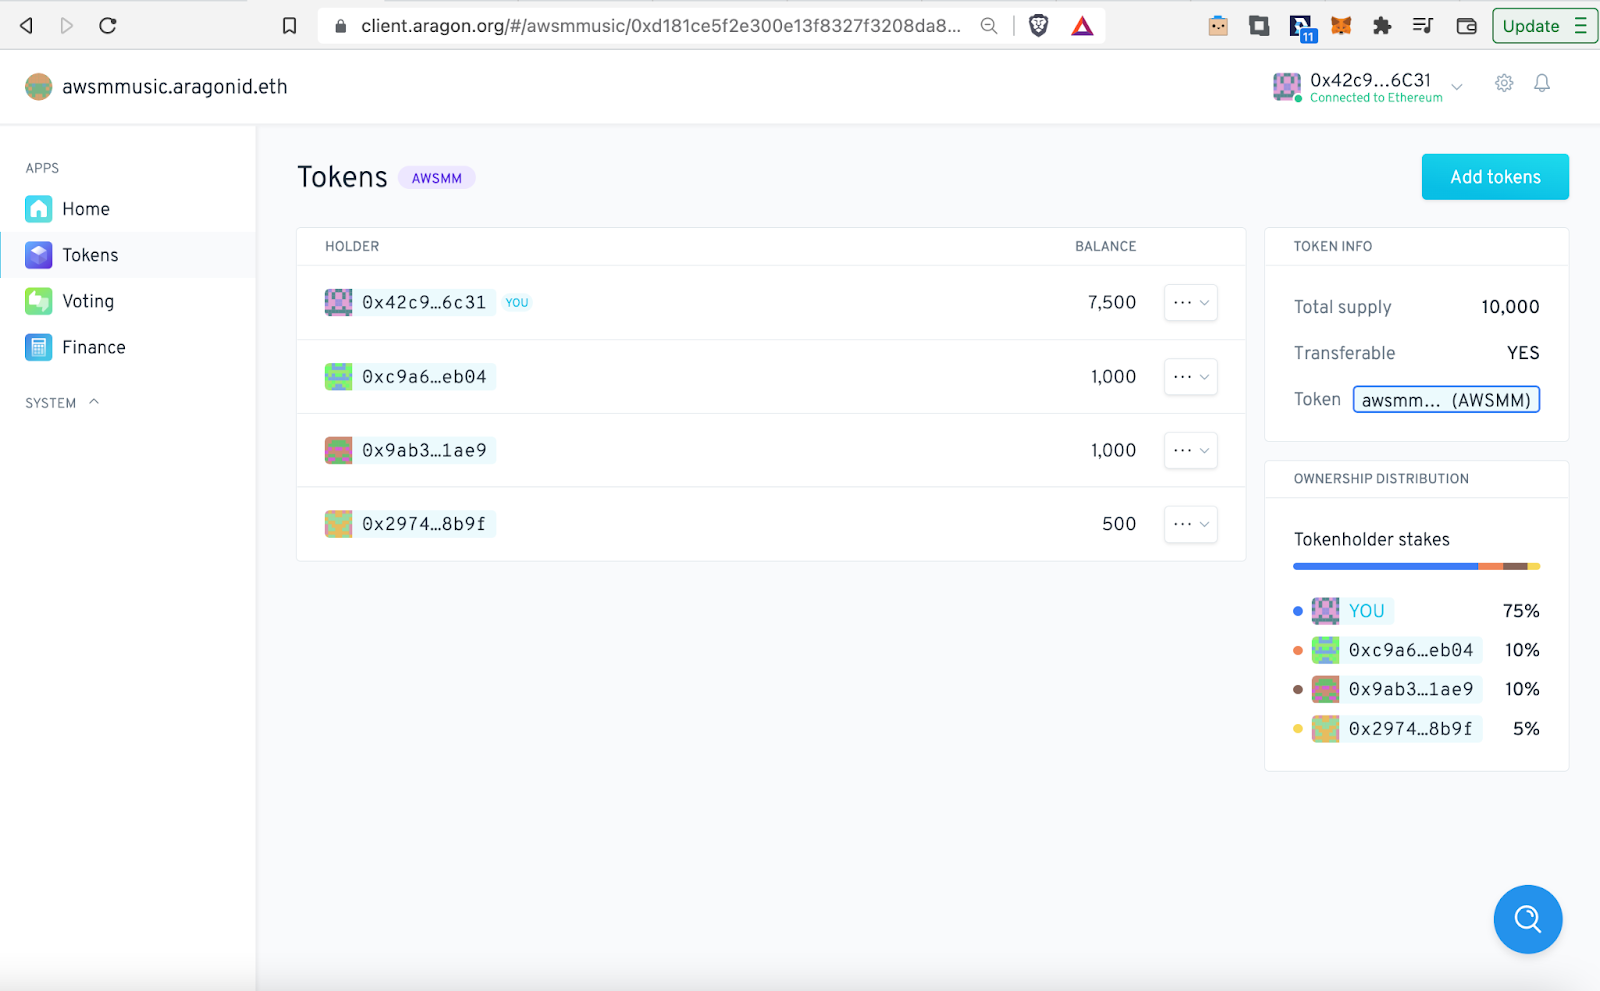
![](https://lh4.googleusercontent.com/g-NoIu1y3lP6fLPCptcSmj3szpAZv7rgBYMblACdj12eD-OmzSuJpY5JPGzn5mgoX3O0yugiFqrR1JzCqK0iyD3hkWyu5NQsLetm8Jqv8yOXgbfKN6ordhbXJ0iPEazp5cQdhbpqBLjCiM15xHiWVw)

Now last let's take a look at the official LLC documents like the Certificate of Formation. To do so click on 'Files' in the left menu bar. You should see the following:

<figure><img src="https://lh3.googleusercontent.com/kKStyVNxnS4g7RRxr3Ik4ma3bq_VegKxkoROp4BEkgcSY5ogb3ZuqYqAAaJkCYlqE8_0FmsOtJ77aj8zGR1yi4Z2dUsPRUWx9MuigZtNQi3PksRw9U6PBrRZcYMQweGs9pCY99XT8acCQYU7Yi66JrIznjb3m4hdV0_1rro9e9rMRPqistwXcobn" alt=""><figcaption></figcaption></figure>

You can download the LLC documents here.

That was all, good luck now with your DAO in the legacy world! :thumbsup:


# How to Operate your DAO from your Mobile Phone

{% hint style="info" %}
For this example we will use the **MetaMask** Web3 Wallet since it can be used on Desktop with a browser extension and Mobile Phone app with an inbuilt browser.
{% endhint %}

First up: download the MetaMask app for your Android or iOS phone:

{% embed url="<https://play.google.com/store/apps/details?id=io.metamask>" %}

{% embed url="<https://apps.apple.com/us/app/metamask-blockchain-wallet/id1438144202>" %}

{% hint style="info" %}
In this example, your DAO peer has initiated a transaction of 0.3 ETH to a Core-contributor. This has generated a Vote, which you will approve from your Mobile Phone while you are 'flixing' on your couch :popcorn:
{% endhint %}

Open the MetaMask app at your phone and 'Get started':

![](/files/okjmYGMMVUHWJo5NbV7A)

Now there is a possibility to import your Desktop MetaMask wallet into your Mobile Phone wallet. To do so press 'Import using Secret Recovery Phrase':

![](/files/ekgVb3nWc1mGHjzv5MKf)

You will now need to enter the Secret Recovery Phrase. To do so open the MetaMask Desktop extension wallet, and click on the 'account circle' at the top right hand corner and then click 'Settings':

{% hint style="danger" %}
Make sure that it is the wallet which created the DAO or which owns DAO-tokens.
{% endhint %}

![](/files/Yq8jogVzQf4CzD8WUsMf)

Click on 'Security and privacy':

![](/files/SXVssyZEjO1rXRYsD0wl)

Click on 'Reveal Secret Recovery Phrase' and then copy your phrase:

{% hint style="danger" %}
It is **recommended to copy the Secret Recovery Phrase by writing it on a piece of paper**. Be careful sharing it electronically since anyone who gets access to your phrase can sign transactions at your DAO, and can access funds in your MetaMask wallet!
{% endhint %}

![](/files/DyiH3rAYAaXxBvqpSTvr)

Now head back to your Mobile Phone. Enter the Secret Recovery Phrase, create a new wallet password and press 'IMPORT':

![](/files/LLIOcb7f9Gp6Pg3U21VY)

You should now see your Wallet imported in the MetaMask app! To make sure you are connected to the network where your DAO has been deployed, click on 'Wallet':

![](/files/KpnC5N4thENzNvnF4GfR)

Select the right Network (in case of this example it is Goerli Test Network):

![](/files/ck4eTixlimG3Rok0GyTJ)

Now back in the Wallet screen, press on the 'hamburger icon' in the upper left hand corner. A side window should open. Press here on 'Browser' to open the inbuilt MetaMask app browser:

![](/files/jqE8aOc0AWqYxVIoCb97)

Press on the 'Search or Type URL' box:

![](/files/VHGG2yaVYqS5YNT4RoBh)

Now head over to your DAO on the Desktop and copy it's URL. In the case of this example the URL is: <https://client.aragon.org/#/barukimang7>

Paste the URL into the MetaMask browser page and confirm:

![](/files/TTUhrznImb3iZkdtiRgZ)

The DAO should now open in the browser. Time to connect the MetaMask Mobile Phone wallet, press on the :zap:-symbol:

![](/files/M0fFl16pQdWUiCAuUuXT)

Press 'Metamask':

![](/files/jKfik2sBf2exO1GTo8dp)

Press 'Connect':

![](/files/6ztCfT9ky8TmNyDPkVBo)

You should now see a connection between your DAO and your MetaMask mobile wallet!

{% hint style="info" %}
A similar Web3 Wallet connection is **NOT** possible using another mobile phone browser.
{% endhint %}

Time to approve the Vote which has been initiated by your DAO peer. So press 'Vote':

![](/files/0So9wdVNJCauERs6QNQo)

Your peer told you approval of Vote #5 is needed. You the Vote, press on it:

![](/files/BTE57NGTwnTwqpoyVoO4)

To approve the Vote, press 'Yes':

![](/files/WRKrvdX5EoZJbfXM299s)

Now press 'Create transaction':

![](/files/J1S5CFyOtTMVJp7H4h06)

'Confirm' the transaction:

![](/files/I2tXZxwb3ucIIxbEORMo)

The Voting transaction has processed and the Vote has passed!

{% hint style="warning" %}
Passing of the Vote depends on meeting the minimum required support and approval for the Vote.
{% endhint %}

![](/files/gXVUXXWTka8u2dS1UJQx)

To check whether the transaction of 0.3 to the Core-contributor has been executed, click the lowest of the two 'hamburger icon' in the top left hand corner, and select 'Finance'. In Finance you can see the payment has been done!

![](/files/kzBkjnpNhh1qaUDko2pg)

Victory! :medal:

You can now operate your DAO like a real boss :video\_game:


# How to Brick your DAO 🧱

{% hint style="danger" %}
**Warning**

**Don't try this at home!** This guide is meant to make you aware of some of the mistakes you can make which will **brick** 🧱 (ruin) your DAO.
{% endhint %}

## Top ways to Brick 🧱 your DAO:

1. Set the minimum accepted Quorum Percentage of Votes in your DAO to 100%, and then lose access to the only Wallet Account which can vote :scream:.

{% hint style="info" %}
**Lesson**

Reconsider whether a high 100% Quorum is necessary, and make sure you always have a backup of your Wallet Account secret recovery phrase.
{% endhint %}

2\. Go to the Aragon Forum for help and copy/ paste the private keys of the Web3 Wallet controlling your DAO. Someone found the private keys, took control of your wallet and is now in control of your DAO :scream:.

{% hint style="info" %}
**Lesson**

Never ever share 'secrets' like your private keys, secret recovery phrase, or something else secret on a public forum, Discord server, or not even in a direct message (DM), there are a lot of scammers out there looking for this info.
{% endhint %}

3\. Mint new DAO tokens to the address of the DAO, instead of to a DAO member, which makes the 'DAO address' the largest token holder. DAO addresses can not vote, and since it is the largest DAO token holder not a single vote can be enacted anymore :scream:.

{% hint style="info" %}
**Lesson**

Only mint DAO tokens to DAO members wallet addresses, and never send them to a smart contract such as the address of your DAO.
{% endhint %}

4\. You have a bad actor in your DAO and want to get rid of him by removing/ burning all of his DAO tokens. Accidentally you remove/ burn all of your own DAO tokens, and the Vote to do so has already been approved by your DAO members! Now you lost control over your DAO :scream:.

{% hint style="info" %}
**Lesson**

It's easy to make fatal mistakes, always double-check the details when making transactions in your DAO.
{% endhint %}

{% hint style="danger" %}
**Warning**

**Again don't try this at home!** This guide is meant to make you aware of some of the mistakes you can make which will **brick** 🧱 (ruin) your DAO.
{% endhint %}


# Aragon Govern

{% hint style="info" %}
In this section, you will learn how to create and navigate a DAO using Aragon Govern.

The Aragon Govern product itself can be found [here](https://govern.aragon.org/).
{% endhint %}


# What is Aragon Govern?

Aragon Govern is a **DAO framework** that relies on **optimistic governance**, empowering digital groups to operate in a low-friction governance model with on-chain execution and dispute resolution. Aragon Govern ties in with Aragon Voice and thus has low gas fees.

Instead of requiring your community to vote on every single proposal, with Aragon Govern your DAO operates by **continuously executing actions unless these are challenged**. Challenged actions are all safeguarded by [Aragon Court](/products/aragon-court), a subjective dispute resolution system. It requires some technical background, yet has considerable potential.


# How to create a Govern DAO

{% hint style="info" %}
In this section, you will learn how to create a DAO using Aragon Govern.
{% endhint %}

## How to create a DAO

Creating a Govern DAO is a quick and easy process.

Go to <https://govern.aragon.org/#/create-dao>, choose the network and connect your web3 wallet (if you need help go [here](/products/set-up-metamask)) and fill out all the relevant information regarding your DAO.

## Basic Information

![](https://d33v4339jhl8k0.cloudfront.net/docs/assets/5c98a4fe0428633d2cf3fcf7/images/61155889b55c2b04bf6ddda0/file-jQxSjLKpa8.png)

## In the first step you should define

* **DAO identifier**: This will be your DAO unique identifier, and will be used as part of the URL to directly access your DAO. It may not contain spaces, and must not have already been used by another DAO. Try and name it something that relates to your community only (eg. "space\_invaders\_gamers\_dao").
* **DAO token**: Fill out the information about the token your community will use to govern your DAO. 3-4 letters is generally sufficient for your token name.

{% hint style="info" %}
**If you don't have a token yet**

\=> Choose the **New Token** option and fill out the token name, token symbol, and how many tokens you would like to mint initially. You can mint more tokens in the future, or even change the token contract to restrict future further minting. All the minted tokens will initially be sent to your wallet.

**If you already have a token**

\=> Choose the **Existing Token** option and add your token address to it.
{% endhint %}

![](https://d33v4339jhl8k0.cloudfront.net/docs/assets/5c98a4fe0428633d2cf3fcf7/images/61155a2d21ef206e5592aff7/file-6re43pNq8c.png)

* **Use Aragon Proxies**: Instead of deploying a whole smart contract to be the executor of your DAO (the one that executes transactions as the DAO), you will just deploy a proxy contract (which is a minimal version that forwards requests to a full contract that was already deployed by Aragon). By selecting this option you will drastically reduce the amount of gas needed to deploy your DAO.

{% hint style="warning" %}
This option **DOES NOT** reduce the security of your DAO in any way.
{% endhint %}

## Configuration

![](https://d33v4339jhl8k0.cloudfront.net/docs/assets/5c98a4fe0428633d2cf3fcf7/images/6115589a6ffe270af2a9855f/file-jLdUKuX5Ov.png)

## In the second step you should define

* **Execution delay**: The amount of time a given transaction will be on hold before being executed. During this period, the transaction can be reviewed by your community members, and if it does not conform with your DAO agreement, it can be challenged. At the end of the delay period, the transaction will be available for execution. [Learn more](/products/aragon-govern/why-do-transactions-require-a-delay-period-in-order-to-be-executed).
* **Rules & Agreement**: An Aragon Govern DAO works thanks to optimistic governance: it expects its members to act in its best interest, and for them to always follow a specific set of (pre-agreed) rules. These rules are what make a DAO agreement, and can be provided as free text, pdf, or document.
* **Dispute resolution client**: This is the address of a smart contract that can act as a dispute resolution system for the optimistic governance model to be enacted. The default address is set to Aragon Court, a tested and secure dispute resolution system by Aragon. Be aware that if you change this address, and the new smart contract does not implement the [ERC3k standard](https://eips.ethereum.org/EIPS/eip-3000) (or it relies on an insecure system) you might make your DAO unusable or allow funds to be stolen.

## Collateral

![](https://d33v4339jhl8k0.cloudfront.net/docs/assets/5c98a4fe0428633d2cf3fcf7/images/611558bd64a230081ba1eaec/file-dYJrDvkzgq.png)

## In the third step you should assert a...

* **Schedule token amount**: This is the token cost that will be required by any member to spend before they can schedule a transaction. Members who do not own the amount of tokens you define here will not be able to schedule any transaction. [Learn more about collaterals](/products/aragon-govern/understanding-collaterals-in-aragon-govern).
* **Challenge token amount**: This is the token cost that will be required by any member to challenge a transaction. Members who do not own the amount of tokens you define here will not be able to challenge any transaction. [Learn more about collaterals.](/products/aragon-govern/understanding-collaterals-in-aragon-govern)\*\*\*\*
* **Whitelist of addresses (optional):** This is an additional safeguard step you might want to add to your DAO to grant only a subset of members permission to schedule transactions.

{% hint style="danger" %}
Important: If a wallet address is in the whitelist, it still needs to hold the collateral token to schedule a transaction.
{% endhint %}

## Review the information to make sure everything is correct.

If you are happy with it, just go ahead and click the "Confirm and create a DAO" button.

![](https://d33v4339jhl8k0.cloudfront.net/docs/assets/5c98a4fe0428633d2cf3fcf7/images/611559fdb55c2b04bf6dddb3/file-fxIiexUROg.png)


# Navigate into your Govern DAO

{% hint style="info" %}
In this section you will learn:

* how to mint and assign tokens
* how to deposit tokens
* how to challenge a transaction
  {% endhint %}


# How to mint and assign DAO tokens to others

## Minting and assigning Tokens

Go to <https://govern.aragon.org/#/daos/\\><DAO name>/ where \<DAO name> is the name of your DAO.

The token can be minted and assigned to other wallets in the ***Actions*** section:

!["Action" section on the left side menu](/files/T3Gn81SucjWhAwO8xbCE)

{% hint style="info" %}

* Click *Actions* on the left side menu - *New action*

**Insert the following fields:**

* *Title* = a title to identify the transaction

* *Justification* = a text or a file to tell DAO members why you schedule this transaction.-
  {% endhint %}

* Click on the \*\* **\_**&#x41;dd new transaction\*\*\_\*\* \*\* button.

![](/files/9UAwhNHUt6iPYynWAT7f)

* Click on ***Select Action - Mint tokens*** to mint more DAO tokens.

![](/files/rHs7VZU860PDkRK2JrrP)

* Select *Other address* to enable the option to insert the address of a DAO member.

{% hint style="info" %}
Recipient address - insert the address where the new to mint DAO tokens should be transferred to.

Amount - quantity of token to deposit. The correct format is \<number>.\<number> (ex. 5.0)
{% endhint %}

* Click *Add transaction*

![](/files/wmLXuMYgLppEJkw7lcix)

* Back on the \*\****New transaction***\*\* page fill the fields in the ***mint*** box.

{% hint style="info" %}
To - insert the address where the new to mint DAO tokens should be transferred.

Amount - needs to be in wei (not in Ether), you can use a converter such as [https://eth-converter.com/](https://eth-converter.com) (for example: so instead of 200.0 for your amount you need to input 200000000000000000000).

Context - should be 0x (without " ") or any other hex byte you wish.
{% endhint %}

* Click ***Schedule*** to execute the transaction.

![](/files/Iyu37MLEKq7MAZDFYZeV)


# How to deposit funds

## Depositing Tokens

Tokens may be deposited in the ***Finance*** section.

!["Finance" section on the left side menu](/files/45qgZ1vc6glhQdryJmZV)

{% hint style="info" %}
Finance - New Transfer - Deposit.

**Fill in the following fields:**

Token - Select an erc20 token from the drop-down menu, the token that will be deposited on Finance. If the token is not listed, click "Add other token" and paste the smart contract address of your token.

Amount - quantity of token to deposit. The correct format is \<number>.\<number> (ex. 5.0)

Reference (optional) - some text to identify this transa­ction later on.
{% endhint %}

* Click on the ***Review Deposit*** button and then click ***Confirm the Deposit***.![](https://github.com/78carla/tech_1/blob/main/.gitbook/assets/bottone.png) ![](/files/6FuYklG1Ta5p1cBTKvBN)


# Challenging a transaction

With Aragon Govern's **optimistic governance model**, every transaction has a **delay period** (you can read more [here](/products/aragon-govern/why-do-transactions-require-a-delay-period-in-order-to-be-executed)) allowing the community time to review and decide if there are actions described that might be contrary to the DAO agreement.

During this delay period **transactions may be challenged**, and if challenged a dispute is created in [Aragon Court](/products/aragon-court) (or any other preferred dispute resolution system specified in the DAO).

{% hint style="warning" %}
If you do not agree with a transaction that has been scheduled, provide a clear justification so that guardians can understand why you are disputing it. This will greatly increase case comprehension for the guardians and allows for faster dispute resolution.
{% endhint %}

![](https://d33v4339jhl8k0.cloudfront.net/docs/assets/5c98a4fe0428633d2cf3fcf7/images/6113ed15b55c2b04bf6dd6a2/file-hd6ZlldfSY.png)

{% hint style="danger" %}
**VERY IMPORTANT NOTE!!!**

* When you challenge a transaction, \*\*you need to add \*\*<mark style="color:blue;">**collateral**</mark> to the challenge. The collateral token and amount are defined in the DAO settings.
* When creating a challenge, **you also need to pay the court fees** in <mark style="color:blue;">**DAI**</mark>, which will be used to pay guardians and actors on the dispute.

So for challenging a transaction you need to have both these tokens on your wallet:

1. The <mark style="color:blue;">**collateral token**</mark>
2. <mark style="color:blue;">**DAI**</mark> token
   {% endhint %}


# Reasons for the delay period in the transaction

{% hint style="info" %}
In this section, you will learn about delay periods and why they are necessary to execute a transaction.
{% endhint %}

An Aragon Govern DAO works with the principle that participants interacting with it are acting in the best interest of the respective community. It assumes that any scheduled transactions respect the DAO agreement.

To counter and prevent bad actors from executing non-conforming actions, **all transactions** come with a **cool-off period**, allowing community members time to review before execution. This is what is called the "delay period" on Aragon Govern DAOs.

Thanks to the delay period the community has the opportunity to challenge any to-be-executed transaction, ensuring an extra layer of security.


# Collateral for scheduling or challenging a transaction. Why?

{% hint style="info" %}
In this section, you will learn about collateral and why it is necessary to schedule or challenge a transaction.
{% endhint %}

To provide additional **security**, all transactions may be challenged before execution. When a given transaction is challenged, a dispute is created in [Aragon Court ](/products/aragon-court)(or any dispute resolution system that is compliant with ERC-3k), and guardians will be summoned to arbitrate the case.

To make sure that not only this process, but also the process of scheduling transactions in the DAO is not abused both the transaction creator as well as the person challenging the transaction needs to provide collateral.

If the dispute is ruled in favor of the original transaction creator the person who created the transaction will get the collateral tokens from the challenger. If the transaction is blocked (e.g. the dispute is ruled in favor of the challenger), then the challenger gets the collateral tokens from the transaction creator.

Collaterals make sure members have skin in the game when interacting within an optimistic governance model and will be less likely to abuse it. Collaterals also allow DAO creators to restrict transaction and challenge creation to specific token holders so that only certain individuals who hold a specific token create transactions to begin with.


# Acting as a guardian for an Aragon Govern dispute

The first use case for [Aragon Court](/products/aragon-court) is to be the subjective dispute resolution for Aragon Govern DAOs, enabling optimistic governance to take place with an extra layer of security.

Whenever an Aragon Govern transaction is challenged, a new dispute is created in Aragon Court. If you get summoned as a guardian for this kind of dispute, this is what you need to know.

## Understanding the content

### **Dispute fields**

![](https://d33v4339jhl8k0.cloudfront.net/docs/assets/5c98a4fe0428633d2cf3fcf7/images/6113a430766e8844fc34f656/file-WrG7lYSfrJ.png)

**Description**

The basic description of the transactions. This should provide you with additional context on what the transaction is about.

**Agreement**

The agreement or contract that supports this transaction. All Aragon Govern DAOs MUST have a human-readable agreement that states how the DAO intends to operate, and what actions should be allowed or forbidden. For example, an agreement might say that a given DAO may only invest in sustainability projects, and a conflict would arise if a transaction instead intended to transfer funds to a car manufacturing company.

**Executor**

The address of the contract that will execute this transaction.

**Dispute creator**

The address of the person/contract that created the dispute.

**Actions**

The set of transactions that will be executed if the dispute is ruled in favor of who created this.

**Original justification**

This is a human-readable justification stating why actions were scheduled to be executed. For example the creator might say something like "Transferring funds to a project that is creating a carbon footprint offset device". This is added by the actions creator during scheduling.

**Dispute evidence**

The justification of why the actions are being challenged. For example "The destination address actually belongs to a car manufacturing company, and therefore we should not allow this transferring of the funds". This information is added by the person challenging the actions.

### **What are Actions?**

Actions are nothing more than smart contract transactions that have been scheduled with an Aragon Govern DAO. These can be any interaction with an EVM-compatible blockchain, such as transferring funds, minting tokens, swapping tokens, etc.

On Aragon Govern, an action can be a bundle of several transactions. This is what is shown in Aragon Court. Understanding the Actions is essential to ruling on a dispute.

![](https://d33v4339jhl8k0.cloudfront.net/docs/assets/5c98a4fe0428633d2cf3fcf7/images/61139fe464a230081ba1e1d8/file-MUdTAgjhC3.png)

### The action contains the following information:

**To**: Smart contract that will receive the transaction

**Value**: Optional amount of ETH being sent in the transaction

**Function to be called**: Name of the function being called in the "**To**" smart contract

**Data**: The parameters being sent to the function.

![](https://d33v4339jhl8k0.cloudfront.net/docs/assets/5c98a4fe0428633d2cf3fcf7/images/6113a04bb37d837a3d0e2b5d/file-EGn7CGNTer.png)

{% hint style="info" %}
If you want to dig deeper and understand what a given function does, and what each parameter is used for, click on the **TO address** and open it on Etherscan. There you should be able to see details of the contract and function code.
{% endhint %}

Sometimes the function and data might not be available (when the contract is not verified on Etherscan ([Learn More](https://etherscan.io/verifyContract)). In this case, you will see the **Raw Data**, which can still be decompiled if you research the destination contract.

![](https://d33v4339jhl8k0.cloudfront.net/docs/assets/5c98a4fe0428633d2cf3fcf7/images/6113a0e26ffe270af2a97c43/file-xCv7UHQxZH.png)

You may always click on the addresses to check the contracts on Etherscan to better understand what the transactions will actually be performing.

### **The Pieces of Evidence**

The evidence section of Aragon Court shows the address of the person that submitted the evidence, as well as the date of the submission, and its content (text or file).

![](https://d33v4339jhl8k0.cloudfront.net/docs/assets/5c98a4fe0428633d2cf3fcf7/images/6113a7fd6ffe270af2a97c76/file-5Js1MtD8Up.png)

### Ruling upon the dispute

Once the dispute goes into the voting stage (after the guardians have been summoned, and if you were one of them) it is time to vote if these actions should be permitted or not.

### **Voting**

When the voting time comes for an Aragon Govern dispute, you need to decide if the Actions should be allowed, blocked, or if you don't have enough context to rule upon it. Remember that if you voted with the majority (for any of the 3 aforementioned options) your tokens will not get slashed, and you will earn slashed tokens from whoever did not vote with the majority.

Voting is **MANDATORY** if you are summoned. If you don't cast your vote (the refusing to vote option is considered a cast vote as well) your tokens will be slashed.

**Allow action**

This means the transactions will happen if the majority votes for it.

**Block action**

This means the transactions will be canceled if the majority votes for it.

**Refuse to vote**

This means the transactions will happen if the majority refuses to vote.

![](https://d33v4339jhl8k0.cloudfront.net/docs/assets/5c98a4fe0428633d2cf3fcf7/images/6113a830766e8844fc34f672/file-IxTy2xkH3b.png)

### **Revealing vote**

To make sure guardians act without any bias, votes are kept secret during the voting phase. For this reason, when you commit your vote, you will be asked to save a one-time code to be used when the reveal phase starts.

You also have the option to enable the auto-reveal service.

![](https://d33v4339jhl8k0.cloudfront.net/docs/assets/5c98a4fe0428633d2cf3fcf7/images/6113a83f6ffe270af2a97c78/file-AfZaSlWkn6.png)

{% hint style="danger" %}

* Auto-reveal service might not be available sometimes. If this happens, please wait for about 2 minutes, and try again.
* If you do not enable auto-reveal, and do not manually reveal your vote when the reveal stage is available, the system will consider that you did not vote, and you will get your tokens slashed.
  {% endhint %}

![](https://d33v4339jhl8k0.cloudfront.net/docs/assets/5c98a4fe0428633d2cf3fcf7/images/6113a872b55c2b04bf6dd4e7/file-2ebMDlmKLp.png)

### Next steps

The next stages can be triggered by anyone in Aragon court (including you) but are not your responsibility. If a dispute is appealed, a new round of guardians will be summoned. If you are one of them, follow this same process again.


# Using the Client DAO with the Govern DAO

{% hint style="info" %}
In this article, we will show how to use the Client DAO with the Govern Execution Engine and how you can incorporate optimistic governance within your Aragon Client DAO.

We are going to use Aragon Govern to schedule, challenge, and execute proposals that will take effect on the Aragon Client DAO.

This will replace the Voting App with a cheaper governance mechanism that will also lower users' governance fatigue.
{% endhint %}

{% hint style="warning" %}
Aragon Govern is in Beta and the UI might have changed from the time of this article.
{% endhint %}

## Prerequisites:

1\. An Aragon Client DAO: you can create one [here](https://client.aragon.org).

2\. An Aragon Govern DAO: you can create one [here](https://aragon.org/aragon-govern).

{% hint style="danger" %}
Please, make sure both DAOs are on the same network.
{% endhint %}

3\. Grant the Govern Executor address desired permissions within the Aragon Client DAO. Follow [this](/products/aragon-client/explore-template-dao/system-setting/permissions-setting) article to learn how to do this. You should grant the permissions you want the Aragon Govern DAO to be able to schedule execution for.

If you want to replace the governance mechanism, then grant the Govern Executor the same set of permissions that the Voting App currently has and then revoke the Voting App's permissions. We would not recommend changing the Permission Manager from the Voting App as it will make setting up permissions complicated in the future.

## To get the Govern Executor Address:

1\. Go to your Aragon Govern DAO and press "DAO Settings"

![](https://d33v4339jhl8k0.cloudfront.net/docs/assets/5c98a4fe0428633d2cf3fcf7/images/61127c93b55c2b04bf6dcebe/file-TKEUQTEflm.png)

2\. Copy the address from the Govern Executor Address field

![](https://d33v4339jhl8k0.cloudfront.net/docs/assets/5c98a4fe0428633d2cf3fcf7/images/61127cbfb55c2b04bf6dcec3/file-ywEiJaplN9.png)

## Linked Execution:

1\. Go to your Aragon Govern DAO and press ***New Transaction***

2\. Populate \*\* **\_**&#x54;itle\*\*\_ and \_\*\*Justification\*\*\_ fields

3\. Press the ***Add new transaction*** button

![](https://d33v4339jhl8k0.cloudfront.net/docs/assets/5c98a4fe0428633d2cf3fcf7/images/61127d6664a230081ba1dc1f/file-aOxPU2RNOl.png)

4\. Select the \*\* ***External Contract*** \*\* option

5\. Enter "0x4c0960a290be920c92c5c2538e6d9d9e4d50e397" or any other unverified contract from Etherscan. We will change it later.

This is a workaround due to current Govern UI limitations. Hopefully, in the future, you will be able to avoid this step.

![](https://d33v4339jhl8k0.cloudfront.net/docs/assets/5c98a4fe0428633d2cf3fcf7/images/61127efa6ffe270af2a9766e/file-lPh3S1aIUP.png)

6\. When prompted with an \*\* **\_**&#x49;nput contract address\_\*\* change it with the address of the App from the Aragon Client DAO you would like to interact with.

You can find it on the \*\* ***Organisations*** \*\* page of your DAO portal. Look at the "INSTALLED ARAGON APPS" section there.

![](https://d33v4339jhl8k0.cloudfront.net/docs/assets/5c98a4fe0428633d2cf3fcf7/images/610d1014766e8844fc34e2cd/file-8cuqErvYC1.png)

7\. Into the \*\* **\_**&#x49;nput function ABI\_ \*\* field enter the ABI obtained with the following steps:

1\. Find the base contract of the selected Aragon App that you would like to interact with

a. Open the address that you have used in step 4 on [Etherscan](https://etherscan.io).

b. Go to ***Contract***

c. Select \*\* **\_**&#x52;ead contract\_ \*\*

d. Expand \*\* **\_**&#x49;mplementation\*\*\_\*\* \*\*

e. Open the address that appeared under ***implementation*** on [Etherscan](https://etherscan.io).

![](/files/gc4nWVgbQ2QJBoLePFN4)

2\. Copy the ABI of the opened address to the field in Step 5

a. Go to *Contract*

b. Select \*\* ***Code*** \*\*

c. Locate \*\* **\_**&#x43;ontract ABI\_ \*\*

d. Copy the ABI to the Govern Form ABI input field

![](/files/nKi03uSQtEzxUKykMeEa)

e. You should see a page similar to the following

![](https://d33v4339jhl8k0.cloudfront.net/docs/assets/5c98a4fe0428633d2cf3fcf7/images/611280b56ffe270af2a97676/file-PXPncUqoqC.png)

8\. Press the \*\* ***Select*** \*\* button and select the method you would like to invoke on the Client DAO App, then press ***Select***.

Here we will interact with the \*\* ***Finance*** \*\* app and we have selected to create a new payout from the Client DAO vault.

![](https://d33v4339jhl8k0.cloudfront.net/docs/assets/5c98a4fe0428633d2cf3fcf7/images/611281d4b55c2b04bf6dcede/file-bLujO4lFMW.png)

9\. Populate input parameters for this function call. Here, we will create a new immediate payment from the Finance app. It will transfer 0.1 ETH (represented by a 0x0..0 token address) to the 0x424... address.

![](https://d33v4339jhl8k0.cloudfront.net/docs/assets/5c98a4fe0428633d2cf3fcf7/images/61128276b37d837a3d0e2588/file-xmRD6BPguS.png)

10\. Press the ***Add new transaction*** button you would like to add more contract interactions to this proposal. Otherwise, press the ***Schedule*** button.

11\. Once the challenge period is over, you will be able to execute the actions that will take effect on the Aragon Client DAO.

## Possible Issues

{% hint style="warning" %}
If action execution fails there has been a mistake either in permissions, method parameters, or in the ABI and contract address. If you have not granted the right permissions to the Govern Executor Address please do so and try to execute the action again. If a mistake has been made in method parameters or ABI and contract address you will have to redo the whole process.

If you are populating fractional numbers, add 18 zeros to the original value. For example, if you want to invoke the immediateTransfer method that will transfer 10.5 tokens, you will have to input 10.5\*10^18 = 10500000000000000000 into the amount field.
{% endhint %}


# Aragon Voice

{% hint style="info" %}
In this section, you will learn what Aragon Voice is and how to create and execute a voting proposal using Aragon Voice.

The Aragon Voice product itself can be found [here](https://voice.aragon.org/).
{% endhint %}


# What is Aragon Voice?

[**Aragon Voice**](https://voice.aragon.org) is a new and universally verifiable voting solution that doesn't require the payment of the gas fees (it is gasless). Using Aragon Voice it is possible to submit proposals with any [standard ERC20](https://ethereum.org/en/developers/docs/standards/tokens/erc-20/) token and vote on the proposals using a decentralized end-to-end verifiable protocol.

Aragon Voice is **free to use**, meaning that no one is priced out of participation. Full transparency removes any doubt about the integrity of the ballot, meaning that communities are more likely to view ballots as unbiased and run fairly.

With Aragon Voice even the most humble token holder will be empowered to **propose** changing the exchange fee on a Balancer Pool and directly contributing to the development of their favorite project.

## Anyone with an Ethereum address can:

* Design and implement **on-chain proposals** for their ERC20 project, where **votes** can be cast **without gas fees**, and are recorded as metadata on IPFS.
* Signal proposals that use a centralized backend but are universally verifiable\* on our custom vote-counting blockchain (Vochain).

> \* from process creation to vote recount, every operation is transparent and can be freely audited by a third party. Voters themselves can also check that their vote has been counted properly using their ballot receipt to query the [Vochain explorer](https://explorer.vote).

{% hint style="warning" %}
Only on-chain proposal creators need to pay the gas costs of deploying the information to the mainnet. The votes are cast without gas fees.
{% endhint %}

Proposals are processed on Vochain (Aragon's layer 2 protocol) and vote metadata is stored on IPFS.

## **Vocdoni OpenStack**

To power Aragon Voice, we are using the Vocdoni OpenStack: **a fully anonymous voting protocol by design, ensuring data availability and censorship-resistant protocol communication**.

This technology is also the base for Vochain, a layer-2 (L2) voting-specific blockchain, used for accounting ballots transparently.

The result is a completely permissionless, decentralized, and highly scalable governance solution for DAOs and other initiatives that make use of ERC20 tokens.

{% hint style="info" %}
Aragon Voice can be used for permissionless signaling, dispute resolution and deterministic on-chain execution when combined with Aragon Court and Aragon Govern.
{% endhint %}


# Creating a voting proposal

## Steps to create a voting proposal

To create a proposal go [here](https://voice.aragon.org) and connect your web3 wallet.

{% hint style="info" %}
If you need help with this task go [here](/products/set-up-metamask).
{% endhint %}

Please select Ethereum Mainnet in your wallet.

![](/files/WQIybVPCWu8BpLqzwyl2)

Select the project where you want to make a proposal and click the ***Create new proposal***\*\* \*\* button.

{% hint style="info" %}
In this example, we selected Aragon Network Token (ANT).
{% endhint %}

![](/files/z1txNujxgu4aXLAwgxK7)

Select the type of the new proposal:

* **Signaling proposal**: gasless proposal creation using Vochain layer 2 solutions. (For example, a Signaling proposal is great for an initial discussion, and collecting feedback).
* **On-chain proposal**: metadata is stored on Ethereum, increasing decentralization and verifiability. (For example, on-chain proposal can be created after the community has discussed the signaling proposal and provided feedback).

Fill in all the fields in the new proposal.

{% hint style="info" %}
**Title:** insert a title for your proposal

**Description:** a description of what your proposal is about

**Proposal date:** the period during which the vote is open

**Question:** a short description of what the vote is about

**Description:** a description of what the vote is about

**Add question:** if your proposal has more than one vote
{% endhint %}

Click ***create proposal***\*\* \*\* and approve the transaction on your wallet.

![](/files/x1NZQClNu5eJBIXgCLWX)


# Creating a voting proposal using your token

## Steps to create a voting proposal using your token

To create a voting proposal go [here](https://voice.aragon.org) and connect your web3 wallet.

{% hint style="info" %}
If you need help with this task, go [here](/products/set-up-metamask).
{% endhint %}

Expand the view with ***all tokens*** button and click ***Register a token***.

![](/files/mAs8f4Uws8qykHPHaZ6d)

Insert the token smart contract and validate the contract.

![](/files/fVtM6tMDtPICsmDTx0E3)

Return to the main token page [https://voice.aragon.org/](https://voice.aragon.org), select your token in the ***Tokens you hold** category,* and create a new proposal as described [here](/products/aragon-voice/creating-a-voting-proposal).

![](/files/tik7es62QwcpyeZmMzBI)


# Voting on a proposal

## Steps to vote on a proposal

To vote a proposal go [here](https://voice.aragon.org) and connect your web3 wallet.

{% hint style="info" %}
If you need help with this task, go [here](/products/set-up-metamask).
{% endhint %}

Please select the Ethereum network in your wallet.

![](/files/WQIybVPCWu8BpLqzwyl2)

Select the project where you want to cast a vote.

{% hint style="info" %}
In this example, we selected Aragon Network (ANT).
{% endhint %}

![](/files/z1txNujxgu4aXLAwgxK7)

On the ***Token details page**,* you can see all the \*\* **\_**&#x41;ctive votes\*\*\_\*\* \*\* and the ***Vote results.*** Select the proposal you want to vote for (in our example there are no proposals to vote for) and cast your vote.

![](/files/yS3em2RbxcrMxanup1JX)

![](/files/kmLPB6M2bxlTbW3nDkew)


# Aragon Court

{% hint style="info" %}
In this section, you will learn what is Aragon Court and how to use it.

The Aragon Court product itself can be found [here](https://court.aragon.org/#/dashboard).
{% endhint %}


# What is Aragon Court

Aragon Court is a **dispute resolution** protocol that handles subjective disputes that cannot be solved by smart contracts. This is achieved by having a **set of guardians** drafted for each dispute **who will vote to guarantee a certain ruling.**

![](https://d33v4339jhl8k0.cloudfront.net/docs/assets/5c98a4fe0428633d2cf3fcf7/images/5e3afa9104286364bc94e693/file-nGEAP7l6NI.jpg)

## Aragon Court fundamentals

**Guardians sign up** to get drafted into the court by **activating ANT** tokens in Aragon Court's smart contract. The more tokens a guardian has activated, the higher the probability of getting drafted.

## Plurality rule

Unlike traditional courts, Aragon Court guardians are not asked to rule impartially on disputes but instead are asked **to rule the way they expect the plurality of guardians to rule.** Aragon Court attempts to find what the subjective truth is (i.e. the most correct outcome of a dispute) with a [Schelling point](https://en.wikipedia.org/wiki/Focal_point_\(game_theory\)). Every time a guardian is drafted for a dispute, a portion of their activated tokens is locked until the dispute is finalized. To incentivize consensus, guardians who don’t vote in favor of the final ruling have their locked tokens slashed. Guardians who vote in favor of the final ruling are rewarded with dispute fees and tokens from any guardians who voted for a minority ruling.

## Proof of stake

Aragon Court is a **permissionless protocol** where any participant can come and go without asking for anyone's authorization. Therefore, the protocol must function with integrity even in the presence of malicious actors, who may pose as multiple guardians at once to "Sybil attack" the Court. The defense against these attacks begins with a simple **staking system where guardian impact is weighted by their active stake of tokens**.

You may be thinking that if a cartel gets a majority of tokens, they'll have a majority weight and attack the system unopposed since they'll influence more than 50% of the decisions. Aragon Court, however. uses multiple countermeasures including iterative appeals, commit and reveal voting, and locked withdrawal periods that are designed to dissuade a cartel from acquiring tokens and abusing Aragon court.

## Guardian responsibilities

Guardians are expected to perform certain duties and responsibilities, like reviewing arguments for a dispute and casting a vote. To help guardians properly execute their tasks, the Aragon Court Dashboard is available and provides all the tools they need.

{% hint style="info" %}
You can learn more about the Dashboard [here](/products/aragon-court/court-dashboard) and the details of dispute resolution here.
{% endhint %}


# Court Dashboard

{% hint style="info" %}
In this section, we will explore the Aragon Court Dashboard.
{% endhint %}

## What is the Aragon Court Dashboard?

The Aragon Court Dashboard is the central app where all dispute-related tools are available for guardians. It also contains **detailed information about past and current disputes**, including arguments, rulings, timelines, and much more.

The following guide presents an overview of the various sections of the Dashboard.

![](/files/BgqcQPYFbzOFfRZkUfR2)

## **Connecting to the Dashboard**

The Dashboard is accessible to all users at [court.aragon.org](https://court.aragon.org). General information and statistics are available on the main page as well as more specific information related to disputes, tasks, and guardians on their respective pages.

You need to connect your Ethereum account to the Aragon Court Dashboard to use your app. To do so, simply click on the ***Connect account*** button at the upper right and select the provider of your choice.

![](/files/Vq2ajSnDuGuwcs9ORJCK)

On the top of the dashboard, you can see a countdown timer for the current **Court Term**. Time in Aragon Court is measured in Court Terms, and **each term lasts for 8 hours**.

{% hint style="warning" %}
Occasionally you may see a message on this countdown timer that says "Term needs updating".

Aragon hosts the Aragon Court Dashboard instance at [court.aragon.org](https://court.aragon.org) and runs an automated service that will automatically update the Court within a couple of hours of the term ending, so this message can be disregarded.
{% endhint %}

![](/files/tjLa5zfZOu7xSubKxdmq)

## **Notifications**

Aragon Court guardians can sign up for email notifications to be notified of important events, such as when they have been drafted to a dispute, task reminders, and more.

Email notifications are important so that as a guardian you do not miss out on any important tasks.

{% hint style="danger" %}
**Remember that if you do not complete the required tasks, you will lose a portion of your locked tokens (more info about this** [**here**](https://help.aragon.org/article/43-dispute-lifecycle#drafting-jury)**).**

It is strongly recommended that you sign up for email notifications and monitor them closely while you are an active guardian. If you fail to complete your tasks on time, you will lose your money.
{% endhint %}

To opt-in, click the \*\* **\_**&#x67;ear-shaped\*\*\_ Settings icon in the top corner and click \_\*\*Notifications\*\*\_.

![](/files/hNdUMuX3CWMAbpBKpFHd)

Click **Unlock notification settings**. Sign the message on the prompt to prove ownership of your Ethereum address, so that you can modify your notification settings.

![](/files/7oeuY2RLZoe2P0hwZMeU)

Once you have proven ownership of your address, you will be able to enter your email address to opt-in to notifications.

After entering your email address, a verification email will be sent to your email address (if you don't see it in the inbox, check the Spam folder). Click the link in the verification email to confirm your address.

![](/files/4k7i7i01pPK5nwu7w2i3)

After you successfully verify your email address, click the ***x*** button in the top corner to close the notification verification window then re-enable your Ethereum account on the main Dashboard page.

You will then be able to go back to the Notifications section of the Settings menu to manage your notification subscription.

![](/files/5dDLf6wA69y8JObQVyll)

## **Balances**

![](/files/o9Zz53bGiKvAxg46SKS7)

The first section you will see at the top of the Dashboard contains your token balance information.

This section is divided into three columns:

* My wallet
* Inactive
* Active

Each column contains its history of recent actions executed in the last 24 hours.

#### The **wallet** shows the number of tokens that your Ethereum wallet currently contains and its relative value in US dollars.

{% hint style="info" %}
Those tokens are not being managed by the Court and are at any given time fully under your control. To activate them and increase your chances of being drafted as a guardian, you can click the Activate button at the bottom of the section and a side panel will appear asking for the amount of tokens that you want to activate. The amount will be transferred to the Active section once the transaction is executed.
{% endhint %}

#### The second column contains your **Inactive token** balance along with its value in US dollars. Inactive tokens are held in the Court contract but don't increase your probability of being drafted.

Two actions are available when you have an inactive balance:

* **Withdraw:** Withdraws a specified portion of the inactive tokens to your wallet.
* **Activate:** Activates a specified portion of the inactive tokens and transfers it to the Active section.

#### The third column contains your **Active tokens.** Active tokens serve three main purposes:

* They determine your probability of being drafted as a guardian. The higher the amount, the higher the probability.
* Subscription rewards are directly proportional to active tokens.

{% hint style="info" %}
[Click here](#rewards) to learn more about the different types of rewards.
{% endhint %}

* To incentivize consensus decisions and honest behaviors, a portion of your active tokens are locked when drafted for a dispute and you can get rewarded or penalized depending on the final ruling.

{% hint style="info" %}
[Click here ](/products/aragon-court/dispute-lifecycle)to learn more about disputes.
{% endhint %}

The ***Deactivate*** button can be used to transfer tokens to an inactive state.

{% hint style="danger" %}
Tokens do not get deactivated immediately, but only at the start of the next term (reminder here that each term currently lasts for 8 hours). You can still be drafted to rule on a dispute before your tokens are deactivated. After you rule on the dispute, your deactivated tokens will enter an inactive state.
{% endhint %}

#### Finally, at the top of the section, you can see in real-time your probability of being drafted as a guardian.

The more tokens you have activated relative to the rest of the tokens other guardians have activated, the higher the probability will be.

## **Tasks**

#### Aragon Court requires certain tasks to be executed at various points in the lifecycle of a dispute. Some tasks can be executed by anyone while others are strictly assigned to specific accounts.

You can quickly see every task assigned to you along with their due date in the \*\* **\_**&#x55;pcoming Tasks\*\*\_ section of the main page. A page dedicated to tasks is also available by clicking the \_\*\*Tasks\*\*\_ menu item in the left side panel.

If you are concerned about missing important tasks, don't worry, if you signed up for email notifications then notifications about your tasks will be sent directly to your email inbox.

![](/files/G1XXtuAMK9JVEJV5vXnX)

#### The following list contains every task you may encounter:

* **Summon Guardians:** This task must be executed at the beginning of a round to select the guardians. Anyone can execute this task by clicking on the ***Summon Guardians*** button of the dispute. A small DAI reward is granted for successfully executing the task.
* **Commit vote**: One of the most important tasks in Aragon Court. When a guardian is drafted to adjudicate a dispute, their duty is to review the submitted arguments and commit a vote within the voting period limit. Failure to execute this action would penalize the guardian.

{% hint style="info" %}
Click [here](/products/aragon-court/dispute-lifecycle) for more information about committing votes.
{% endhint %}

* **Reveal vote**: Since votes are secret until the end of the voting period, a task is also needed in order for the ruling to be revealed. However, an option is available to make this task fully automated.

{% hint style="info" %}
Click [here](/products/aragon-court/dispute-lifecycle) to learn more about revealing votes.
{% endhint %}

* **Appeal ruling**: Once the ruling is revealed, it can be appealed by anyone who disagrees with its result. Be aware that you need to lock an amount of DAI to appeal a ruling. You will get rewarded if the ruling ends up turning in your favor at the end of the dispute.

{% hint style="info" %}
Learn more about appeals[ here](/products/aragon-court/dispute-lifecycle).
{% endhint %}

* **Confirm appeal:** To officially appeal a ruling and launch a new adjudication round, a second account also needs to lock an amount of DAI to confirm that there is indeed a need for an appeal.

{% hint style="info" %}
Learn more about appeal confirmation [here.](/products/aragon-court/dispute-lifecycle)
{% endhint %}

* **Execute ruling**: If no appeal has been requested and confirmed within their respective periods of time, the "Execute ruling" task is available to finalize the dispute.

{% hint style="info" %}
[Click here](/products/aragon-court/dispute-lifecycle) to learn more about final rulings.
{% endhint %}

## **Rewards** <a href="#rewards" id="rewards"></a>

Rewards can be obtained in multiple ways, both as a guardian and as a normal user.

![](/files/GF0UgeoSZWwCDaQOm14z)

### **As a guardian:**

* **Subscription fees:** You earn a monthly reward, in DAI, proportional to your active tokens, whether you are drafted or not.
* **Dispute fees:** If drafted, you earn reward for ruling in favor of the dispute's final ruling.
* **Ruling fees:** The locked tokens of guardians who voted in the minority in a given dispute are redistributed to guardians who voted in the [plurality](/products/aragon-court/aragon-court) according to the final ruling. Ruling fees are automatically transferred to your inactive wallet.

{% hint style="info" %}
Click [here](/products/aragon-court/dispute-lifecycle) for further information about ruling fees.
{% endhint %}

### **As a normal user:**

* **Maintenance action fees:** Certain tasks (e.g. draft jury) reward the user with a small amount of DAI.
* **Appeal Fees:** Anyone can earn a reward in DAI for successfully appealing a dispute (i.e. correctly predicting a dispute's final ruling).

{% hint style="info" %}
Click [here ](/products/aragon-court/dispute-lifecycle)for further information about appeal fees.
{% endhint %}

## **Subscription rewards**

As mentioned above, through subscription fees activated guardians can earn a monthly reward, in DAI, proportional to their active tokens, whether they are drafted or not.

### However, there are a few relevant factors guardians should consider about how these rewards are computed.

Subscription rewards can be claimed by guardians after each Court period.

{% hint style="info" %}
Note that Court periods are not the same as Court terms.

Each Court period lasts 90 Court terms, and with each term lasting 8 hours, this means each Court period lasts exactly 30 days.
{% endhint %}

Since subscription rewards are computed based on the active tokens each guardian has, we need to define a checkpoint in the whole Court period to check these balances and assign a portion of all the subscription fees to each guardian.

Because a guardian's balance can change during each period, to avoid gaming we are using the randomness assigned to the first Court term of the following period, i.e. a future event that cannot be known beforehand.

This effectively means that the longer guardians keep their tokens activated, the higher their chances to receive a portion of the subscription fees being assigned among them.

{% hint style="info" %}
For example, for the first period of Aragon Court, the resulting random checkpoint was the Court Term #84. This means if you had the minimum necessary tokens activated in Court Term #84, then you are eligible to claim rewards for the first Court period.
{% endhint %}

**So, to increase your chances of receiving subscription rewards after each Court period, you should keep your tokens activated as long as possible.**

## **Disputes**

![](/files/V9DD6xzzEKPlQ7vb2BIh)

### Disputes are at the core of Aragon Court.

A dedicated page can be accessed by clicking the ***Disputes***\*\* \*\* menu item in the side panel where you will see a list of disputes related to your account as well as every other past and active dispute.

**By clicking on one of them, you will get redirected to a page containing all the relevant details to this specific dispute, like its current status, description, timeline, and arguments.**

Additionally, every single task related to a dispute can be executed from here.

{% hint style="info" %}
[Click here](/products/aragon-court/dispute-lifecycle) for a complete guide about the lifecycle of disputes and what you need to do as a guardian to manage them.
{% endhint %}

![](/files/D8UwxuRMO8y39A2nP39A)


# Dispute lifecycle

{% hint style="info" %}
In this section, you will learn what is a dispute lifecycle. The following guide aims to cover all the information you need to know as a guardian to understand a dispute's lifecycle and its related tasks so you can have the best experience possible using the Aragon Court Dashboard. For an overview of the Dashboard and its modules, [click here.](/products/aragon-court/court-dashboard)
{% endhint %}

![](/files/553RPst3XPi0bLR4BnoO)

The Court's main unit of time is called a **term**, which is currently set to **eight hours**. Every period in Aragon Court is composed of terms (e.g. the vote commit duration lasts six terms or two days).

The current term and its remaining time are always displayed at the top of the dashboard.

As for disputes, they essentially observe the following lifecycle:

* **Pre-draft state:** Dispute creation, and evidence submission.
* **Adjudication rounds:** Adjudication rounds are where guardians are drafted, review the dispute's evidence, then cast and reveal their votes. Disputes can be made up of multiple rounds if the first round's ruling is appealed.
* **Final ruling:** Dispute is settled.

## **Dispute creation and evidence submission**

Disputes can be created by any entity subscribed to Aragon Court.

Once a dispute is created, a period of seven days is allowed to submit evidence that will later be reviewed by guardians. During this period, the dispute creator can also decide to close the evidence submission at any point in time. Evidence can be submitted in text format but HTTP and IPFS links are also accepted.

No action is required by guardians during this period.

## **Summoning Guardians**

![](/files/ZWg4ZWfE35kGeHvhWFNW)

#### After the evidence period is over, the first adjudication round is initiated and the Summon guardians period begins.

The only task required during this period is to click on the Summon guardians button on the dispute page. Anybody can execute this task and receive a DAI reward proportional to the number of guardians being drafted. The current draft reward amount is <mark style="color:blue;">`Draft_Fee`</mark> per guardian.

Your chances of being drafted as a guardian are directly proportional to your active amount of tokens.

**If you get selected as a guardian,** here are a few things you need to know:

* **You will receive an email notification containing information about the dispute and the next steps for you (if you subscribed to email notifications).**
* **A portion of your active tokens will be locked until the final ruling is confirmed.** The main purpose of locking your active tokens is to incentivize consensus decisions and honest behavior. The exact locked amount is equal to 30% off the minimum active balance for each time you get drafted. The minimum active balance is currently <mark style="color:blue;">`Min_Active_Balance`</mark>, therefore the amount locked would be <mark style="color:blue;">`Min_Active_Balance x 0.3`</mark>.
* **It's possible to get drafted multiple times for the same dispute, if there are appeal rounds.** In that case, the amount locked will be multiplied by the number of times you are being drafted. The voting power will also be proportional to this number. For example, a guardian getting drafted twice for a dispute would have <mark style="color:blue;">`Min_Active_Balance x 0.3 x 2`</mark> locked and twice the normal voting weight.
* **Neither your inactive tokens nor the tokens contained in your wallet will be locked, only a portion of your active tokens.**

## **Vote commit** <a href="#votecommit" id="votecommit"></a>

{% hint style="danger" %}
The voting period is critical for a drafted guardian.
{% endhint %}

What you must do within the allocated time is first to review the evidence, then to try anticipating what the voting decision of the plurality of guardians will be.

This seems counterintuitive at first. Aragon Court is not exactly functioning like most legacy court systems in which every guardian is asked for their unbiased opinion. If this would be the case, it would be unfair to penalize the ruling minority. Instead, guardians are incentivized to reach consensus and are rewarded or penalized accordingly.

Most importantly, it is essential to cast a vote since failing to do so will result in financial penalties for you.

**Failing to cast a vote will result in your locked tokens getting slashed and redistributed to the winning guardians after the final ruling - so make sure to commit and reveal your vote in the allotted time periods.**

{% hint style="info" %}
The vote commit period lasts two days.
{% endhint %}

## Steps required to cast a vote:

### **Select one of the three voting choices.**

Three choices are available: voting to **Allow** the action being disputed, voting to **Block** the action, or **Refuse to vote**.

You can choose to refuse to vote for many reasons, for example, if you consider that the evidence was not conclusive enough or the description was incoherent.

{% hint style="warning" %}
Remember that you should vote the way that you think a plurality of guardians will vote, since you will be penalized if your vote is in the minority.
{% endhint %}

### **One-time-use-code**

To keep the votes secret until the end of the voting period, your vote will be combined with a randomly generated code.

{% hint style="warning" %}
For security purposes, it's important that you save this code somewhere safe (such as inside a password manager) and do not share it with anyone.
{% endhint %}

**Enable Court Auto-reveal service** is a convenient option available if you want your vote to be revealed automatically during the next phase. If you select this option, you are relying on Aragon, which hosts the Aragon Court Dashboard at [court.aragon.org](https://court.aragon.org), to cast your reveal transaction on time. Otherwise, manual action will be necessary during the Reveal period.

Click the **Commit your vote** button to send the transaction.

### **Leaking the secret one-time-use code**

If you leak your one-time-use-code, either on accident or on purpose, you could be **penalized**. This will put you on the losing side of a dispute even if you cast your vote for the plurality outcome, and your locked tokens will be redistributed to the plurality guardians after the final ruling. This mechanism is in place to dis-incentivize cheating/ collusion among guardians.

If another guardian leaks their one-time-use code then you can penalize them using the following steps (this will be added to the guardian dashboard for ease of use in the near future).

**Step 1.** Visit the **"leak"** section of the Aragon Court ["write contract page"](https://etherscan.io/address/0x96D7B5E5372743Abc69d1eAc714e893fA71d3baa#writeContract) on Etherscan.

**Step 2.** Fill out the form fields with the following information:

* \_voteId: enter the **vote ID** that the guardian is leaking their code for.
  * To get the vote ID, go to the Aragon Court subgraph ["Disputes and rounds with votes"](https://thegraph.com/explorer/subgraph/aragon/aragon-court?query=Disputes%20and%20rounds%20with%20votes) section, enter the Dispute # in place of "0" where it says {id\_in: \[0]}, then press Ctrl+Enter on your keyboard to execute the query. On the right side of the query box it will say "vote": "id": "0". In this case 0 is the vote ID. Note that the vote ID will be different for any dispute other than Dispute #0.
* \_voter: the **Ethereum address** of the cheating guardian.
* \_outcome: the outcome the cheating guardian submitted. It can be a 2 (Refuse to rule), a 3 (Against), or a 4 (In favor).
* \_salt: the **salt** the cheating guardian used to commit the vote
  * To get the salt, take the one-time-use code that was leaked and enter it as the "Input" on [this Keccak256 conversion tool](https://emn178.github.io/online-tools/keccak_256.html) then press the "Hash" button. The result in the "Output" box is what you should copy/paste into the \_salt field.

{% hint style="info" %}
**An example of the completed form looks like this:**

Step 3. Click the "write" button, then sign and send the transaction. Once the transaction is confirmed, the guardian who leaked their one-time-use code will be penalized.
{% endhint %}

## **Vote reveal** <a href="#votereveal" id="votereveal"></a>

After the voting period has ended, guardians will have **two days** to reveal their vote.

If you enabled the **Auto-reveal service**, there is no action required from you at this stage. Otherwise, simply click on the **Reveal your vote** button. Your one-time code shouldn't be necessary unless a problem occurred within the court, but if it is needed, you'll be prompted to retrieve it from the safe place you stored it and enter it into the guardian app.

## **Appeal and appeal confirmation**

**Now that the votes are revealed, you can see whether you voted with the plurality or not.** But before the ruling can be executed, an appeal period is started during which any user can lock DAI as collateral to propose an appeal. Appeal collateral amounts can be found in the Aragon Court FAQ.

{% hint style="info" %}
An appeal must be confirmed by a second user to officially start a new round. Appeal confirmation collateral amounts can be found in the [Aragon Court FAQ](/faq/products/aragon-court-faq).
{% endhint %}

{% hint style="success" %}
**If an appeal is confirmed.**

A new adjudication round is initiated and a new jury is drafted. With each new appeal, the number of guardians is multiplied by **three**. The appeal and appeal confirmation periods both last **two days.**
{% endhint %}

{% hint style="danger" %}
**If an appeal is not confirmed**

The outcome proposed by the appealing party wins. For example, if the ruling of the previous round was "Allow" and the appealing party proposes an "Block" ruling, and no one confirms the appeal, then the final ruling will be "Block".
{% endhint %}

### When the final ruling is confirmed:

* if the ruling has switched in favor of the user who appealed (the "appealing party") then the collateral of the user who confirmed the appeal (the "confirming party") is redistributed to the appealing party.
* If the ruling is in favor of the confirming party, then the collateral of the appealing party is redistributed to the confirming party.
* If the final ruling is in neither the appealing party nor the confirming party's favor, then both the appealing party and confirming party get their collateral back minus a fee that goes to the guardians who voted in the plurality.

## **Final ruling**

Once a ruling has been decided without any appeal, the final ruling is sent to the smart contract that triggered the dispute and all the adjudication rounds for the dispute can be settled taking into account the final ruling for rewards and penalties.

{% hint style="success" %}
**If you voted as a guardian with the plurality of guardians in the final ruling.**

You just earned a percentage of the slashed tokens from guardians who voted in the minority.
{% endhint %}

{% hint style="danger" %}
**If you voted with the minority**

Your locked tokens are redistributed to the guardians who voted with the plurality in the final ruling.
{% endhint %}

## **Final appeal round**

The maximum number of appeal rounds is not infinite, it is currently set to **four**.

{% hint style="success" %}
**If an appeal is still confirmed after the maximum allowed is reached.**

A final round is initiated where the number of guardians equal to <mark style="color:blue;">`total active stake / Min_Active_Balance`</mark> is drafted, in which case all drafted guardians will be required to make up and safely store a secret passphrase to vote. The auto-reveal service is currently disabled for the final appeal round, so guardians will have to manually reveal their vote with their secret passphrase during the final reveal period.
{% endhint %}


# Acting as guardian for a dispute

{% hint style="info" %}
In this section, we will explain how to act as a guardian for an Aragon Govern dispute.
{% endhint %}

{% hint style="info" %}
The first use case for Aragon Court is the subjective dispute resolution for [Aragon Govern](/products/aragon-govern) DAOs, enabling optimistic governance to take place with an extra layer of security.

Whenever an Aragon Govern transaction is challenged, a new dispute is created in Aragon Court. If you get summoned as a guardian for this kind of dispute, this is what you need to know.
{% endhint %}

## **Understanding the content**

### **Dispute fields**

![](https://d33v4339jhl8k0.cloudfront.net/docs/assets/5c98a4fe0428633d2cf3fcf7/images/6113a430766e8844fc34f656/file-WrG7lYSfrJ.png)

* **Description**: The basic description of the transactions. This should provide you with additional context on what the transaction is about.
* **Agreement**: The agreement or contract that supports this transaction. All Aragon Govern DAOs MUST have a human-readable agreement that states how the DAO intends to operate, and what actions should be allowed or not. For example, an agreement might say that a given DAO can only invest in sustainability projects, and the action instead intends to transfer funds to a car manufacturing company.
* **Executor**: The address of the contract that will execute this transaction.
* **Dispute creator**: The address of the person/contract that created the dispute.
* **Actions**: The set of transactions that will be executed if the dispute is ruled in favor of who created this.
* **Original justification**: This is a human-readable justification stating why actions were scheduled to be executed. For example, the creator might say something like "Transferring funds to a project that is creating a carbon footprint offset device". This is added by the actions creator when scheduling the actions.
* **Dispute evidence**: The justification of why the actions are being challenged. For example, something like "The destination address belongs to a car manufacturing company, and therefore we should not allow this transferring of the funds". This is added by the person that challenged the actions.

### **What are Actions?**

**Actions are nothing more than smart contract transactions that have been scheduled with an Aragon Govern DAO.** Those can be any interaction with an EVM-compatible blockchain, such as transferring funds, minting tokens, swapping tokens, etc.

On Aragon Govern, an action can be a bundle of several transactions. This is what is shown in Aragon Court. Understanding the Actions is primordial to be able to rule on this dispute.

![](https://d33v4339jhl8k0.cloudfront.net/docs/assets/5c98a4fe0428633d2cf3fcf7/images/61139fe464a230081ba1e1d8/file-MUdTAgjhC3.png)

{% hint style="info" %}
**The action contains the following information:**

* **To**: Smart contract that will receive the transaction
* **Value**: Optional amount of ETH being sent in the transaction
* **Function to be called**: Name of the function being called in the "**To**" smart contract
* **Data**: The parameters being sent to the function.
  {% endhint %}

![](https://d33v4339jhl8k0.cloudfront.net/docs/assets/5c98a4fe0428633d2cf3fcf7/images/6113a04bb37d837a3d0e2b5d/file-EGn7CGNTer.png)

{% hint style="info" %}
If you want to dig deeper and understand what a given function does, and what each parameter is used for, click on the **TO address** and open it on Etherscan. There you should be able to see details of the contract and function code.
{% endhint %}

{% hint style="warning" %}
Sometimes the function and data might not be available (when the contract is not verified on Etherscan ([Learn More](https://etherscan.io/verifyContract)). In this case, you will see the **Raw Data**, which can still be decompiled if you research the destination contract.
{% endhint %}

![](https://d33v4339jhl8k0.cloudfront.net/docs/assets/5c98a4fe0428633d2cf3fcf7/images/6113a0e26ffe270af2a97c43/file-xCv7UHQxZH.png)

You can always click on the addresses to check the contracts on Etherscan to better understand what the transactions will be performing.

### **The Pieces of Evidence**

As mentioned, whenever someone schedules transactions on Aragon Govern or challenges these, they are required to provide evidence on why they are doing so. The evidence section of Aragon Court shows the address of the person that submitted the evidence, as well as the date of the submission, and its content (text or file).

![](https://d33v4339jhl8k0.cloudfront.net/docs/assets/5c98a4fe0428633d2cf3fcf7/images/6113a7fd6ffe270af2a97c76/file-5Js1MtD8Up.png)

### Ruling upon the dispute

Once the dispute goes into the voting stage (after the guardians have been summoned, and you were one of them) it is time to vote if these actions should be permitted or not.

### **Voting**

When the voting time comes for an Aragon Govern dispute, you need to decide if the Actions should be allowed, blocked, or if you don't have enough context to rule upon it.

{% hint style="warning" %}
Remember that if you voted with the majority (for any of the 3 aforementioned options) your tokens will not get slashed, and you will earn slashed tokens from whoever did not vote with the majority. Take the time to deeply think about what is the right decision here.
{% endhint %}

Voting is **MANDATORY** if you are summoned. If you don't cast your vote (The refuse to vote option is considered a cast as well) your tokens will be slashed.

* **Allow action**: transactions take place if the majority votes for it.
* **Block action**: transactions are canceled if the majority votes for them.
* **Refuse to vote**: transactions take place if the majority refuses to vote.

![](https://d33v4339jhl8k0.cloudfront.net/docs/assets/5c98a4fe0428633d2cf3fcf7/images/6113a830766e8844fc34f672/file-IxTy2xkH3b.png)

### **Revealing vote**

To make sure guardians act without any bias, votes are kept secret during the voting phase. For this reason, when you commit your vote, you will be asked to save a one-time code to be used when the reveal phase starts.

You also have the option to enable the auto-reveal service.

![](https://d33v4339jhl8k0.cloudfront.net/docs/assets/5c98a4fe0428633d2cf3fcf7/images/6113a83f6ffe270af2a97c78/file-AfZaSlWkn6.png)

{% hint style="danger" %}

* Auto-reveal service might not be available sometimes. If this happens, please wait for about 2 minutes, and try again.
* If you do not enable auto-reveal and do not manually reveal your vote when the reveal stage is available, the system will consider that you did not vote, and you will get your tokens slashed.
  {% endhint %}

![](https://d33v4339jhl8k0.cloudfront.net/docs/assets/5c98a4fe0428633d2cf3fcf7/images/6113a872b55c2b04bf6dd4e7/file-2ebMDlmKLp.png)

### Next steps

The next stages can be triggered by anyone in Aragon court (including you) but are not your responsibility. If a dispute is appealed, a new round of guardians will be summoned. If you are one of them, follow this same process again.


# Glossary

{% hint style="info" %}
*Find below a list of unique terms that you may encounter when using Aragon Court. You can learn more about these concepts and why they matter to you as an Aragon Court user by reading through the rest of the* [*Aragon Court documentation*](/products/aragon-court)*.*
{% endhint %}

### Appeal

When someone disagrees with the preliminary ruling of a dispute, they can challenge the outcome and escalate the dispute to the next round of jury voting. Each appeal round brings in a larger and larger group of guardians until the fourth and final appeal round, when all active guardians are invited to vote on the final ruling.

### **Aragon Court**

A blockchain-based dispute resolution protocol that uses randomly selected guardians to resolve subjective disputes.

### **Arguments**

Text, audio, video, and images put forth to make a case in favor of one of the possible dispute outcomes (Allow, Block, or Refuse to vote).

### **Commit and reveal voting**

When a vote is first committed in secret, and then revealed at a later designated time. This voting mechanism is used to incentivize guardians to select the ruling that they believe a plurality of other guardians will select.

### **Dispute**

When an Aragon Court subscriber believes that a subjective agreement they are party to has been violated and they decide to try to block the disputable action or proposal using Aragon Court.

### **Draft/ Summon guardians**

The process of randomly selecting guardians for a new dispute round from the pool of active guardians.

### **Final ruling**

The final ruling of a dispute is one of either:

1. The ruling that a plurality of guardians in the current round have voted for, provided there has been no appeal or it is the final appeal round, or
2. The ruling proposed by an appealing party, provided that no one challenges the appeal.

### **Guardian**

A participant in the Aragon Court protocol who has locked and activated a specified minimum amount of tokens, making them eligible to be drafted to resolve disputes brought before the court.

### **Period**

Disputes are broken up into multiple periods, which are themselves each made up of a specific number of terms. The periods of a dispute are:

* Argument submission (optional)
* Vote commit
* Vote reveal
* Appeal
* Appeal challenge

### **Plurality rule**

When the winning outcome of a vote is determined by the option that has the most votes, as opposed to majority rule where the winning outcome is determined by the option that has the majority of votes.

### **Preliminary ruling**

The ruling selected by the plurality of guardians in the current dispute round, which may become the final ruling provided there is no appeal.

### **Rewards**

Aragon Court offers financial rewards to users who successfully perform certain actions, such as summoning guardians, appealing preliminary rulings, and voting in favor of the final ruling of a dispute. Some rewards, such as dispute fees, ruling fees, and subscription fees, are only given to active guardians. Other rewards, such as appeal fees and maintenance fees, can be earned by anyone.

### **Round**

Aragon Court disputes are made up of at most five rounds of guardians deliberation. Disputes are escalated from one round to the next only if someone appeals the preliminary ruling and someone else challenges the appeal.

### **Slash**

When a guardian either fails to perform their tasks on time, has their vote leaked, or votes incoherently i.e. against the final ruling, their locked ANT is taken from them ("slashed") and redistributed to guardians who ruled in favor of the final ruling.

### **Term**

The basic unit of time in Aragon Court. One term is equal to 8 hours.


# Legacy Developer Documentation

{% hint style="danger" %}
The products and developer tools in this documentation are Aragon Legacy Products & Tools and are no longer being maintained. For a better experience and support **check out our newest Aragon Products and OSx** [**here**](https://aragon.org)**.**
{% endhint %}

Welcome to the Aragon Legacy Developer Documentation.

* Get started [here](/developers/tools/the-basics/getting-started).
* Take the tutorial [here](/developers/tools/guides/custom-deploy).

#### General tools:

* <img src="/files/kZUFaBfsp6D40pgGr83v" alt="" data-size="line"> [**aragonPM**](https://github.com/aragon/documentation/blob/legacy_docs/developers/developers/tools/aragonpm/README.md): Decentralized package manager based on aragonOS that handles upgreadability of smart contracts and arbitrary data blobs, such as webapps.
* <img src="/files/BNA3UU2SUa2IqJSQZtjS" alt="" data-size="line"> [**aragonOS**](https://github.com/aragon/documentation/blob/legacy_docs/developers/developers/tools/aragonos/README.md) Framework: that enables flexible and upgradeable governance mechanisms by creating and assigning permissions to multiple entities.
* <img src="/files/HcR8ZScnMJ9Vg0nATXvi" alt="" data-size="line"> [**aragonAPI**](https://github.com/aragon/documentation/blob/legacy_docs/developers/developers/tools/aragonapi/README.md) Standard: set of APIs and specifications used to interact with aragonOS-powered contracts by handling transaction pathing, upgradeability, and contract state.
* <img src="/files/RJ8eZug60jO2VJPxa0sD" alt="" data-size="line"> [**aragonUI**](https://github.com/aragon/documentation/blob/legacy_docs/developers/developers/tools/aragonui/README.md): Aragon-native toolkit of React UI components for decentralized apps that implement aragonDS. Slick, fast and easily extendable.
* <img src="/files/rOTtVL2YRpXNxI8HZswg" alt="" data-size="line"> [**aragonCLI**](https://github.com/aragon/documentation/blob/legacy_docs/developers/developers/tools/aragoncli/README.md): Tool for creating, testing and publishing Aragon applications. Also allows for creating custom Aragon organizations.
* <img src="/files/H1D7huGZ3VtxdSPEb1UX" alt="" data-size="line"> [**aragonDS**](https://github.com/aragon/documentation/blob/legacy_docs/developers/developers/tools/aragonds/README.md): The Aragon Design System defines a set of user behaviours and guidelines to ensure consistency across all Aragon apps.

#### Products tools:

* For Aragon **Govern** documentation go [here](/developers/products/aragon-govern).
* For Aragon **Vocdoni** documentation go [here](/developers/products/aragon-vocdoni).


# General Tools


# The Basics

{% hint style="info" %}
In this section, you will find the basic information and settings necessary to deploy and run your first Aragon Client DAO using the command-line.

We will walk through these main concepts for understanding the Aragon tools structure:

* What is the Aragon Stack?
* What are the App Permissions?
* What is the Forwarding?
* What is the Upgradeability?
* What is the Package Manager?
* What are the Templates?
* What is the Aragon Client?
* What are the Human readable transactions?
  {% endhint %}


# Before starting

Before starting to go into depth into the command-line-interface, creating Aragon apps, etc., first some important basics:

## What is Web3? <a href="#web3" id="web3"></a>

Unless you've been living under a rock for the last few years, you've probably come across the term **Web3** 😋.

But what does it mean exactly? And why do we care about it in the context of Aragon?

Web3 is the vision of a fully **decentralized web**. One of the craziest things to wrap your head around is that in web3, apps don't need a central server to fetch data from!

How is this possible?

In a nutshell: thanks to something called **peer-to-peer data architectures**. The key point is that in a P2P architecture, instead of requesting data from a central server, you request it from multiple computers (peers) around you.

While this is nothing new in itself -- P2P architectures have existed since the 1990’s (where they rose to fame with file sharing programs like BitTorrent and Napster) -- what's new is the addition of **cryptography and economic incentives** to these architectures.

The fusion of these seemingly disparate disciplines was the big innovation behind Bitcoin, and has since led to the emergence of a new field of research devoted to their intersection (what we now call cryptoeconomics).

While we won't get into the details here, the key takeaway:

{% hint style="success" %}
Cryptoeconomics is the big unlock that has allowed us to start moving from centralized data structures (web2) to more decentralized or fully distributed data architectures (web3).
{% endhint %}

<figure><img src="/files/RXgKQnw4uDGVKOJrYyyG" alt=""><figcaption><p>Centralized vs Decentralized</p></figcaption></figure>

> Note that there’s a spectrum from fully centralized (left) to fully decentralized (right).

## IPFS (InternetPlanetary File System)

While blockchains -- like Bitcoin and Ethereum -- are key to this Web3 vision, it's important to note that there are **other essential parts** of the Web3 stack that are not covered by them.

For example, since blockchains are relatively expensive to **store data** on, it turns out that they don't make great file systems. That's why there's also a need for decentralized file systems like the \*\*\*\* [**IPFS (InterPlanetary File System)**](https://ipfs.io/) which Aragon also makes use of.

IPFS is a distributed system for storing and accessing files, websites, applications, and data.

## What is a Web3 provider? <a href="#web3" id="web3"></a>

Definition: a Web3 provider an abstraction of a connection to the Ethereum Network, providing a concise, consistent interface to standard Ethereum node functionality.

In poor words, a Web3 provider is "something" that can actually sign and send transactions to the Ethereum blockchain.

If you're new to the decentralized web you might be wondering why we have to use a separate provider to interact with the blockchain.

Why don't decentralized apps (like Aragon's) just do it themselves?

In short, while it's possible for dapps (decentralized apps) to interact directly with the blockchain, using a Web3 provider allows users to interact with dapps without trusting every one of them with their private keys (the keys to their funds).

Without a Web3 provider, users have to have total trust in every dapp they use. With a Web3 provider, they just need to trust that provider.

Examples of web3 providers are [Metamask](https://metamask.io/) and [Frame](https://frame.sh/).

## **Metamask**

Metamask is a browser plugin that allows users to make Ethereum transactions through regular websites. It does this by injecting a javascript library called Web3.js into the namespace of each page your browser loads.

Web3.js is written by the Ethereum core team and has functions that regular web pages can use to make read and write requests to the blockchain. Eventually, we'll have browsers with this sort of functionality built-in (Brave and Opera are working on this). But for now, we need plugins like Metamask to help us bridge the gap between Web2 and Web3.

For instructions on how to use Metamask as your Web3 provider, please follow our [Metamask guide.](https://documentation.aragon.org/products/set-up-metamask)

## Further resources <a href="#further-resources" id="further-resources"></a>

* [DAOs and the Web3 vision](https://www.youtube.com/watch?v=YG3a5ihbkAQ)
* [Why The Internet Needs IPFS Before It’s Too Late](https://techcrunch.com/2015/10/04/why-the-internet-needs-ipfs-before-its-too-late/)
* [A hands-on introduction to IPFS](https://medium.com/coinmonks/a-hands-on-introduction-to-ipfs-ee65b594937)
* [Blockchain infrastructure landscape: a first principles framing](https://medium.com/@trentmc0/blockchain-infrastructure-landscape-a-first-principles-framing-92cc5549bafe)
* [The case for decentralization](https://a16z.com/2019/04/17/why-work-in-crypto-startup-grind-2019/)
* [What comes after open source?](https://a16z.com/2019/01/22/what-comes-after-open-source/)
* [Fat protocols](http://www.usv.com/blog/fat-protocols)


# Quick start

## Up and running <a href="#up-and-running" id="up-and-running"></a>

Now that we've got you all excited, let's go through what you need to get started building with Aragon 😊

{% hint style="warning" %}
Note before starting: Windows is not officially supported by aragonCLI at the moment.

For more support about using Windows go [here](/developers/tools/guides/troubleshooting-and-faq).
{% endhint %}

## Environment setup

### Node.js <a href="#nodejs" id="nodejs"></a>

First off, we need to be sure we have the right version of Node.js installed to prevent errors.

{% hint style="danger" %}
Dependencies of aragonCLI are constantly [updated](https://github.com/aragon/aragon-cli/pulls?q=) which result in Node version errors. Use [**NVM**](https://techstacker.com/run-multiple-node-versions-node-nvm/) to install and select the right Node version. For compatibility across OS use **`Node v12.7 LTS`** version.

Also using *yarn* instead of *npm* as package manager is advised in some cases. Find how to install [yarn](https://classic.yarnpkg.com/lang/en/docs/install/#mac-stable).
{% endhint %}

To see which version of Node you have installed, from the command line run:

```
node -v
```

### Web3 provider <a href="#web3-provider" id="web3-provider"></a>

Next, we'll need what we call a [web3 provider](/developers/tools/the-basics/before-starting) to actually sign and send transactions to the Ethereum (or another) blockchain.

In general, if you have a hardware wallet, we recommend you use [Frame](https://frame.sh/) as your web3 provider -- we'll go over how to do this in the[ tutorial](/developers/tools/guides/your-first-aragon-app) that follows.

For now in this section, to interact with the **Aragon app** we'll be using Metamask. If you haven't please proceed with the installation of [Metamask.](https://documentation.aragon.org/products/set-up-metamask)

### The aragonCLI <a href="#the-aragoncli" id="the-aragoncli"></a>

The [aragonCLI](/developers/tools/aragoncli) (or Aragon Command Line Interface) is a tool used for complex interactions with DAOs, like installing a new app, granting permissions with specific parameters or executing transactions through the [Agent app](/developers/tools/guides/the-agent-app).

Now install aragonCLI from the command line running:

```
npm i -g @aragon/cli
```

{% hint style="danger" %}
Again: It is recommended to have [**NVM**](https://techstacker.com/run-multiple-node-versions-node-nvm/) installed so that you can switch to **`Node v12.7 LTS`** to install the cli. At the moment the product isn't compatible with the later versions of node anymore.

If the installation takes a long time don't worry. It can happen, wait until the process is completed (sometimes it takes 30 min!).

Check with `aragon -v` whether the package has indeed installed.
{% endhint %}

{% hint style="danger" %}
If you're having trouble with this step, you should take a look at the installing aragonCLI section of the [**troubleshooting guide**](/developers/tools/guides/troubleshooting-and-faq). If that doesn't fix things, please don't hesitate to reach out to us in the [#dev-space channel](https://discord.gg/DHgjDnp9) off our Discord server.
{% endhint %}

### The Aragon Builder plugin <a href="#the-aragon-buidler-plugin" id="the-aragon-buidler-plugin"></a>

The [Aragon Builder plugin](https://github.com/aragon/buidler-aragon) is a user-friendly tool for developing apps on top of Aragon. The plugin is automatically installed when using the boilerplate templates but we can suggest to install now with the following command:

```
npm i @aragon/buidler-aragon
```

## Getting Started <a href="#quick-start" id="quick-start"></a>

In order to get up and running quickly, **we’ll build our first DAO** using some basic scaffolding. Just like real scaffolding in a construction site, when we talk about scaffolding in this context, we mean a simple prebuilt structure for your project, on top of which you can build the real one.

To create your first (scaffolded) DAO, from the command line run:

```
npx create-aragon-app first-dao.aragonpm.eth
```

{% hint style="warning" %}
Don't worry about fully understanding this line right now. Really. We'll cover that in the [tutorial ](/developers/tools/guides/your-first-aragon-app)coming up. Right now, you just need to know that the scaffolding relies on some generated code, magically created by the `create-aragon-app` command.
{% endhint %}

{% hint style="info" %}
If you're unsure what the difference is between `npx` and `npm`, we recommend you read through this [medium post](https://medium.com/@maybekatz/introducing-npx-an-npm-package-runner-55f7d4bd282b) and this [stackoverflow post.](https://stackoverflow.com/questions/50605219/difference-between-npx-and-npm)
{% endhint %}

Now if you look at your terminal, you should see a five step process:

:white\_check\_mark:`Preparing initialization`

:white\_check\_mark:`Cloning app template`

:white\_check\_mark:`Preparing template`

:white\_check\_mark:`Installing package dependencies`

:white\_check\_mark:`Created new application first-dao.aragonpm.eth in first-dao.`

Once all 5 have ticks next to them, you should run the following:

```
cd first-dao
yarn start
```

where:

* `cd first-dao`, just moves us into the directory where the scaffolded app was created.
* `yarn start`, sets up everything for us in the background so we can quickly live test our DAO.

{% hint style="success" %}
If you've made it this far congrats 🤗. You've just created your first DAO! It’s running on your local network and as soon as it's ready it will open in your browser at [localhost:3000](http://localhost:3000/)!
{% endhint %}

## Interacting with your first DAO <a href="#interacting-with-your-first-dao" id="interacting-with-your-first-dao"></a>

Once your browser is open at the right address, you should see a screen that looks like the one below.

<figure><img src="/files/nNXoWTr82cL2UXIxfc7R" alt=""><figcaption><p>DAO Home</p></figcaption></figure>

As you can see on the left, this DAO is made up of two Aragon apps:

* Home
* first-dao (Counter)

Right now, we're in the Home app. This app just displays a welcome message with no possible user interactions.

Click on first-dao to open up the (slightly) more interesting Counter app.

![Counter app](/files/RKSCSw9qGGLpE3Osi97a)

Right now the count is at 0. Let's increment it.

Note that incrementing the counter triggers a blockchain transaction that saves the new value to the chain. But before the transaction can be sent, we need to sign it (to prove it was us that really sent it).

Click on the + button, which opens a Metamask transaction and sign it. For help on how to sign a transaction on Metamask go through these steps:

{% hint style="danger" %}
First of all, you have to connect your *first-dao* app to Metamask. [Here](/developers/tools/guides/how-to-sign-with-web3-providers/set-up-metamask) you can learn to setup a Metamask wallet. [Here](/developers/tools/guides/how-to-sign-with-web3-providers/set-up-metamask/import-your-seed-wallet-in-metamask) how to import your *first-dao* seed phrase. And [here](/developers/tools/guides/how-to-sign-with-web3-providers/set-up-metamask/metamask) on how to sign a *first-dao* transaction using Metamask.
{% endhint %}

After the transaction is completed, you should see Count: 1.

{% hint style="success" %}
Done! We hope you enjoyed that 😊!
{% endhint %}

## Next steps <a href="#next-steps" id="next-steps"></a>

Now that you’ve built your first DAO, feel free to take a look at the docs. If you're interested in understanding things at a deeper level go ahead to this [tutorial](/developers/tools/guides/your-first-aragon-app)!


# Tech Stack

{% hint style="success" %}
For <mark style="color:blue;">**creating DAOs, dapps**</mark> and <mark style="color:blue;">**protocols**</mark>.
{% endhint %}

From a technical perspective, Aragon can be seen as an **operating system for human organizations**. Therefore, the **Aragon stack** can be thought of as an **operating system**, just like macOS or Linux.

A computer operating system manages which processes have access to the computer's resources. They do that with the following components:

* A Kernel, which has drivers that let the software control the hardware
* A permission system, to manage which processes can access each resource
* A self-upgrade system, for bugs and enhancements

You wouldn't want a Tetris app to own full control over your computer's RAM. That would enable tampering with other apps or stealing precious information. Similarly, you wouldn't want a CryptoKitties app to have full control over the funds of your DAO.

The role of the OS, and in this case of the Aragon stack, is to create an environment in which **apps can abstract over the underlying resources** while ensuring security.

You can read more and see how they work [here](https://documentation.aragon.org/products/aragon-client/explore-template-dao/what-are-apps).

## The layers of the stack <a href="#the-layers-of-the-stack" id="the-layers-of-the-stack"></a>

<figure><img src="/files/VkwG43sdJ4jBgHpcyNuK" alt=""><figcaption></figcaption></figure>

{% hint style="info" %}
This is a diagram of the Aragon stack, from the Ethereum Virtual Machine to the User Interface
{% endhint %}

## The Kernel <a href="#the-kernel" id="the-kernel"></a>

The Kernel is a very simple smart contract. It keeps track of an Access Control List (ACL) app which it uses for **permission management of the entire DAO**.

The Kernel also knows where to find its installed apps and handles upgradeability of the apps by keeping references to the actual code that apps run.

You can read more about the Kernel [here](/developers/tools/aragonos/reference-documentation#kernel).

## Permission management <a href="#permission-management" id="permission-management"></a>

In conventional operating systems you just have normal users and admins but for decentralized governance, you need much more.

aragonOS contains a **rich permissions system**. Any resource or functionality can be assigned a **role**. Only entities that have permission to call that role can access that resource. Those permissions are all set in the [Access Control List](/developers/tools/the-basics/permissions).

With aragonOS, permissions work the following way:

{% hint style="info" %}
*Entity **E*** can call *Function **F*** (protected by *Role **R*** and parameterized by *Params **P***...) on *App **A,***

only

Only if *Entity **E*** holds a permission for *Role **R*** on *App **A*** and their arguments to *Function **F*** satisfy *Rules **R***.

A *Permission Manager **M*** can revoke or reassign that permission.
{% endhint %}

Which simplified would be:

{% hint style="success" %}
An entity can call a function on an app and its manager can revoke or reassign that permission.
{% endhint %}

This enables a great amount of flexibility in permission configuration. You can read more about Permissions [here](https://documentation.aragon.org/products/aragon-client/explore-template-dao/system-setting/permissions-setting).

## Permission escalation <a href="#permission-escalation" id="permission-escalation"></a>

In a conventional OS there is usually just one way to escalate permissions, by using tools like `sudo`.

With aragonOS, since permissions are so rich, there may be **many paths to escalate permissions**.

#### **Example:**

A token holder may have permission to create a vote, and the voting app may have permission to withdraw funds. In that case, the Aragon client tells the user that option when they attempt to withdraw funds.

Users can show their intent for performing an action by trying to execute it directly without having to know the process for executing the action. By traversing the Access Control List, Aragon can automatically determine the path needed for executing the action.

## Full sandboxing <a href="#full-sandboxing" id="full-sandboxing"></a>

Permission management is key for allowing security at the smart contract level. This is similar to the Kernel, filesystem and process security in a conventional OS.

Yet the Aragon client is a frontend too, so security is also paramount in the UI environment. This is similar to how many operating systems impose **app sandboxing**. An app shouldn't be able to access or tamper with another running app. It would be disastrous if a malicious app could inject code or modify the frontend of another app.

Aragon's approach to frontend sandboxing is a combination of **sandboxed iframes** and **cross-origin messaging** through a custom RPC protocol built specifically for Aragon. Apps do not have direct access to Web3 or Ethereum.

The Aragon Client uses [aragonAPI ](/developers/tools/aragonapi)to provide apps APIs for accessing smart contracts, displaying notifications and signing transactions. When signing transactions, a panel opens up in the client, not in the app. Apps cannot prompt users to sign transactions directly and they cannot interact with the contracts of other apps—in reality, they can only send action "intents". Thus all transactions are securely handled by the Aragon Client, decreasing the attack surface.

You can read more about the Aragon Client [here](/developers/tools/the-basics/the-aragon-client).

## Cohesive UI <a href="#cohesive-ui" id="cohesive-ui"></a>

It is commonly thought that iframes degrade the user experience and are not best practice. Though [aragonUI](/developers/tools/aragonui) uses iframes, it has been built to mitigate this issue. Additionally, it allows all apps to look and behave the same to provide a consistent experience for users across Aragon apps.

You can read more about aragonUI [here](/developers/tools/aragonui).


# App permissions

{% hint style="success" %}
Use the <mark style="color:purple;">**Access Control List (ACL)**</mark> to control who can access your app's functionality.
{% endhint %}

## How does it work?

The ACL essentially just contains a set of who has permission to execute an action in an Aragon app and who can re-grant or revoke that permission.

Most generally, an *Entity* can hold the permission to call a function protected by *Role* in an *App*, and their permission is managed by a *Manager*, who can revoke or regrant that permission.

### Example

Now let's say we have these 3 apps:

* A *Token Manager* app, which represents BOB token holders and forwards all their intents to another app
* A *Voting* app, which executes any arbitrary action after a voting of BOB token holders passes
* A *Finance* app, which controls the funds of the organization

| Entity        | App     | Role       | Manager |
| ------------- | ------- | ---------- | ------- |
| Token Manager | Voting  | OPEN\_VOTE | Voting  |
| Voting        | Finance | WITHDRAW   | Voting  |

With the simple mapping in the table above, we have done the following:

* Given permission to BOB token holders, using the *Token Manager*, to open votes in the *Voting* app
* Given permission to the *Voting* app to withdraw funds from the *Finance* app

{% hint style="info" %}
We have achieved a fully democratic way of withdrawing funds in Ethereum! :tada:
{% endhint %}


# Forwarding

{% hint style="success" %}
Use <mark style="color:purple;">**forwarders**</mark> to allow app interoperability and governance.
{% endhint %}

## How does it work?

The ACL allows Aragon apps to be interoperable by creating and managing permissions.

A **Forwarder** is a contract that, given some conditions, will pass along a certain action to other contract(s).

### Example

A *Token Manager* app may send an action to the *Voting* app so if a vote passes the *Voting* app can withdraw funds from the *Finance* app.

This is possible thanks to Forwarders.

Below is an extract of our *Voting* app and is all the code required to make it a Forwarder:

```solidity
pragma solidity 0.4.24;

import "@aragon/os/contracts/apps/AragonApp.sol";
import "@aragon/os/contracts/common/IForwarder.sol";

contract Voting is IForwarder, AragonApp {
    /**
    * @notice Creates a vote to execute the desired action, and casts a support vote
    * @dev IForwarder interface conformance
    * @param _evmScript Start vote with script
    */
    function forward(bytes _evmScript) public {
        require(canForward(msg.sender, _evmScript));
        _newVote(_evmScript, "", true);
    }

    function canForward(address _sender, bytes _evmCallScript) public view returns (bool) {
        return canPerform(_sender, CREATE_VOTES_ROLE, arr());
    }

    function isForwarder() public pure returns (bool) {
        return true;
    }
}
```

`canForward` checks if a caller `canPerform` the action `CREATE_VOTES_ROLE`. If it can, it means the caller can create a vote.

`forward` checks if a caller `canForward`, and if it can, it creates a new vote with an `_evmScript`.

This `_evmScript` is the action that will be executed if the voting passes, which can be withdrawing some funds from a *Finance* app, for example, but it can be any other action. The action is abstracted and doesn't need to be known in advance.


# Upgradeability

{% hint style="success" %}
Make your app <mark style="color:purple;">**upgradeable**</mark> to fix bugs and push enhancements.
{% endhint %}

## How does it work?

The ACL and Forwarders allow you to create apps that are interoperable and generic so you don't have to reimplement any governance or authentication logic whatsoever. This is thanks to Proxies.

A **Proxy** is a very simple smart contract that consists of decoupling the instance of a particular smart contract with the location of its actual business logic.

All a Proxy does is **delegate calls to another contract that contains its actual logic**.

This allows for **upgradeability** since **you can always interact with the same Ethereum address for the smart contract** but its logic can be upgraded over time.

Proxies help enable the decoupling of authentication and logic since you do not need to authenticate any particular version of the smart contract but rather a reference to it that never changes.

We created [EIP897](https://github.com/ethereum/EIPs/pull/897), which has been merged, in order to standardize how Proxy interfaces work across all the ecosystem.

The [aragonOS Kernel](/developers/tools/the-basics/the-aragon-stack#the-kernel) takes care of maintaining the mapping between the Proxy address of an app and the address where its actual logic lives.

Then, upgrading an app is as easy as:

```solidity
    kernel.setApp(kernel.APP_BASES_NAMESPACE(), appId, newAppCodeAddr)
```


# Package management

{% hint style="success" %} <mark style="color:purple;">**Publishing and upgrading**</mark> Aragon apps.
{% endhint %}

## How does it work?

**To ease upgrades** for Aragon apps, both **app smart contracts and frontend** can be upgraded using **aragonPM**.

aragonPM is a DAO built on top of aragonOS (taking advantage of upgradeability and the ACL).

aragonPM allows for multiple package registries to exist with different governance models for package publishing and releasing new versions.

There is an official Aragon curated aragonPM, `aragonpm.eth`, which has very strict restrictions of what gets published and very high-quality standards that we use for publishing our core components.

Different aragonPM registries in which everyone can publish their packages are expected to be created by the community. You can create your own registry and have full control over it.

You can read more about aragonPM [here](/developers/tools/aragonpm).


# Templates

{% hint style="success" %} <mark style="color:blue;">**Create templates**</mark> for easy DAO setup.
{% endhint %}

## How does it work?

Creating a DAO with all the desired apps and permissions requires multiple operations that must be properly orchestrated. In the context of Ethereum, performing all these operations would require sending many transactions. This would not only be very costly, as every transaction needs to pay for gas, also the integrity of the deployment depends on all operations occurring in the right order.

For these reasons, the **recommended way of creating Aragon DAOs** is using what we call **templates**, on-chain *deployment scripts* that create a DAO and perform all the required configuration steps in an **atomic manner** without the possibility of an attacker interacting with the DAO while it is still being set up. **Templates allow creating a DAO in just one transaction** and when the transaction is processed the DAO is already **fully configured and functional**.

Templates can also be thought of as **DAO templates** as every template can **create a DAO** with **specific settings** for an organization type.

The two DAO configurations that one can choose from when using the [Aragon client](https://client.aragon.org/) correspond to the beta templates ([Democracy](https://github.com/aragon/dao-templates/blob/ce62d132d944951dc200df8aa74e42db8e70a094/kits/democracy/contracts/DemocracyKit.sol) and [Multisig](https://github.com/aragon/dao-templates/blob/ce62d132d944951dc200df8aa74e42db8e70a094/kits/multisig/contracts/MultisigKit.sol)) available in the [DAO templates repository](https://github.com/aragon/dao-templates).

{% hint style="danger" %}
The above Democracy and Multisig `kits` have been deprecated and `templates` should now be used instead. You may still find the `kits` notation in some places while we make the transition.
{% endhint %}

## Environment setup <a href="#environment-setup" id="environment-setup"></a>

Before starting you need to check if you have already installed all these prerequisites:

* the right version of **node.js** (recommended `v12 LTS` version)
* **Metamask** web3 provider
* the **aragonCLI** (Aragon Command Line Interface)
* the **Aragon Buidler plugin**

If you haven't already installed them or if you need more info about this go to the "*Environment Setup*" paragraph [here](/developers/tools/the-basics/getting-started).

## Getting started with templates using the aragonCLI

Now we are ready to build our DAO with the templates.

The [aragonCLI](/developers/tools/aragoncli) (>= v4.1.0) supports using templates to create a DAO to interact with the apps being developed.

To quickly get started developing your own templates:

```
npx create-aragon-app app
```

That command will create a new Aragon app project. A sample template for this [Counter example app ](/developers/tools/guides/your-first-aragon-app)can be found here in [`Template.sol`](https://github.com/aragon/aragon-cli/blob/ff99addc784a261608b66c269c0292891da5a311/packages/cli/test/mock/contracts/Template.sol)

Import this in the app under the `contracts` folder. Then install the `@aragon/templates-shared` package which contains contract, deployment, and testing utilities to help you build your own template.

Then to run your DAO enter:

```
cd app
yarn start
```

When modifying the name of your contract or app name be sure to update those in `Template.sol` otherwise running the template will fail.

{% hint style="info" %}
The client should load within few minutes. In case of not, please terminate it and then restart it.
{% endhint %}

## Template structure <a href="#template-structure" id="template-structure"></a>

All templates follow a similar structure:

1. Use a [DAOFactory](https://github.com/aragon/aragonOS/blob/4.0.1/contracts/factory/DAOFactory.sol) to create a DAO.
2. Assign the template contract the necessary permissions in the DAO needed for installation (usually only `APP_MANAGER_ROLE`).
3. Create app proxy instances for all the apps (`dao.newAppInstance(...)`).
4. Initialize apps (`app.initialize(...)`).
5. Set up permissions for the apps and the DAO.
6. Clean up the permissions temporarily assigned to the template.


# Aragon client

{% hint style="success" %}
How the user experiences an Aragon DAO
{% endhint %}

## How does it work?

The [Aragon client](https://github.com/aragon/aragon) is a **full dapp** that can **create and manage decentralized organizations** by running Aragon apps inside it.

The client provides Aragon app developers with the following capabilities:

* **Sandboxing**: The client is running code from third-party developers and so in order to mitigate risk (such as cross-site scripting and phishing attempts by manipulating the DOM) we sandbox apps.
* **App listing**: It traverses the organization to find all the relevant apps for it.
* **Transaction pathing**: It checks with the [ACL ](/developers/tools/the-basics/permissions)to see if the user can perform an action (e.g. withdrawing funds) and if not, it gives the user alternative paths to perform it (e.g. maybe by opening a vote)
* **Human readable transactions**: It uses [Radspec](/developers/tools/the-basics/human-readable-transactions) and describes the user action in a human-readable way
* **Notifications**: Aragon apps can send notifications to the user when something relevant happens

It looks like this:

![The Aragon Client](https://raw.githubusercontent.com/aragon/aragon-wiki/master/docs/media/press/press-kit/screenshots/0.5/aragon_core_v05_beta_home04.png)


# Human readable transactions

{% hint style="success" %}
Keeping **users informed.**
{% endhint %}

## How does it work?

A big part of Aragon is user-friendliness, and one of the most unfriendly things in the Ethereum world is transaction data.

Examine this screenshot of a transaction in MetaMask:

<figure><img src="/files/wvCfh2sspQFjgnlI1CMk" alt=""><figcaption><p>UTF8 string in MetaMask</p></figcaption></figure>

Would you know what this transaction does? Not even a developer could tell. This is why we created **Radspec**.

**Radspec is a secure alternative to Natspec**. Natspec was supposed to be a way to describe transactions from a Natspec *expression* and some transaction data.

The issue with Natspec, however, is that it is insecure. Any JavaScript can execute in Natspec which opens up a lot of potential attacks, like cross-site scripting, which might successfully phish users.

## How to use Radspec <a href="#how-to-use-radspec" id="how-to-use-radspec"></a>

It's as easy as adding `@notice` to functions in the smart contracts.

```solidity
contract Counter is AragonApp {
    /**
     * @notice Increment the counter by `step`
     */
    function increment(int step) auth(INCREMENT_ROLE) external {
        // ...
    }

    /**
     * @notice Decrement the counter by `step`
     */
    function decrement(int step) auth(DECREMENT_ROLE) external {
        // ...
    }
}
```

These Radspec expressions are **written in comments in your source code**, and they will be grabbed by `aragon` and bundled with your app.

The [Aragon client ](/developers/tools/the-basics/the-aragon-client)will display these *with* the transaction a user is about to perform so that they have a clear understanding of what they're about to sign.

<figure><img src="/files/eExX0wDMxouBg1YucROs" alt=""><figcaption><p>Screenshot of signer showing Radspec</p></figcaption></figure>

{% hint style="info" %}
Our Radspec expressions show up while signing a transaction.
{% endhint %}

Obviously, this is a super trivial example as we are not actually evaluating anything but we could instead write something more complex.


# Guides

{% hint style="info" %}
In this section, we will walk you through several Guides:

* how to create your first Aragon app?
* how to migrate an Aragon app from the [aragonCLI](https://github.com/aragon/aragon-cli) to the new [Buidler plugin](https://blog.aragon.one/buidler-plugin)?
* how to publish the Aragon app to aragonPM?
* how to deploy a blank Organization and configure it as a custom Organization using Aragon CLi?

We will show you how to use the Agent app.
{% endhint %}


# How to create your first custom DAO using Aragon CLI!

{% hint style="info" %}
This guide will show you the process to deploy a **blank DAO** using Aragon CLI and configure it as a **custom DAO** for a cooperative organisation, let's say a cooperative of dairy farmers.

We assume you have a general understanding of Aragon stack.
{% endhint %}

## Environment setup <a href="#environment-setup" id="environment-setup"></a>

Before starting you need to check if you have already installed all these prerequisites:

* the right version of **node.js** (recommended `v12.7 LTS` version)
* web3 provider: [Frame](/developers/tools/guides/how-to-sign-with-web3-providers/setting-up-a-frame-wallet) or [Metamask](/developers/tools/guides/how-to-sign-with-web3-providers/set-up-metamask) (Frame is necessary for this guide).
* the **aragonCLI** (Aragon Command Line Interface)
* an [IPFS server.](https://docs.ipfs.io/install/)

{% hint style="info" %}
If installing IPFS on Linux, it can be easily done with: `sudo snap install ipfs`
{% endhint %}

If you haven't already installed them or if you need more info about this goes to the "*Enviroment Setup*" paragraph [here](/developers/tools/the-basics/getting-started).

### Creating a blank DAO <a href="#creating-a-blank-organization" id="creating-a-blank-organization"></a>

{% hint style="danger" %}
**Warning**

Installing Frame is necessary for this step. Read [here](/developers/tools/guides/how-to-sign-with-web3-providers/setting-up-a-frame-wallet) how to setup a Frame wallet. Select 'RINKEBY' network and make sure you open your new account (unfold it) in Frame for the transaction to appear.
{% endhint %}

Let's create a blank DAO! Insert and run the following command in your terminal:

```
 dao new --use-frame --env aragon:rinkeby
```

In the Frame app now a 'permission request' from aragonCLI should show up. 'Sign' the request.

After this a transaction to create the DAO should show up in Frame, also 'sign' this transaction:

![](/files/M11ZZOGft2etaoz01rgQ)

{% hint style="warning" %}
**Hint**

Make sure you have sufficient Rinkeby Ethereum (ETH) in your wallet for the transaction fees. If not you can request for Rinkeby ETH [here](https://faucets.chain.link/). The transaction could take long. Increase the 'gas fees' to speed up the transaction.
{% endhint %}

{% hint style="success" %}
Well done you just created your first DAO! You should now be able to open the DAO on: `https://client.aragon.org/#/<dao-address>`
{% endhint %}

Find the DAO address in the terminal, and make sure you select the 'Rinkeby' network in Aragon Client for your DAO to load (since Ethereum mainnet is default). You can change to Rinkeby network from here in the top right hand corner: <https://client.aragon.org/#/>

The DAO was created with the default [`bare-template`](https://github.com/aragon/dao-templates/blob/master/templates/bare/contracts/BareTemplate.sol). So it won’t have a token manager, vault, finance, or voting app installed yet.

{% hint style="info" %}
**Note**\
The `bare-kit` has been deprecated and `bare-template` should be used instead. To learn more about templates check the[ introduction about them](/developers/tools/the-basics/templates).

The above command used the `--use-frame` and `--env` flags. You can find other possible flags [here](/developers/tools/aragoncli/dao-commands#dao-new), or by adding the `--help` flag to the command.
{% endhint %}

### Adding a Token and Token Manager to your DAO <a href="#adding-a-token-and-token-manager-instance" id="adding-a-token-and-token-manager-instance"></a>

Next we will add a token and a token-manager to your DAO. The following types of tokens can be created:

* `Membership`: a non-transferrable token limited to 1 per account.
* `Reputation`: a non-transferrable token without balance restriction.
* `Equity`: a transferrable token without balance restriction.

For the dairy cooperative we want to start with a membership token: one farmer, one member.

First we need to deploy a MiniMe token. The `dao new token` command takes the following variables:

```
dao token new <token-name> <symbol> [decimal-units] [transfer-enabled]
```

{% hint style="info" %}
**Note**

The [MiniMeToken](https://github.com/Giveth/minime) contract is a standard ERC20 token with extra functionality.
{% endhint %}

For our membership token we take `"Member"` as `token-name`, with `"MBR"` as `symbol`.

We want to set `decimal-units` to `0` (the default is `18`).

The default of `tranfer-enabled` is `true`. By leaving `transfered-enabled` out of the command it takes the default value automatically, which is good for now since we will restrict transferability using the token-manager in a later step.

{% hint style="danger" %}
**Warning**

For the next step it is necessary to start an instance of **Aragon Devchain**. To do so open up an new tab or window in your terminal and run the following command:

`aragon devchain --env aragon:rinkeby`
{% endhint %}

So now run the following command in your terminal:

```
dao token new "Member" "MBR" 0 --use-frame --env aragon:rinkeby
```

Copy the **token address** from the terminal as we will need it later!

Next we need to deploy an instance of the **token-manager** app which will serve as the token-controller for the membership token we just created.

{% hint style="info" %}
**Note**

The token-manager cannot be initialized unless it's already the controller of a MiniMe token. So in this case we want to use the `dao install` command with the `--app-init none` flag. In that way we can perform some actions before we initialize the token-manager. Read more about this [flag](/developers/tools/aragoncli/dao-commands#dao-install) here.
{% endhint %}

Insert the DAO address in the below command and run it in your terminal:

```
dao install <dao-address> token-manager --app-init none --use-frame --env aragon:rinkeby
```

In order to get the token-manager address we need to run the following command:

```
dao apps <dao-address> --all --use-frame --env aragon:rinkeby
```

You should see a list of apps, and a token-manager instance listed under permissionless apps. Copy this address as we will need it later.

Next are going to set the token-address as the token-controller on our token, by running the following command:

```
dao token change-controller <token-address> <token-manager-address> --use-frame --env aragon:rinkeby
```

Now we are creating a `MINT_ROLE` permission for the token-manager so more farmers can be added as members to the dairy-DAO at a later point in time. Run the following command:

```
dao acl create <dao-address> <token-manager-address> MINT_ROLE <your-address> <your-address> --use-frame --env aragon:rinkeby
```

{% hint style="danger" %}
**Warning**

Make sure you do not accidentally include multiple spaces instead of 1 space between each variable in the command. Since if you do, you will run into this error:

`✖ Not enough non-option arguments: got 4, need at least 5`
{% endhint %}

We can now initialize the token manager using the `dao exec` command. The token-manager’s initialise function takes 3 parameters:

1. `minime token`: token-address of a MiniMe token.
2. `transferrable`: a boolean indicating if the token should be transferrable or not.
3. `uint`: determining max number of tokens an address can control (use `0` if you do not want to restrict balances).

{% hint style="info" %}
**Note**

You can find more info about `dao exec` commands [here](/developers/tools/aragoncli/dao-commands#dao-exec).
{% endhint %}

We would not like dairy farmers to transfer their membership tokens, so we set the boolean to `false`. Then we want one address to control a maximum of 1 membership token, so the `unit` will be set to `1`. Insert the data of the variables in the below command, and run it in your terminal:

```
dao exec <dao-address> <token-manager-address> initialize <token-address> false 1 --use-frame --env aragon:rinkeby
```

At this point if you open your DAO in a web browser you should be able to see the [token manager app installed](https://documentation.aragon.org/products/aragon-client/explore-template-dao/what-are-apps/token-app), and should be able to mint tokens from `your-address`. Open your DAO UI from here: `https://client.aragon.org/#/<dao-address>`

![](/files/bTTfZr3ycQT0Y4OxNZxj)

{% hint style="danger" %}
**Warning**

Even though we have initialized the token manager as `transferrable = false`, and token transfers fail, there is what appears to be a UI bug where the token manager will list the token as transferrable even though it is not. [GitHub issue](https://github.com/aragon/aragon-apps/issues/630).
{% endhint %}

### Adding a Voting App to your DAO <a href="#adding-a-voting-instance" id="adding-a-voting-instance"></a>

Adding a [voting-app](https://documentation.aragon.org/products/aragon-client/explore-template-dao/what-are-apps/voting-app) allows actions to be protected by a vote. This to ensure that the required support and quorum is reached in case of changes to your DAO. The dairy-DAO might want to transfer control to another member, such as change can then only be executed when the required majority of members is met.

Since we already have a token and token-manager deployed all we have to do is install the voting-app. This can be done in one step using the `dao install` command and passing arguments via `--app-init-args`.

The voting-app requires the following initialization parameters:

* `minime token`: token-address of a MiniMe token.
* `support required percentage`: percentage of yeas in casted votes for a vote to succeed (expressed as a percentage of `10^18`; eg. `10^16 = 1%`, `10^18 = 100%`).
* `min accept quorum`: percentage of yeas in total possible votes for a vote to succeed (expressed as a percentage of `10^18`; eg. `10^16 = 1%`, `10^18 = 100%`).
* `vote time`: seconds that a vote will be open for token holders to vote (unless enough yeas or nays have been cast to make an early decision).

So if we want a voting-app instance with a support requirement of 60% and min accept quorum of 25% and a voting period of 7 days we would use the following command. Run the command in your terminal:

```
dao install <dao-address> voting --app-init-args <token-address> 600000000000000000 250000000000000000 604800 --use-frame --env aragon:rinkeby
```

Next you will need to assign the create votes permission. If you want all token holders to be able to create votes, we can assign the `CREATE_VOTES_ROLE` to the `token-manager-address`.

The following command grants token holders (so all members of the dairy-DAO) the ability to create votes. Also from now a vote will be required to manage changes to the permissions. Run the command:

```
dao acl create <dao-address> <voting-app-address> CREATE_VOTES_ROLE <token-manager-address> <voting-app-address> --use-frame --env aragon:rinkeby
```

At this point you should be able to open your organization in the browser and be able to create votes! :clap:

{% hint style="info" %}
**Note**

You can find more info about `dao acl` commands [here](/developers/tools/aragoncli/dao-commands#dao-acl).
{% endhint %}

### Adding a Vault and Finance App <a href="#adding-a-vault-and-finance-instance" id="adding-a-vault-and-finance-instance"></a>

{% hint style="info" %}
**Note**

The **vault-app** is intended to securely store and manage funds but does not have its own user interface (UI). The [**finance-app**](https://documentation.aragon.org/products/aragon-client/explore-template-dao/what-are-apps/finance-app) provides an interface for the vault-app and provides some limited budgeting capabilities. In the future, it may make sense to install the vault app without the finance app, or the finance app with a different version of the vault app, but for now these two apps generally make sense to install as a pair.
{% endhint %}

The vault-app can be installed without passing any specific initialization parameters. Run the following command in the terminal:

```
dao install <dao-address> vault --use-frame --env aragon:rinkeby
```

Copy the provided `vault-address` from the terminal, which will be needed later.

The finance-app however requires two initialization parameters:

1. `vault-address.`
2. `budgeting period` (in seconds).

If you are familiar with the finance-app in the UI, you may have noticed that there is not way to configure or set a budget. However, the smart-contracts allow you to set a per-asset budget which is reset each time period.

Eventually the UI will be updated to support these functions. If you don’t intend to use any of the budgetting functionality the budget period parameter doesn't matter but it does need to be passed. If you do plan on using the budgeting functionality however here is how it works:

> For a given budget period *P*, a budget *B* can be set for asset *A*. The total volume of transfers of *A* cannot exceed its budget within a period *P*. So for example, if we initialize *P* as 1 Month, we could set a budget for DAI of 1000, and even if the vault contains more than 1000 DAI it will not be able to spend more than 1000 DAI per month. Keep in mind that the budget cannot be seen from the UI, so transactions which exceed the budget will just fail.

For demonstrations purposes, let's set install the finance-app with a budget period of 30 days (in seconds). Run the following command:

```
dao install <dao-address> finance --app-init-args <vault-address> 2592000 --use-frame --env aragon:rinkeby
```

Now we want to create a permission that grants the finance-app the `TRANSFER_ROLE` on the vault. For future possible changes we will also make voting required. Run the following command to do so:

```
dao acl create <dao-address> <vault-address> TRANSFER_ROLE <finance-address> <voting-address> --use-frame --env aragon:rinkeby
```

We also want to grant some permissions to the voting app on the finance-app. In that way voting will be required do the dairy-DAO members wish to make changes to the roles. Run the follwoing commands in the terminal:

```
dao acl create <dao-address> <finance-address> CREATE_PAYMENTS_ROLE <voting-address> <voting-address> --use-frame --env aragon:rinkeby

dao acl create <dao-address> <finance-address> EXECUTE_PAYMENTS_ROLE <voting-address> <voting-address> --use-frame --env aragon:rinkeby

dao acl create <dao-address> <finance-address> MANAGE_PAYMENTS_ROLE <voting-address> <voting-address> --use-frame --env aragon:rinkeby
```

For more information on what each of these roles do as well as additional roles made available by the finance-app, see the [repository](https://github.com/aragon/aragon-apps/blob/87b55951fcd83e4aefcc49f616fa2417743836c3/apps/finance/arapp.json).

{% hint style="success" %}
At this point you should be able to open your custom DAO in the web browser and manage tokens, create votes, and manage funds using the vault and finance apps! :tada:
{% endhint %}

### Review & Finalize Permissions <a href="#review-finalize-permissions" id="review-finalize-permissions"></a>

While we have a mostly functional dairy-DAO [the permissions](https://documentation.aragon.org/products/aragon-client/explore-template-dao/system-setting/permissions-setting) need to be cleaned up because we do not want our personal address to have root authority in the organization. These steps can be done from the permissions UI (see image below), or directly from Aragon CLI.

![](/files/qZKgmZcZom3y4ia5aETs)

To see what permissions are currently assigned, run the following `dao acl` command:

```
dao acl <dao-address> --use-frame --env aragon:rinkeby
```

You will notice that some key permissions have been granted and are managed by the address you used to perform these commands. By following these steps you are transferring authority as creator of the organization to other applications and entities defined above,

{% hint style="danger" %}
Warning

Transferring permissions is an irreversible process, so be careful not to revoke a permission before granting it to an appropriate entity!
{% endhint %}

You’ll want to grant permissions which are currently only assigned to your address to another entity (eg. `voting-address`):

```
dao acl grant <dao-address> <app-address> <ROLE> <voting-address> --use-frame --env aragon:rinkeby
```

You’ll want to revoke permissions for yourself once they have been granted to another entity:

```
dao acl revoke <dao-address> <app-address> <ROLE> <your-address> --use-frame --env aragon:rinkeby
```

You’ll want change the permission manager for permissions from your address to another entity (eg. `voting-address`):

```
dao acl set-manager <dao-address> <app-address> <ROLE> <voting-address> --use-frame --env aragon:rinkeby
```

{% hint style="success" %}
At this point you should have changed permissions. Well done you successfully set up a custom DAO for the dairy-farmers cooperation. Let's toast to that! :cow::milk::milk::cow:
{% endhint %}


# How to use the Agent App

{% hint style="info" %}
This guide will show you how to <mark style="color:blue;">**install and use the Agent App**</mark>.
{% endhint %}

### Introduction

The Agent app (or Aragon Agent) is an Aragon app that can be installed in any Aragon DAO. It's main feature is its ability to perform arbitrary calls to contracts. This means it can be thought of as the **external interface of a DAO**.

Put another way:

{% hint style="info" %}
Aragon Agent is a fully-fledged Ethereum account owned by an Aragon organization. **It's like a multi-signature account on steroids that enables organizations to interact with any Ethereum contract or protocol.** For example trading tokens on 0x or Uniswap, opening a Maker CDP, managing names in ENS, owning digital LAND parcels, or even breeding digital cats.
{% endhint %}

In technical terms, it's a superset of the [Vault app](https://github.com/aragon/aragon-apps/tree/master/apps/vault), which means it can hold valuable assets (ETH and [ERC-20](https://en.wikipedia.org/wiki/ERC-20) tokens).

Concretely, the Agent app allows for things like:

* An Aragon DAO to interact with other Ethereum smart contracts or protocols without the need to implement a custom Aragon app for every protocol.
* Members of DAOs to identify themselves as their DAO when using any Ethereum dApp.
* An Aragon DAO to participate as a stakeholder in another DAO.


# Installing Aragon Agent from aragonCLI

## Prerequisites <a href="#prerequisites" id="prerequisites"></a>

While there are no formal prerequisites to this guide, it'll be helpful for you to have a basic understanding of both our [Voting](https://documentation.aragon.org/products/aragon-client/explore-template-dao/what-are-apps/voting-app) and [Token Manager](https://documentation.aragon.org/products/aragon-client/explore-template-dao/what-are-apps/token-app) apps. Apart from that this guide should be self-contained.

## Installing the Agent App

### 1. Create a Company DAO <a href="#id-1-create-a-company-dao" id="id-1-create-a-company-dao"></a>

Before we start, you'll need to head over to [Aragon](https://aragon.org/) and create a new DAO with the company template. If you're not sure how to do that, please have a look [here](https://documentation.aragon.org/products/aragon-client/how-to-create-a-dao-using-aragon-client/use-company-template).

The first thing you'll be asked to do is to choose the network for your organization. For the purposes of this guide, we'll choose **Ethereum Rinkeby (Testnet)**. If you need help with this go [here](https://documentation.aragon.org/products/set-up-metamask/getting-started-with-rinkeby-testnet).

Then when you select the Company template you can choose to install the Agent app as an optional app, select this and click **Use this template**:

![](/files/PCPDcVwTsVZgYS01srmb)

{% hint style="danger" %}
Only for Company, Membership, and Reputation templates, it is possible to install the Agent app from the onset! If you want to install the Agent app after setting up your DAO, or if you use a different template continue with this guide.
{% endhint %}

When setting up the DAO you'll be asked to set three parameters for your organization, the **support**, the **minimum approval**, and the **vote duration**.

Set them to these defaults:

* Support: 100%
* Min. Approval: 0%
* Duration: 168 hours (or 1 week)

### 2. Install aragonCLI <a href="#id-2-install-aragoncli" id="id-2-install-aragoncli"></a>

The [aragonCLI](/developers/tools/aragoncli) (Command Line Interface) is what we use to create, interact with, and develop Aragon apps.

If you haven't done so already, install aragonCLI from NPM by running the following command:

`npm install -g @aragon/cli`

{% hint style="success" %}
Hopefully, it installed successfully 😊.
{% endhint %}

{% hint style="danger" %}
If not, we recommend you take a quick look at the installing aragonCLI section of our [troubleshooting guide](/developers/tools/aragoncli). It should help diagnose and fix the problem 🧐.

If that still doesn't fix things 😟, please reach out to us in our [#questions-channel](https://discord.gg/XgCeeKYd) on the Discord Server. We're more than happy to help.
{% endhint %}

Note that aragonCLI v5.4.0 was the first version to include support for Agent.

If you're unsure which version of aragonCLI you have, run the following command in your terminal:

`aragon -v`

If your version number is less than `7.0.3`, or if it's been a while since you last installed the aragonCLI, we recommend you reinstall it (by running the `npm install` command above).

### 3. Install the Agent app <a href="#id-3-install-the-agent-app" id="id-3-install-the-agent-app"></a>

Now that we've installed aragonCLI 🎉, we're ready to install the Agent app.

aragonCLI installs the [`aragon dao` ](/developers/tools/aragoncli/dao-commands)commands. We use these to interact directly with our DAO from the command line. They're also available directly using the `dao` shortcut.

{% hint style="danger" %}
**Warning**

For this step it is necessary to install **Frame Wallet.** You can import the Metamask wallet you used to setup your DAO into Frame Wallet. [Here](/developers/tools/guides/how-to-sign-with-web3-providers/setting-up-a-frame-wallet) you can read how.
{% endhint %}

We'll use the the [`dao install`](/developers/tools/aragoncli/dao-commands) command to install the Agent app. `dao install` takes two arguments:

1. The address or aragonID name of an Aragon DAO.
2. The package name of an Aragon app published to [aragonPM](/developers/tools/aragonpm) (for the Agent app this would be agent or agent.aragonpm.eth).

So in our case, to install the Agent app, include your DAO address or name and run the following command:

```
dao install <dao-address-or-name> agent --use-frame --env aragon:rinkeby
```

{% hint style="danger" %}
**Warning**

Make sure you open the right address account in your Frame wallet. Also make sure that the Ethereum address you use to sign the transaction with is holding tokens of your DAO. Otherwise you might run into this error:

`→ Cannot find transaction path for executing action`
{% endhint %}

Now Frame wallet should come with a pop-up requesting to sign a transaction (note: this can take a few minutes)! Sign and the Agent app will install:

![](/files/M11ZZOGft2etaoz01rgQ)

The command included the `--use-frame` flag to use Frame wallet and the `--env` flag to use Rinkeby. If you have a custom IPFS, it can be defined with the `--ipfs-rcp` flag.

<details>

<summary>Tell me more about Aragon IPFS and these global options.</summary>

The `--env` flag allows us to specify the network (environment) we want to use. In our case we've created our organization on rinkeby so we pass in `aragon:rinkeby`.

Note that if we had chosen the **Ethereum Mainnet** as the network for our organization we would have passed `aragon:mainnet` instead of `aragon:rinkeby` as the argument to `--env`.

The `--ipfs-rpc` flag allows us to point to an IPFS node that has the files we are looking for. In our case it is pointed automatically to the Aragon network IPFS node, so we do not have to use the flag.

If you want to point to a custom IPFS node, include the flag:

`--ipfs-rcp <ipfs-url>`

However, since IPFS propogation is slow, it's better to point directly to the aragon IPFS node.

</details>

{% hint style="danger" %}
The Agent app does not yet appear in your DAO UI (User Interface). A **vote** has been generated (in the true spirit of democracy) to confirm installation of the app.
{% endhint %}

To confirm the vote:

1. Click on the **Voting** app icon in the left panel. You should see you have one open vote.

<figure><img src="/files/gAIRDplJcl5ZeFsSYvyT" alt=""><figcaption></figcaption></figure>

2\. Click on the **View vote** button. You should see a panel pop up on the right hand side.

<figure><img src="/files/zk3WsEQUVDOS0Z1ewGDA" alt=""><figcaption></figcaption></figure>

3\. Scroll to the bottom of the panel and click on the big green **Yes** button.

<figure><img src="/files/UdS6SM0Qyf5giqdNQYlQ" alt=""><figcaption></figcaption></figure>

4\. Sign the transaction with your favourite web3 provider (like Metmask or [Frame](/developers/tools/guides/how-to-sign-with-web3-providers/setting-up-a-frame-wallet/frame)) and voila! That's all there is to it. When you click on the Voting app again you should see the vote has passed with a 100% Yes vote.

<figure><img src="/files/4jHYdvkYgyoO7HYrk3Ej" alt=""><figcaption></figcaption></figure>

Well done installing the Agent app. :tada: Let's now proceed to give the Voting app permission to use the Agent app to execute actions and to make it appear in the UI as well.


# Setting and Checking permissions

In this guide we're going to give the Voting app permission to use the Agent app to execute actions.

{% hint style="info" %}
To assign these permissions we need to get a hold of the Ethereum address of the Agent app -- remember **Agent is a fully-fledged Ethereum account** -- as well as the address of the Voting app in our DAO.
{% endhint %}

The Agent app address can be found by running the [`dao apps`](/developers/tools/aragoncli/dao-commands) command. `dao apps` takes one argument: the address or name of an aragon DAO.

By default it only returns apps with permissions. But we can use the `--all` option to get it to return apps without permissions.

From the command line run:

```
dao apps <dao-address-or-name> --all --use-frame --env aragon:rinkeby
```

You should see a table that looks something like this:

{% hint style="danger" %}
This can take a couple of minutes
{% endhint %}

| App                    | Proxy address                                | Content                                               |
| ---------------------- | -------------------------------------------- | ----------------------------------------------------- |
| `kernel`               | `0xa25fb31870bc492d450012ae32dafa72af9e82c3` | `(No UI available)`                                   |
| `acl`                  | `0xfefb0cdb7a1fac257815d52ba82776f98dc70205` | `(No UI available)`                                   |
| `evmreg`               | `0x9087db02300ef24b116daf0426b6ba22b28a0c79` | `(No UI available)`                                   |
| `voting@v2.0.4`        | `0x15a102f80ea3b1bd585a044e9b3c39a84c5f44e5` | `ipfs:QmPjWU51opgTVnXwAhYAWasL2CaiYHqy2mXdXtzqfC8sKx` |
| `vault@v3.0.1`         | `0x952a18185da912984e0bc8a830ba98f8151976af` | `ipfs:QmeMabCnkA5BtTTszqqRztYKCXZqE9VQFH4Vx7dY9ue2nA` |
| `finance@v2.0.5`       | `0x4171f7ac1a4606b93093e8648e2f9a16c59cf3b1` | `ipfs:QmeMLs4jHya89khHVSubLaao9cZW6ELZUoYPHkwCUwKBH7` |
| `token-manager@v2.0.3` | `0xbf07e1c74a72aa60df3ddf3115d15575d27e61e1` | `ipfs:Qmb9Bv3J9AuXD5auY1WNwiJeohnYRhyso7XMULs7EZ8eTG` |

Followed directly by another that looks like this:

| Permissionless app | Proxy address                                |
| ------------------ | -------------------------------------------- |
| `agent`            | `0x843bfA21a040E742ec32b8F6991e182D9655AF21` |

The 'permissionless app' is the Agent app we've just installed. Its address is listed under **Proxy address** in the bottom table. In this guide that's `0x843bfA21a040E742ec32b8F6991e182D9655AF21`. Yours will be slightly different however.

You should see that you can also find your Voting app's address by looking up the **Proxy address** of the voting app in the first table. In this guide that's `0x15a102f80ea3b1bd585a044e9b3c39a84c5f44e5`. Again, yours will be different!

Another way you can find your Voting app's address is to use the UI:

1. Click on **App Center** in the left panel to see your installed apps.

<figure><img src="/files/IjXAIDRTGSbIcdB66yOO" alt=""><figcaption></figcaption></figure>

2\. Click on the **View details** button under the voting app.

<figure><img src="/files/X3aC6iWNbO4aBWqDfI3V" alt=""><figcaption></figcaption></figure>

3\. Click on the blue box under **Installed instances** (see inside the red ellipse in the image below).

<figure><img src="/files/Ni1MfRPnbMmNMkWnJdxd" alt=""><figcaption></figcaption></figure>

4\. You should see a small pop up appear with a header that says **Address**. Under the header is the address of your voting app. It should look something like `0x15a102f80ea3b1bd585a044e9b3c39a84c5f44e5`. Again, yours will be different!

<figure><img src="/files/ONP11cfInCCwIUp8fqdm" alt=""><figcaption></figcaption></figure>

{% hint style="info" %}
Note: the above process works with any permissioned app!
{% endhint %}

Once you've located your Agent and Voting app addresses, run the following command to give your Voting app permission to use the Agent app to execute actions.

```
dao acl create <dao-address-or-name> <agent-address> EXECUTE_ROLE <your voting app address> <your voting app address> --use-frame --env aragon:rinkeby
```

You should see a transaction appear in Frame Wallet. Sign and you should see the following appear in the terminal:

```
✔ Executing createPermission on <dao-address-or-name>.aragonid.eth

✔ Successfully executed: "Execute desired action as a token holder"
```

{% hint style="warning" %}
The Agent app does not yet appear in your DAO UI (User Interface). A **vote** has been generated (in the true spirit of democracy) to confirm the Voting app permission to use the Agent app to execute actions .
{% endhint %}

To confirm the vote:

Find the vote in the **Voting** app (left menu bar). Then **View vote**, click **Yes** and sign the transaction with your favourite web3 provider (like [Frame](/developers/tools/guides/how-to-sign-with-web3-providers/setting-up-a-frame-wallet/frame)) and voila!

![](/files/826z2HXdAEw6F4Tu8v2T)

{% hint style="success" %}
Now the **Agent** app should appear in the left menu bar! :partying\_face:
{% endhint %}

### 5. Check permissions

As a final step, let's verify that permissions have been set properly through the UI:

1. Click on the **Permissions** menu option in the left panel. You should see the Agent app at the end of the second row. Click on it.

<figure><img src="/files/k9UroVCwDQCwBugSGw5S" alt=""><figcaption></figcaption></figure>

Under **Actions available on this app** should see that the Voting app now manages who has the ability to execute actions for the Agent app:

![](/files/pw6Z3eXU8y1fNsvYwuRD)

{% hint style="success" %}
Well done! Now it's time to start interacting with Aragon agent!
{% endhint %}


# Interacting with Aragon Agent

{% hint style="info" %}
In case you have not yet installed the Agent app, check [here](/developers/tools/guides/the-agent-app/installing-aragon-agent-from-aragoncli) how to do it.
{% endhint %}

### Introducing dao act <a href="#introducing-dao-act" id="introducing-dao-act"></a>

`dao act` is the main way we'll interact with Aragon Agent. It's the command we use to perform transactions with the Agent app directly from aragonCLI.

According to the documentation:

{% hint style="info" %}
`dao act` provides some syntax sugar over `dao exec` for executing actions using Agent app instances in a DAO.
{% endhint %}

Like `dao exec` it takes at least three arguments:

1. The address of the Agent app you want to use to perform an action.
2. The address of an **external contract** or **the address of an app** within a DAO.
3. The [full signature](https://www.4byte.directory/) of the method we wish to execute in either the external contract or the app we specified in the second argument -- note that by the full signature we mean the [human readable function signature](https://solidity.readthedocs.io/en/v0.5.3/abi-spec.html#function-selector).

{% hint style="info" %}
For example if we wanted to execute the `vote` method of a Voting app we would pass in its full signature `vote(unint256,bool,bool)` as the third argument. And if we wanted to execute the `confirmTransaction` method of a [Gnosis Multisig](https://wallet.gnosis.pm/#/wallets) we would pass in `confirmTransaction(uint256)`.
{% endhint %}

The remaining arguments are the parameters which the method we specified will be executed with.

Don't worry if it's not completely clear to you how `dao act` works at this stage. The following use cases will help you develop some intuition for it!

### Use case: Voting in another organization <a href="#use-case-voting-in-another-organization" id="use-case-voting-in-another-organization"></a>

Let's start by seeing how we can use the Agent app to allow one Aragon organization to participate as a stakeholder in another.

#### 1. Create another Democracy DAO <a href="#id-1-create-another-democracy-dao" id="id-1-create-another-democracy-dao"></a>

The first step is to create another Democracy DAO. Exactly the same as before, head over to [Aragon](https://client.aragon.org/#/) and choose the following defaults:

* Support: 100%
* Min. Approval: 0%
* Duration: 168 hours (or 1 week)

If you're not sure how to do that, please have a look [here](https://documentation.aragon.org/products/aragon-client/how-to-create-a-dao-using-aragon-client/use-company-template).

#### 2. Mint a token to allow our first DAO (A) to vote in our new DAO (B) <a href="#id-2-mint-a-token-to-allow-our-first-dao-a-to-vote-in-our-new-dao-b" id="id-2-mint-a-token-to-allow-our-first-dao-a-to-vote-in-our-new-dao-b"></a>

We've now created two Democracy DAOs -- let's call them **A** and **B**. A has an Agent app, B doesn't. We want to allow A to vote in B.

Remember that A needs to be a tokenholder of B to be able to vote in B. And that A's Agent app acts its external interface.

In other words, A's Agent app allows it to participate as a stakeholder in B.

This means that to allow A to vote in B we need to mint a token for A's Agent app in B.

To do this run:

```
dao exec <dao-B-address-or-name> <token-manager-address-dao-B> mint <agent-app-address-dao-A> 1000000000000000000 --use-frame --env aragon:rinkeby
```

{% hint style="warning" %}
For this step it is necessary to install **Frame Wallet**. You can import the Metamask wallet you used to setup your DAO into Frame Wallet. [Here](/developers/tools/guides/how-to-sign-with-web3-providers/setting-up-a-frame-wallet) you can read how.

Remember, you can find the addresses of the apps in any of your DAOs by running:

`dao apps <dao-address-or-name> --all --use-frame --env aragon:rinkeby`
{% endhint %}

{% hint style="danger" %}
**Warning**

If execution of the command fails with the error: `→ No functions specified in artifact for..`

Or with the error: `→ Cannot find transaction path for executing action`

Make sure the address you sign the transaction with has both created the DAO and is owner of DAO tokens.
{% endhint %}

As you can see, we are using the `dao exec` command to interact with the `mint` method of B's [Token Manager](https://documentation.aragon.org/products/aragon-client/explore-template-dao/what-are-apps/token-app) app.

[`mint`](https://github.com/aragon/aragon-apps/blob/master/apps/token-manager/contracts/TokenManager.sol#L104) is used to create new tokens and assign them to a receiver. It takes two arguments: a receiver address, and the amount of tokens to be created.

In our case the receiver is A's Agent App, and the amount of tokens to be created is 1.

However, you should notice that instead of writing `1` as the second argument to `mint` we've gone with `1000000000000000000`.

This is because the token created by the [company template](https://github.com/aragon/dao-templates/tree/master/templates/company) has 18 decimals, so 1 unit of a token is actually `0.000000000000000001` tokens. This is not what we want.

In order to mint a full token from the CLI we need to pass the full number, which will then be interpreted with 18 decimals. In our case this is a 1 followed by eighteen 0s, or `1000000000000000000`.

{% hint style="danger" %}
Finally, the usual warning: running the above command will trigger a vote in B to create and send a token to A's Agent App: we'll need to vote **Yes** to confirm the minting of the token.
{% endhint %}

You can do this either directly through the UI in the web browser or by running:

```
dao exec <dao-B-address-or-name> <voting-app-address-dao-B> vote 0 true true --use-frame --env aragon:rinkeby
```

{% hint style="info" %}
If you have a custom IPFS, it can be defined with the `--ipfs-rcp` flag.
{% endhint %}

On the UI, the vote will look something like this.

<figure><img src="/files/QiORAf7Vo2Ru8VJ9orVs" alt=""><figcaption></figcaption></figure>

Once you've voted **Yes**, switch over to the Token Manager app (click on **Tokens** in the left sidebar).

<figure><img src="/files/xsJiEYmA0Jbh51CDworn" alt=""><figcaption></figcaption></figure>

{% hint style="success" %}
You should see that you've successfully added another token holder (your Agent app)! 🎉😊
{% endhint %}

#### 3. Create a vote in B to add a third entity <a href="#id-3-create-a-vote-in-b-to-add-a-third-entity" id="id-3-create-a-vote-in-b-to-add-a-third-entity"></a>

As in step 2, we'll run `dao exec` again, except this time the first argument to `mint` will be the address of the third entity we want to add to B.

```
dao exec <dao-B-address-or-name> <token-manager-address-dao-B> mint <third-entity-address> 1000000000000000000 --use-frame --env aragon:rinkeby
```

Running the above will create an open vote in B. Again we'll need to vote *yes* to confirm the minting.

<figure><img src="/files/CFLP5zw0URZaEBxS6nY8" alt=""><figcaption></figcaption></figure>

As before, you can either do this through the UI or run the same command we ran at the end of step 2 with one small modification:

{% hint style="danger" %}
This time the first argument to `vote` will be a `1` and not a `0`, since the id of this new vote is 1. Remember that vote ids start at zero and increment by one each time a vote is created.
{% endhint %}

If you go to the Voting app after you've voted, you'll see that the **Yes** vote is only 50%.

<figure><img src="/files/EvcfmTkysFIF6uo34iQO" alt=""><figcaption></figcaption></figure>

That's because only one out of two token holders have voted. The other token holder (A's Agent app) still has to vote.

#### 4. Use A's Agent app to take part in B's vote <a href="#id-4-use-a-s-agent-app-to-take-part-in-b-s-vote" id="id-4-use-a-s-agent-app-to-take-part-in-b-s-vote"></a>

In order to close and enact the vote, we'll use A's Agent app to vote yes to adding a third entity to B.

To do this we need to use the `dao act` command we introduced at the beginning of this section.

Remember that `dao act` takes at least three arguments:

* The first is the address of the Agent app you want to use to perform an action. In our case, this is the address of A's Agent app.
* The second is the address of an **external contract** or the address of an app within a DAO. In our case this is the address of B's [Voting app](https://documentation.aragon.org/products/aragon-client/explore-template-dao/what-are-apps/voting-app).
* The third is the [full signature](https://developer.mozilla.org/en-US/docs/Glossary/Signature/Function) of the method we wish to execute in either the external contract or the app we specified in the second argument. In our case the method is [`vote`](https://github.com/aragon/aragon-apps/blob/master/apps/voting/contracts/Voting.sol#L154) and its full signature is `vote(unint256,bool,bool)`.
* Finally, the remaining arguments are the arguments which the method -- in our case `vote` -- will be executed with. We can see from the signature that `vote` takes three arguments: an integer, a boolean, and a boolean. In our case we will pass in: `1`, `true` and `true`.
  * The first (`1`) is the id for the vote we want to interact with. This is always an integer. Remember that vote ids start at 0 and increment by 1 each time a vote is created.
  * The second (`true`) specifies which way we want to vote: true means yes and false means no.
  * And the third (`true`) specifies whether the contract should check if a vote already has enough support to be executed. If it does, the Voting app will perform the action that was being voted on, and the vote will be close. `true` means check if this vote can be executed, `false` means don't check.

So in our case, we run:

```
dao act <agent-app-address-dao-A> <voting-app-address-dao-B> "vote(uint256,bool,bool)" 1 true true --use-frame --env aragon:rinkeby
```

The result of this command will be to trigger a vote in A on whether to allow A's Agent app to execute the vote in B.

<figure><img src="/files/SwNmHzSmqxRK4JBteQtg" alt=""><figcaption></figcaption></figure>

#### 5. Confirm the vote/action in A <a href="#id-5-confirm-the-vote-action-in-a" id="id-5-confirm-the-vote-action-in-a"></a>

The final step is to confirm the vote in A.

Again, we can do this either through the UI or by running:

```
dao exec <dao-A-address-or-name> <voting-app-address-dao-A> vote 2 true true --use-frame --env aragon:rinkeby
```

{% hint style="warning" %}
Note that we passed in a vote id of `2` as the first argument to `vote`. That's because this is the third vote created in A, and vote ids start at 0.
{% endhint %}

Once you've confirmed the vote, if you head over to B's voting app again you should see that the vote to mint one token for your chosen third entity now has 100% support.

<figure><img src="/files/d9mxal2png48n37FPvZW" alt=""><figcaption></figcaption></figure>

Finally, to double check that your chosen entity has really been added as a stakeholder in B, click on B's Token Manager (named **Tokens** in left panel).

<figure><img src="/files/Le2V1Isn0a9SeqvHqYhw" alt=""><figcaption></figcaption></figure>

You should see there are now three tokenholders, each with equivalent stakes.

{% hint style="success" %}
If you've made it this far, congratulations! 😊🎉
{% endhint %}

You've just used the Agent app to allow one Aragon organization to participate as a stakeholder in another!

On the next iteration of this guide we will explain 3 new use cases:

1. Interacting with Compound
2. Creating an Aragon Trust
3. Opening a Maker CDP

Stay tuned!

## Further resources <a href="#further-resources" id="further-resources"></a>

* [Dynamic Permissions for Organization “Actions” with Signer Integration](https://forum.aragon.org/t/dynamic-permissions-for-organization-actions-with-signer-integration/116)
* [Agent app, arbitrary actions from DAOs](https://forum.aragon.org/t/agent-app-arbitrary-actions-from-daos/275)


# How to build your first Aragon App!

{% hint style="info" %}
In this guide, we will walk you through building your first <mark style="color:blue;">**Aragon App**</mark> using <mark style="color:blue;">**aragonOS**</mark>, the JavaScript implementation of <mark style="color:blue;">**aragonAPI**</mark><mark style="color:blue;">,</mark> <mark style="color:blue;">**aragonUI**</mark> and the <mark style="color:blue;">**Aragon builder plugin**</mark><mark style="color:blue;">.</mark>
{% endhint %}

## Environment setup <a href="#environment-setup" id="environment-setup"></a>

Before starting you need to check if you have already installed all these prerequisites:

* the right version of **node.js** (recommended`v12 LTS` version)
* **Metamask** web3 provider
* the **aragonCLI** (Aragon Command Line Interface)
* the **Aragon Buidler plugin**

If you haven't already installed them or if you need more info about this goes to the "*Environment Setup*" paragraph [here](/developers/tools/the-basics/getting-started).

## The setup

Let's first set up and bootstrap our project:

```
npx create-aragon-app foo tutorial
```

{% hint style="danger" %}
For this particular command switching from `node v12` to `node v14 LTS or v16 LTS` might be required to prevent a node error on install. In that case you have to switch, do not forget to switch back to `v12 LTS` afterwards!
{% endhint %}

This will create a new directory named `foo`, with files cloned from [your first Aragon app template](https://github.com/aragon/your-first-aragon-app). This particular boilerplate includes everything you need to get started:

* [buidler](https://buidler.dev/) (now Hardhat),
* aragonOS,
* aragonAPI.

## Structure <a href="#structure" id="structure"></a>

This boilerplate has the following structure:

```md
root
├── app
├ ├── src
├ ├ ├── App.js
├ ├ ├── index.js
├ ├ └── script.js
├ └── package.json
├── contracts
├ └── CounterApp.sol
├── scripts
├ └── buidler-hooks.js
├── arapp.json
├── manifest.json
├── buidler.config.js
└── package.json
```

* **app**: Frontend folder. Completely encapsulated, has its package.json and dependencies.
  * **src**: Source files.
    * `App.js`: Aragon app root component.
    * `index.js`: Aragon app entry point.
    * `script.js`: Aragon app background script.
  * [**package.json**](https://docs.npmjs.com/creating-a-package-json-file): Frontend npm configuration file.
* **contracts**: Smart Contracts folder.
  * `CounterApp.sol`: Aragon app contract.
* **scripts**: Scripts folder.
  * `buidler-hooks.js`: Buidler script hook.
* [**arapp.json**](https://legacy-docs.aragon.org/developers/tools/guides/pages/OwWAS5g6PYm1nuwA203D#the-arapp.json-file): Aragon configuration file. Includes Aragon-specific metadata for your app.
* [**manifest.json**](/developers/tools/aragoncli/global-configuration#the-manifestjson-file): Aragon configuration file. Includes web-specific configurations.
* [**buidler.config.js**](https://buidler.dev/config/): Buidler (now Hardhat) configuration file.
* [**package.json**](https://docs.npmjs.com/creating-a-package-json-file): Main npm configuration file.

{% hint style="danger" %}
**Stuck?**

If you get stuck at any point come back [**here**](https://github.com/aragon/your-first-aragon-app/pull/2/files) to check the diff with changes after the tutorial is completed.
{% endhint %}

{% hint style="info" %}
If you need help, please reach out to Aragon core contributors and community members in the [#dev-space channel](https://discord.gg/DHgjDnp9) off our Discord server.
{% endhint %}

{% hint style="success" %}
Now let's start with it 💪.
{% endhint %}

## Writing a simple contract <a href="#writing-a-simple-contract" id="writing-a-simple-contract"></a>

To illustrate how easy it is to use aragonOS, we will build our app as a vanilla smart contract, without any Aragon-specific interfaces at all.

Today, we will build a simple counter app — you can increment it, you can decrement it, and it will all be decentralized. Decentralized coffee counter, anyone? If yes, then add the below code to `CounterApp.sol`:

```solidity
// contracts/CounterApp.sol
pragma solidity ^0.4.24;

import "@aragon/os/contracts/lib/math/SafeMath.sol";


contract CounterApp {
    using SafeMath for uint256;

    /// Events
    event Increment(address indexed entity, uint256 step);
    event Decrement(address indexed entity, uint256 step);

    /// State
    uint256 public value;

    function increment(uint256 step) external {
        value = value.add(step);
        emit Increment(msg.sender, step);
    }

    function decrement(uint256 step) external {
        value = value.sub(step);
        emit Decrement(msg.sender, step);
    }
}
```

Pretty simple, right? You might wonder why we would bother adding events to this smart contract, but it comes in handy later for illustration purposes — and we can also create an activity feed from it, if we wanted to.

{% hint style="info" %}
**Note**\
We use [SafeMath](https://github.com/aragon/aragonOS/blob/next/contracts/lib/math/SafeMath.sol) for uint256. Using SafeMath is a security convention that allows handling math operations with safety checks that revert on error preventing the risk of overflows.
{% endhint %}

## 3 steps to governance and upgradeability <a href="#id-3-steps-to-governance-and-upgradeability" id="id-3-steps-to-governance-and-upgradeability"></a>

Now for the interesting part: making our simple smart contract an Aragon app.

**First**, inherit from the Aragon app smart contract. Integrate this code in `CounterApp.sol`:

```solidity
import "@aragon/os/contracts/apps/AragonApp.sol";

contract CounterApp is AragonApp {
    // ...
}
```

**Second**, define the roles that you want your app to have.

A role can be assigned to other apps or people and those entities will have access to methods guarded by that role.

In this example, we will define a role for incrementing and a role for decrementing but note that you can have a single role to guard all methods in your contract if you find that appropriate. Integrate this code in `CounterApp.sol`:

```solidity
contract CounterApp is AragonApp {
    // ...
    bytes32 constant public INCREMENT_ROLE = keccak256("INCREMENT_ROLE");
    bytes32 constant public DECREMENT_ROLE = keccak256("DECREMENT_ROLE");
    // ...
}
```

**Third**, guard the methods with the `auth()` modifier that the `AragonApp` interface gives you and add an [initialize function ](/developers/tools/aragonos/developing-with-aragonos)to your contract; we use `initValue` as the starting value of the counter. Integrate this code in `CounterApp.sol`:

```solidity
contract CounterApp is AragonApp {
    // ...

    function initialize(uint256 _initValue) public onlyInit {
        value = _initValue;

        initialized();
    }

    function increment(uint256 step) auth(INCREMENT_ROLE) external {
        // ...
    }

    function decrement(uint256 step) auth(DECREMENT_ROLE) external {
        // ...
    }
}
```

{% hint style="success" %}
That's it. In 3 steps, you now have an Aragon app, with full upgradeability and modular governance. [**Here**](https://github.com/aragon/your-first-aragon-app/pull/2/files) you can double check whether your code is right.
{% endhint %}

## Descriptive transactions <a href="#descriptive-transactions" id="descriptive-transactions"></a>

Aragon wants to be as user friendly as possible, so it provides an easy way for developers to describe what their smart contracts do in a human-readable way. It's called [Radspec.](/developers/tools/the-basics/human-readable-transactions) It works by putting `@notice` statements alongside a human-readable description for the function. In our example, we use the input `step` to describe what is doing our function at runtime.

```solidity
contract CounterApp is AragonApp {
    /**
     * @notice Increment the counter by `step`
     * @param step Amount to increment by
     */
    function increment(uint256 step) auth(INCREMENT_ROLE) external {
        // ...
    }

    /**
     * @notice Decrement the counter by `step`
     * @param step Amount to decrement by
     */
    function decrement(uint256 step) auth(DECREMENT_ROLE) external {
        // ...
    }
}
```

## Building the frontend <a href="#building-the-frontend" id="building-the-frontend"></a>

Because apps inside the [Aragon client ](/developers/tools/the-basics/the-aragon-client)are sandboxed, it also means that apps do not have direct access to Web3.

Apps are run inside an iframe, which means that it only has access to their own DOM, not the outlying DOM. The app can communicate with the client over our custom RPC protocol.

Then the client takes care of connecting to Ethereum via Web3, and also handles things like signing transactions, displaying notifications and more to the end-user.

All of this is achieved by using [**aragonAPI**](/developers/tools/aragonapi). aragonAPI is split into two parts: one for clients and one for apps. The client portion of aragonAPI reads *requests* from the app over RPC, sandboxes apps and performs Web3 actions, whereas the app portion provides a simple API to communicate with the client (to read state, send transactions and more).

### Background scripts and building state <a href="#background-scripts-and-building-state" id="background-scripts-and-building-state"></a>

Apps usually want to listen to events using Web3 and build an application state from those events. This concept is also known as ***event sourcing***.

aragonAPI was built with event sourcing in mind. To build the state continually without having the app loaded indefinitely, though, we need to run a background script.

Thankfully the [Aragon client ](/developers/tools/the-basics/the-aragon-client)will run background scripts specified in the manifest files of our app (more on manifest files later).

Let's start by writing a background script that listens for our `Increment` and `Decrement` events, and builds a state, for this example, the current value of our counter. Add the below code to `script.js`:

```javascript
// app/src/script.js
import 'core-js/stable'
import 'regenerator-runtime/runtime'
import Aragon, { events } from '@aragon/api'

const app = new Aragon()

app.store(
  async (state, { event }) => {
    const nextState = {
      ...state,
    }

    try {
      switch (event) {
        case 'Increment':
          return { ...nextState, count: await getValue() }
        case 'Decrement':
          return { ...nextState, count: await getValue() }
        case events.SYNC_STATUS_SYNCING:
          return { ...nextState, isSyncing: true }
        case events.SYNC_STATUS_SYNCED:
          return { ...nextState, isSyncing: false }
        default:
          return state
      }
    } catch (err) {
      console.log(err)
    }
  },
  {
    init: initializeState(),
  }
)

/***********************
 *   Event Handlers    *
 ***********************/

function initializeState() {
  return async cachedState => {
    return {
      ...cachedState,
      count: await getValue(),
    }
  }
}

async function getValue() {
  // Get current value from the contract by calling the public getter
  // app.call() returns a single-emission observable that we can immediately turn into a promise
  return parseInt(await app.call('value').toPromise(), 10)
}
```

If you've worked with [Redux](https://redux.js.org/) before, this might look vaguely familiar.

The `store` method takes in a reducer function with the signature `(state, event) => state`, where `state` is whatever you want it to be (in this example it is an integer), and `event` is a [Web3 event](https://web3js.readthedocs.io/en/1.0/web3-eth-contract.html#contract-events). The reducer function **must always** return a state, even if it is the same state as before. Returning undefined will reset the reduced state to its initial null state. Also note that the initial state is always null, not undefined, because of JSONRPC limitations.

The `store` should be used as the main "event loop" in an application's background script (running inside a WebWorker). Listens for events, passes them through reducer, caches the resulting state, and re-emits that state for easy chaining. Optionally takes a configuration object comprised of an init function, to re-initialize cached state, and an externals array for subscribing to external contract events. See below for more details.

The store has block caching automatically applied, such that subsequent loads of the application only fetch new events from a cached ("committed") block height (rather than from 0 or the app's initialization block). This state can be observed in the view portion of your app. Also, note that the `store` method returns an observable of states. This is a recurring theme in the JavaScript implementation of aragonAPI—almost everything is an [RxJS](https://rxjs-dev.firebaseapp.com/) observable.

Learn more about it on the [store() documentation](https://github.com/aragon/aragon.js/blob/master/docs/API.md#store).

{% hint style="success" %}
[**Here**](https://github.com/aragon/your-first-aragon-app/pull/2/files) you can double check whether your code is right.
{% endhint %}

## Displaying State <a href="#displaying-state" id="displaying-state"></a>

Now let's write the view portion of our app. In our case, this is a simple HTML file, and a simple React app with the `useAragonApi` [React Hook](https://reactjs.org/docs/hooks-intro.html) that observes the state that our background script builds for us and returns the data needed to interact with the app contract. Add this code to `app/index.html`:

```html
<!-- app/index.html !-->
<!DOCTYPE html>
<html>
  <head>
    <title>Aragon App</title>
  </head>
  <body>
    <div id="root"></div>
    <script src="src/index.js"></script>
  </body>
</html>
```

Add this code to `app/src/index.js`:

```javascript
// app/src/index.js
import React from 'react'
import ReactDOM from 'react-dom'
import { AragonApi } from '@aragon/api-react'
import App from './App'

const reducer = state => {
  if (state === null) {
    return { count: 0, isSyncing: true }
  }
  return state
}

ReactDOM.render(
  <AragonApi reducer={reducer}>
    <App />
  </AragonApi>,
  document.getElementById('root')
)
```

Before using any Hook provided, you need to declare the component `AragonApi` to connect the app. It is generally a good idea to do it near the top level of your React tree. It should only be declared once. It has an optional reducer prop, which lets you process the state coming from the background script. If not provided, the state is passed as-is.

{% hint style="success" %}
[**Here**](https://github.com/aragon/your-first-aragon-app/pull/2/files) you can double check whether your code is right.
{% endhint %}

## App root component <a href="#app-root-component" id="app-root-component"></a>

Add this code to `App.js`:

```javascript
// app/src/App.js
import React from 'react'
import { useAragonApi } from '@aragon/api-react'
import {
  Box,
  Button,
  GU,
  Header,
  IconMinus,
  IconPlus,
  Main,
  SyncIndicator,
  Text,
  textStyle,
} from '@aragon/ui'

function App() {
  const { appState } = useAragonApi()
  const { count, isSyncing } = appState

  return (
    <Main>
      {isSyncing && <SyncIndicator />}
      <Header
        primary="Counter"
        secondary={
          <Text
            css={`
              ${textStyle('title2')}
            `}
          >
            {count}
          </Text>
        }
      />
      <Box
        css={`
          display: flex;
          align-items: center;
          justify-content: center;
          text-align: center;
          height: ${50 * GU}px;
          ${textStyle('title3')};
        `}
      >
        Count: {count}
      </Box>
    </Main>
  )
}

export default App
```

`useAragonApi()` is a React Hook that returns the data needed to interact with the app contract. As with any React Hook, please ensure that you follow the [Rules of Hooks](https://reactjs.org/docs/hooks-rules.html). It returns an object containing the following entries:

* `appState`: Is the app state, after having passed the background script `state` through the reducer prop of AragonApi.
* `api`: This is the current AragonApp instance. Use it to call methods on the contract.

These are not all the entries but the ones we are going to use in the tutorial. To learn about all of them check the [useAragonApi documentation](https://github.com/aragon/aragon.js/blob/master/packages/aragon-api-react/README.md#usearagonapi).

{% hint style="info" %}
**Note**\
We are using several components from aragonUI. aragonUI is a React library based on aragonDS, the Aragon design system. It aims to provide the elements needed to build Aragon apps that feel native to the Aragon ecosystem. We are not going into details of aragonUI on this tutorial. If you feel like to learn more, check the [Getting started guide](https://ui.aragon.org/getting-started/).
{% endhint %}

**Sending transactions**

Our users need to be able to increment and decrement the counter. For this, we send what is called an *intent* to the client. An intent is an action you would like to occur on a specific contract. This intent is handled by the client, which will calculate a *transaction path* using the ACL of our DAO.

To understand transaction paths, we must first understand a little bit about how the ACL works.

The[ ACL (Access Control List) ](/developers/tools/the-basics/permissions)is a simple mapping of *who* can perform *what* actions *where*. In our case, *someone* can perform an action guarded by a specific role (the *what*) on our app (the *where*).

However, it's entirely possible that users can not perform actions directly. For example, to increment the counter, we might want a decision-making process, such as a vote. The beauty of aragonOS is that we never need to specify this directly, as this is handled by the ACL.

We simply say that the only one (*who*) that can perform increments and decrements (*what*) on our app (*where*) is the voting app. This is not done at compile-time, it is done at run time.

This works because of a concept called [*forwarders*](/developers/tools/the-basics/forwarding). A forwarder is simply an app that can execute transactions on someone's behalf, if the ACL permits it, and that app can have its *arbitrary conditions* under which it wants to execute your transaction! In the example of the voting app, the voting app will only execute your transaction if the vote passes.

It's really simple to use. Let's add our intents to our app. Integrate this code into `App.js`:

```javascript
// ...

function App() {
  const { api, appState } = useAragonApi()
  const { count, isSyncing } = appState
  const step = 2

  return (
    <Main>
      <Box>
        <div>
          <Button
            display="icon"
            icon={<IconMinus />}
            label="Decrement"
            onClick={() => api.decrement(step).toPromise()}
          />
          <Button
            display="icon"
            icon={<IconPlus />}
            label="Increment"
            onClick={() => api.increment(step).toPromise()}
            css={`
              margin-left: ${2 * GU}px;
            `}
          />
        </div>
      </Box>
    </Main>
  )
}
```

That's it! Now, whenever the user clicks one of either the increment or decrement buttons, an intent is sent to the wrapper, and it will show the user a transaction to sign.

{% hint style="success" %}
[**Here**](https://github.com/aragon/your-first-aragon-app/pull/2/files) you can double check whether your code is right.
{% endhint %}

## Writing the manifest files <a href="#writing-the-manifest-files" id="writing-the-manifest-files"></a>

For aragonAPI to function, it needs some metadata about your app. This metadata is specified in two manifest files; `manifest.json` and `arapp.json`.

### arapp.json <a href="#arappjson" id="arappjson"></a>

`arapp.json` defines the smart contract and aragonPM-specific things like the roles in your app or different environments.

Let's modify `arapp.json` so that it knows about the roles we defined previously and use the development environment. Add this code to `arapp.json`:

```json
{
  "roles": [
    {
      "name": "Increment the counter",
      "id": "INCREMENT_ROLE",
      "params": []
    },
    {
      "name": "Decrement the counter",
      "id": "DECREMENT_ROLE",
      "params": []
    }
  ],
  "environments": {
    "default": {
      "network": "rpc",
      "appName": "foo.aragonpm.eth"
    }
  },
  "path": "contracts/CounterApp.sol"
}
```

Notice that we input a fully qualified [ENS](https://ens.domains/) name for `appName`. Let's examine the ENS name we entered because it is not entirely arbitrary.

![](https://i.imgur.com/MQnYT6d.png)

The first label in the ENS name is the name of our app. This can be anything you want, given that the full ENS name is not taken.

The second and third label is the name of the [aragonPM](/developers/tools/aragonpm) registry that your repository will be (or is) registered to. For the sake of simplicity, this guide assumes that you have rights to create repositories on aragonpm.eth, but you could deploy your aragonPM registry if you so desire.

### manifest.json <a href="#manifestjson" id="manifestjson"></a>

`manifest.json` defines end-user specific things like the human-readable name of your app, icons, and a small description of your app. It also (optionally) defines background scripts, of which we have one.

Let's modify it accordingly. Add this code to `manifest.json`:

```json
{
  "name": "Counter",
  "description": "My first Aragon app",
  "script": "/script.js",
  "start_url": "/index.html"
}
```

### Buidler script hooks <a href="#buidler-script-hooks" id="buidler-script-hooks"></a>

These hooks are called by the Aragon Buidler plugin during the start task's lifecycle. All hooks receive two parameters:

* Params object that may contain other objects that pertain to the particular hook.
* A "bre" or BuidlerRuntimeEnvironment object that contains environment objects like web3, Truffle artifacts, etc.

We are going to use the `getInitParam` hook. Must return an array with the proxy's init parameters.

That is called when the start task needs to know the app proxy's initialized parameters, `_initValue` for our `CounterApp` initialize function. Add tis code to `buidler-hooks.js`:

```javascript
// scripts/buidler-hooks.js
module.exports = {
  // ...
  getInitParams: async ({}, { web3, artifacts }) => {
    return [15]
  },
  // ...
}
```

{% hint style="success" %}
[**Here**](https://github.com/aragon/your-first-aragon-app/pull/2/files) you can double check whether your code is right.
{% endhint %}

## Running your app locally <a href="#running-your-app-locally" id="running-your-app-locally"></a>

To test out your app without deploying a DAO yourself, installing apps, setting up permissions and setting up aragonPM, you can simply run:

```
yarn
yarn start
```

{% hint style="warning" %}
Please check you have the right compiler version. It is necessary 0.4.24. If not, select the correct one and run *npm start* again.
{% endhint %}

{% hint style="danger" %}
If you receive a lot of errors on the console, please be sure to run the right node.js (**v12 is required**).
{% endhint %}

This will do a couple of things for you:

* It will start a development chain you can interact with (it uses `ganache-core`, so it's a full testrpc instance) and prints 10 accounts.
* It compiles the contracts.
* It deploys the aragonOS bases (ENS, DAO factory, aragonPM registry).
* It deploys an Aragon DAO with apps and development permissions (i.e. everyone can do everything)
* It builds your app front-end. Since we're importing Node.js modules in our front-end, we need a build script. For this, we opted to use `parcel` because it has zero-config, but you can use your favorite bundler.
* It publishes your app to a local aragonPM instance.
* It installs your app.
* It initializes the app proxy with the parameter we defined in `getInitParams` hook.
* It starts the client locally, installing it if it's not cached.

After running this command a browser tab should pop up with your freshly created DAO, complete with permissions and your local app installed.

Login to metamask (if not already logged in), select the [Localhost 8545 network](/developers/tools/guides/how-to-sign-with-web3-providers/set-up-metamask/metamask) and import the [12 words seed phrase](/developers/tools/guides/how-to-sign-with-web3-providers/set-up-metamask/import-your-seed-wallet-in-metamask) (account mnemonic) listed on the console (if not already done). Select the account you want to use.

At this point feel free to play around. Both front-end and smart contract files have hot reloading. Yes, even smart contract code, we do a proxy swap on every change under the hood 😎, enjoy.

{% hint style="success" %}
If you've made it this far, congratulations! 😊🎉😊🎉
{% endhint %}

{% hint style="danger" %}
**Stuck?**

If you got stuck at any point check back [**here**](https://github.com/aragon/your-first-aragon-app/pull/2/files) to check whether there's a diff with your code.
{% endhint %}

## Next steps <a href="#next-steps" id="next-steps"></a>

### Tests <a href="#tests" id="tests"></a>

If you feel like to keep learning about the Aragon stack right away. A great way of doing it is including some tests on your app. Check the [test examples](https://github.com/aragon/aragon-react-boilerplate/blob/master/test/app.test.js) of the react boilerplate repo for ideas.

### Publishing <a href="#publishing" id="publishing"></a>

Now that we're confident that our app will work and amaze the world, we should publish it. You can follow the publishing guide to learn[ how to publish in different environments.](/developers/tools/guides/publish-to-aragonpm)

### Documentation <a href="#documentation" id="documentation"></a>

A good place to go from here would be to check out [our existing apps](https://github.com/aragon/aragon-apps). They are fairly self-contained and use some patterns you might find helpful.

There is much more to [aragonOS](/developers/tools/aragonos) and [aragonAPI](/developers/tools/aragonapi), and we even have our own [UI toolkit](/developers/tools/aragonui). We encourage you to explore all 3 and provide us feedback.

### Community <a href="#community" id="community"></a>

Join the conversation and ask questions on [GitHub](https://github.com/aragon), [Aragon Technical Forum](https://support.aragon.org/) and Discord [#dTech-general ](https://discord.gg/A8gQmUfFWs)channel and make sure to tell us if you build something amazing!

Now you just need to share the great news on Twitter and Reddit, to let people know that you've built something great!


---

[Next Page](/llms-full.txt/1)